Features
- ULTIMATE FLOOD AND STORM PROTECTION: We engineered DURASACK Sand Bags to keep your home and business safe from flooding. These sandbags are portable, easy to fill with a 50 lbs capacity, and effective as building blocks when you need a quick dam or flood barrier. The DURASACK Sand Bag retail pack is a must-have for your year-round disaster and emergency preparedness kit
- MULTIPLE USES: Whether you are working on a landscaping project, construction site, storing dry materials, or anchoring canopies and umbrellas, DURASACK HeavyDuty Sand & Utility Bags offer a wide range of versatile uses. Convenient built-in tie strings give you total control over when, where, and how you want to use these UV-Treated utility bags
- PROVEN QUALITY: Family owned and operated, DURASACK has been a leader in the bag and packaging industry since 1876. Customers have trusted us to provide the highest quality bags for almost 150 years
- CONVENIENT SIZE: Each bag has dimensions of 14 x 26 inches and a 50-pound capacity
Specifications
| Color | Orange |
| Size | 100 Sandbags |
| Unit Count | 1 |
Related Tools
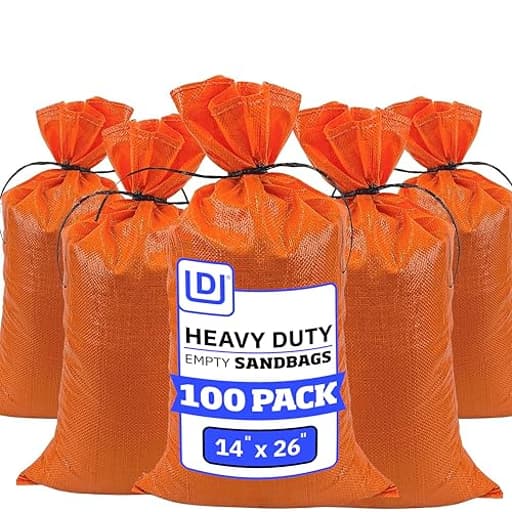
Empty woven polypropylene sandbags (14 x 26 in) with built-in tie strings for flood control, erosion barriers, anchoring canopies, and other utility uses. Each bag holds up to 50 lb, is UV-treated for 1600 hours of sun resistance, and is supplied in a pack of 100 in orange.
DURASACK Heavy Duty Sand Bags with Tie Strings Empty Woven Polypropylene Sandbags for Flood Control with 1600 Hours of UV Protection, 50 lbs Capacity, 14x26 inches, Orange, Pack of 100 Review
Why I reached for these bags
A stack of bright orange sandbags in the back of my truck isn’t glamorous, but it’s been practical more times than I can count. Between spring runoff, coastal storms, and the occasional need to pin down tents and temporary fencing, I wanted a no-nonsense, contractor-style bag I could deploy fast and not baby afterward. The DURASACK sandbags fit that bill: 14 x 26 inches, woven polypropylene, built-in tie strings, and a stated 50 lb capacity. I put a full pack to work across a wet season for flood diversion, erosion control on a slope, and anchoring canopies. Here’s how they held up.
Build and design
The bags are a standard utility weave—stiff enough to stand open for filling, pliable enough to tuck and stack. At 14 x 26 inches, they’re compatible with common sandbag layouts and hand-filling routines. The built-in tie cords are a welcome touch; they’re fixed to the bag and long enough for a quick wrap-and-knot without hunting for separate twine. The orange color reads clearly in low light and against pavement, which matters when you’re placing a barrier at dusk or near traffic.
These aren’t coated or laminated sacks; they’re a straight woven poly with UV treatment. That’s the right choice for flood work, where you want a little conformity and friction as bags settle into each other. Stitching at the bottom seams on my batch was consistent and tidy, with no skipped runs or loose ends out of the box.
Filling and deployment
Here’s what worked best for me:
- Fill to 50–70% full (roughly 30–40 lb per bag) instead of maximizing the full 50 lb capacity. Under-filled bags shape better, seal gaps more effectively, and put less stress on the fabric.
- Use damp, angular sand if you can get it; it compacts and interlocks better than bone-dry play sand. Pea gravel works for weight/anchoring but doesn’t seal water as well.
- Fold the mouth over once before tying. A single overhand or square knot on the integrated cord is sufficient. Keep the tied end pointing downstream or away from prevailing wind when stacking.
For flood diversion, I built a one- to two-course “stretcher bond” along the garage threshold and driveway edge, laying bags like bricks with each course offset. A strip of 6-mil poly sheeting under the first course improves seal enormously—leave a small flap on the wet side to encourage water to back-seal against the bags.
Performance as a flood barrier
For short-duration storm events (hours to a couple of days), these bags performed exactly as I needed: minimal seepage, no seam failures, and no slumping once the stack settled. Weight-for-weight, they’re competitive with any municipal-issue sandbag I’ve used. If you keep to that two-thirds fill rule and tamp each bag into its neighbors, you get a tight barrier quickly.
Pro tip: avoid overfilling the bottom course. The temptation is to pack them full to make fewer trips, but overstuffed bags don’t interlock, and the barrier leaks around the ends. Wasting 10% more time on filling saves you 50% of the rework.
Versatility beyond flood control
I relied on these for:
- Anchoring two 10x10 canopies in gusty conditions. Four bags per leg (under-filled and lashed together) kept things planted without trip hazards.
- Erosion control on a steep garden slope as temporary check dams. The bags conformed to the grade well and slowed runoff effectively until I installed permanent stonework.
- Weighting down tarps and temporary road plates on a job site. The woven texture grips tarps better than smooth paver blocks.
The integrated ties make quick work of bundling pairs for canopy legs, and the bright orange kept them visible around foot traffic.
Durability and weathering
DURASACK calls out 1600 hours of UV treatment. In practice, real-world exposure is messy—sun angle, cloud cover, and temperature swings all play a role. Over a four-month window on a south-facing, full-sun exposure, I noticed:
- Color fading from orange toward a yellow-orange within a few weeks. Aesthetically noticeable but functionally irrelevant.
- Slight embrittlement on the topmost course by the end of the season. Bags that lived in full sun and got handled repeatedly became more prone to surface scuffing and small splits if dragged.
Bags shaded under a canopy or stacked below the top layer fared much better. None of the bottom seams burst, and the majority of the barrier lasted through multiple storms without attention. I did retire a handful that showed frayed weave after months outdoors. If you’re planning long-term outdoor use, rotate or cover the uppermost layer, and consider double-bagging the top course to hedge against UV fatigue.
Size and capacity realities
The 50 lb capacity is real, but the most effective fill weight for stacking was 30–40 lb. At that weight, I could move and place bags solo without straining and still get a tight seal. If your goal is pure anchoring weight (for equipment or signage), fully loading to 50 lb is fine; the seams handled that in my testing as long as the bags weren’t dropped onto abrasive surfaces.
Visibility and safety
The high-viz orange is more than cosmetic. Along a roadside job, the color helped mark the barrier line and kept pedestrians from tripping at twilight. If you’re placing bags where visibility matters, the color is a plus. Expect fading; it doesn’t impact function, but don’t choose these if matching a long-term aesthetic is the priority.
Packaging, count, and storage
My pack arrived in bundled stacks that were easy to stage. I recommend counting bundles on arrival and labeling a few with a marker (e.g., “Flood Kit”) so they don’t walk off to other projects. Unused bags store well in a dry bin. Filled bags stack neatly on a pallet; if you need to keep them longer than a storm cycle, a tarp makes a real difference in longevity.
Environmental and cleanup considerations
Poly sandbags aren’t forever tools. After a storm cycle, plan to:
- Consolidate partially filled bags to bring a few up to working weight and empty the rest to reduce waste.
- Dispose of damaged bags responsibly; check local guidance for flood debris and sediment.
- Reuse intact bags as weights or for non-critical erosion control to extend their life.
If you need a longer-lived, leave-in-place solution, consider geotextile tubes or fabric-encased barriers designed for permanent installation. For quick, portable defense, these are the right category.
What I’d improve
- A thicker UV topcoat would extend outdoor life on constantly exposed layers. The current treatment is adequate for seasonal deployment but not for year-round sun without rotation.
- A printed fill line or quick guide on the bag would help first-time users avoid overfilling.
- Offering a darker, dirt-masking color option alongside orange could help for landscaping applications where looks matter.
Pros
- Fast to fill and stack; tie strings are actually useful
- Reliable seams; no bottom failures in my testing
- Versatile for flood barriers, anchoring, and erosion control
- High visibility aids safety around traffic and pedestrians
- Good value for seasonal and emergency preparedness
Cons
- Color fades quickly in full sun
- Uppermost bags can embrittle after months outdoors
- Polypropylene isn’t ideal for permanent, year-round exposure
Who it’s for
Homeowners in flood-prone areas, small contractors, event crews, and facilities teams who need a dependable, quick-deploy bag for water diversion or anchoring. If you’re building a disaster kit, keeping a bundle of these on a shelf (and a few pre-filled on a pallet) is a smart move. If your use case is a permanent, year-round erosion barrier, step up to heavier geotextile solutions.
Recommendation
I recommend the DURASACK sandbags for short- to medium-term deployment, emergency preparedness, and general utility use. They’re easy to work with, strong where it counts, and versatile across job types. Expect color fading and plan for rotation or shading if you leave them out for months, but within that realistic envelope, they’re reliable performers that make building a solid barrier straightforward.
Project Ideas
Business
Pre-packed Emergency Flood Barrier Kits (Sell/Rent)
Assemble and sell or rent ready-to-deploy flood kits: sets of 10, 25, or 50 sandbags paired with a lightweight shovel, instructions, labels, and gloves. Target homeowners in flood zones, landlords, HOAs, and small businesses. Revenue model: one-time sale for consumer kits; higher-margin rental for seasonal demand with delivery/pickup. Startup needs: bulk inventory, clear assembly instructions, simple marketing to local neighborhoods and emergency preparedness stores.
Event Canopy & Tent Anchor Service
Offer on-site anchoring and branded weight rentals for outdoor events, festivals, farmers markets, and weddings. Provide filled sandbag weights with custom covers (match branding/colors) and deliver/install/remove. Charge by event size or per-anchor plus a service fee. Differentiators: quick setup/takedown, insurance-backed service, and aesthetic covers that look intentional rather than utilitarian.
Commercial Erosion Control & Short-Term Retaining Solutions
Supply sandbags and installation for contractors, landscapers, and municipalities for erosion control, temporary stream diversion, or construction site protection. Offer package pricing for large orders and on-call installation crews for storms. Monetization: material sales, installation labor, and recurring maintenance contracts. Important: carry appropriate liability insurance and follow local permitting/environmental rules.
Branded Promotional Sandbags & Corporate Emergency Packs
Sell custom-printed sandbags and small emergency kits as corporate giveaways, community preparedness donations, or branded swag for outdoor events. Clients: real estate firms, city offices, large employers in flood-prone regions. Business model: bulk manufacturing with design/printing upsells. Marketing channels: B2B outreach, trade shows, and municipal procurement.
DIY Furniture & Decor Kits (E-commerce)
Create and sell DIY kits that turn sandbags into finished products—e.g., ottoman kit with 2–3 bags, custom fabric covers, assembly instructions, and fastening hardware. Include video tutorials and optional custom covers. Price kits to include a healthy margin on supplies and labor. Channels: Etsy, Shopify, local craft fairs, and targeted Facebook/Instagram ads aimed at tiny-home, vanlife, and outdoor-living audiences.
Creative
Modular Outdoor Ottomans
Turn filled sandbags into weatherproof seating modules. Fill each bag to a consistent weight/firmness, tie securely, then slip on a removable, UV-resistant fabric cover (canvas or outdoor Sunbrella). Use Velcro or snap tabs to connect modules into benches, L-shaped seating, or coffee-table bases. Benefits: portable, stackable, and heavy enough to resist wind; covers make them comfortable and stylish. Tip: stitch a reinforced handle into the cover to move modules easily.
Stacked Raised Garden/Retaining Bed
Use sandbags as low-profile retaining blocks to build a raised garden bed or temporary terracing. Line the interior with landscape fabric to keep soil in and prevent fines from washing through the bag weave. Stack staggered bags like masonry; use the built-in tie strings to lash rows together for stability. Ideal for sloped yards, temporary beds, or quick erosion control before installing permanent walls.
Heavy-Duty Outdoor Ottoman/Bench Base
Create rustic benches by placing 2–4 filled sandbags as the base supports for a reclaimed-wood plank top. Secure the plank to the bags with straps or a simple bracket that loops under the bag tie strings. This is an easy, low-cost way to make a sturdy outdoor bench that can be disassembled and relocated when needed.
Functional Play & Fitness Elements
Make an outdoor obstacle course, balance path, or training station. Filled bags can be used as 'stepping stones' for kids, anchors for ropes and cargo nets, or as sandbag weights for functional fitness (cleans, carries, drags). Mark bags with colored duct tape or paint for different difficulty levels. Safety: keep weights age-appropriate and supervise children; use gloves when handling.
Decorative Planters and Raised Pots
Convert sandbags into portable planters for patio and balcony gardens. Line the inside with a plastic pot liner or thick landscape fabric, add a drainage layer (gravel), then potting mix and plants. The filled bottom portion provides stability while the top holds soil. Use decorative outer sleeves or wicker covers to hide the orange bag. Note: avoid filling the whole bag with soil—use sand/aggregate lower, soil upper—to reduce weight and improve drainage.