Features
- Breathe new life into your concrete surfaces with KILZ interior/exterior decorative concrete paint formulated for driveways, garages, pool decks, patios & porches
- Easy to apply concrete paint fills in hairline cracks and stands up to hot tires, dirt and grease
- Slip-resistant surface is ideal for pool decks and walkways
- Important: must apply this product with a 1/4 inch adhesive roller cover. One gallon covers about 50 sq. Ft. With 2 coats. Shake the can before use
- Durable, protective finish enhances the look of concrete surfaces
Specifications
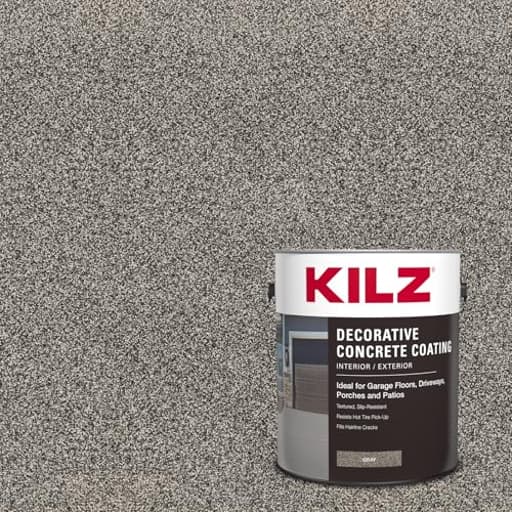
| Color | Gray |
| Size | 128 Fl Oz (Pack of 1) |
| Unit Count | 1 |
A one-gallon decorative concrete coating for interior and exterior concrete surfaces including driveways, garages, pool decks, patios, and porches. It creates a slip-resistant, durable protective finish that fills hairline cracks and resists hot tires, dirt, and grease; apply with a 1/4-inch adhesive roller cover, with one gallon covering about 50 sq ft with two coats.
KILZ Decorative Concrete Coating, Interior/Exterior, Slip Resistant, Gray, 1 Gallon Review
Why I reached for this coating
I used the KILZ decorative concrete coating to revive a weathered patio and adjacent walkway that had the usual mix of hairline cracks, sun fade, and a few stubborn oil spots. I wanted something that would add grip around a hose bib and a small splash area, but still look clean and uniform from the curb. This coating hits that brief: it’s a thick, aggregate‑filled acrylic that hides small flaws, builds a durable film, and leaves a slip‑resistant, low‑sheen finish. It behaves more like a topping than a typical paint, so plan your project accordingly.
What it is—and isn’t
- It’s a high‑build, textured coating with fine mineral grit in the mix. Think pancake batter with sand, not wall paint.
- It’s designed for bare concrete on patios, porches, walkways, pool surrounds, and light‑duty driveways/garages.
- It fills hairline cracks and softens the look of surface imperfections. It won’t bridge structural cracks or deep spalls without patching first.
- The gray I used dries to a neutral, mid‑tone concrete gray with subtle visual variation from the aggregate. It reads cooler on smooth slabs and a touch warmer on broom‑finished surfaces.
If you’re after a perfectly smooth, glossy, showroom floor, this is the wrong product. If you want a grippy, uniform, durable surface that hides flaws and looks finished, it’s a strong fit.
Surface prep matters more than usual
Because this builds a film, adhesion is everything. Here’s what worked for me:
- Degrease thoroughly. I used a concrete degreaser and a stiff brush, then pressure‑rinsed. Any oil you leave will telegraph as adhesion weak spots.
- Open the surface. On troweled‑smooth areas, I etched to create a light profile so the coating could bite. On broom‑finished concrete, a good cleaning was enough.
- Dry completely. I let the slab dry overnight in mild weather. Trapped moisture is the enemy of thick coatings.
- Prime selectively. On especially smooth patches, a masonry primer improved uniformity and cut down on extra coats.
If the slab was previously sealed or painted, test a small area first. Old sealers can block adhesion.
Application: treat it like a topping, not paint
The can instructs a 1/4‑inch adhesive roller cover. I had better control with a dense, non‑porous foam roller made specifically for textured concrete coatings. The key is a roller that doesn’t soak up material; you want to move the coating, not load and unload it like wall paint.
My setup and method:
- Tools: heavy‑duty drill with a mixing paddle, the dense foam roller, an adjustable extension pole, and inexpensive chip brushes (the grit will chew up nicer brushes). Blue tape for crisp edges.
- Mix and shake: I stirred with a paddle for a full two minutes, then shook the can and stirred again. The aggregate settles quickly—keep remixing as you work.
- Pour‑and‑pull: Skip a tray. I poured a ribbon directly on the slab and spread it, section by section.
- Work in shade: This coating self‑levels just enough to erase roller chatter but needs time. I avoided direct sun and worked in the late afternoon around 70–75°F.
- Two coats minimum: First coat medium, just to cover. Second coat determines look and traction.
To avoid lap marks and thin spots, I kept a wet edge and used gentle “pull‑back” passes with almost no pressure on the extension pole to even out the thickness. If the roller stops spinning and starts sliding, you’ve put it down too heavy; redistribute before it skins.
Cutting in with a brush leaves a slightly different texture. I brushed edges first, then lightly backrolled over them while the coating was still wet to blend the transition.
On vertical faces (step risers, stem walls), the material will want to slump if you apply it thick. Thinner passes with more dry time between coats solved that.
Coverage and coats: set realistic expectations
The label’s coverage spec—about 50 square feet per gallon for two coats—is a good planning baseline for a typical broom‑finished slab. Real‑world coverage varies with:
- Surface profile: Smooth, tight concrete takes more material; etched or broomed takes less.
- Target texture: A thicker second coat gives a richer look and more grip, but uses more.
- Temperature and wind: Faster drying makes it harder to maintain a wet edge and can lead to overworking thin sections.
For my patio and walk, I averaged roughly 40–60 sq ft per gallon for two coats. On very smooth spots, a third light coat was the simplest way to even out color and texture. If your project must be a strict two‑coat job, profile and prime the smooth areas first.
Underfoot and to the eye
The finished texture is Goldilocks for outdoor living spaces: distinct enough to feel confident under wet shoes, gentle enough to walk barefoot without irritation. Around sprinklers and a hose bib, the slip resistance is a meaningful upgrade over bare concrete.
Visually, the gray reads as a uniform, matte‑to‑low‑sheen field with a “stone flour” effect from the embedded particles. While wet, it looks darker; after curing, it lightens to a neutral gray consistent with the can’s intent. Direct sun accentuates the micro‑texture, which helps hide minor surface waves and patchwork repairs.
Durability and maintenance
After a full cure, the film is surprisingly tough. It shrugs off dirt and tree droppings with a hose and a broom. Oil smudges sit on the surface long enough to be cleaned, and the finish doesn’t chalk under UV the way thin porch paints can.
A few practical notes:
- Hot tires: On light‑duty garages and driveways, allow a conservative cure (several days) before vehicle traffic. Keep build modest in those areas; very thick films plus tight turning can scuff any textured coating.
- Edges and corners: The coating is thick enough to resist chipping from casual knocks, but snow shovels with metal edges can gouge if you dig in. Use a poly edge if you clear snow.
- Touch‑ups: Because it’s textured, spot repairs blend better than smooth paints. Feather your repair beyond the immediate scuff and backroll to match texture.
Cleaning is as simple as a rinse and a nylon scrub. A light pressure wash works if you keep the nozzle moving.
Pitfalls to avoid
- Direct sun and heat. Above roughly 80°F or in full sun, it skins too fast to self‑level, and you’ll fight lap lines and thin spots.
- Skipping surface prep on smooth concrete. If it looks like a garage trowel finish, profile it or plan on extra coats.
- Overloading the roller. If the roller slides, not spins, redistribute. Thick puddles can shrink‑crack.
- Expecting it to cover like wall paint. It’s a build coat with aggregate—work slower, and let it do its job.
Cost and value
This isn’t a bargain‑bin makeover; you’re paying for build, texture, and durability. The film you get is closer to a resurfacer than a typical porch paint, and the coverage spec reflects that. For patios, porches, pool decks, and walkways where slip resistance and cosmetics matter, the value pencils out. If your priority is a minimal‑build color change on a huge slab, a thin acrylic concrete paint will go farther per gallon but won’t hide flaws or provide the same traction.
Where it shines vs. where it struggles
Shines:
- Patios, porches, pool surrounds, and entries that need traction and a uniform, upgraded look
- Hairline crack hiding and camouflaging patchwork
- Areas that see sun, dirt, and occasional spills but not constant heavy machinery
Struggles:
- Ultra‑smooth, sealed, or previously coated slabs without prep
- Very heavy vehicular use, tight turns, or forklift traffic
- Application in hot, direct sun or windy conditions
Bottom line
I’m impressed with the KILZ coating for what it’s designed to do: transform tired concrete into a consistent, slip‑resistant, durable surface that looks thoughtfully finished. It rewards good prep, shade, and patience. Treat it like a high‑build topping, not a wall paint, and it delivers a professional‑looking result that’s comfortable underfoot and easy to maintain.
Recommendation: I recommend this coating for homeowners tackling patios, porches, pool decks, and walkways who want a thicker, grippier, more forgiving finish than standard concrete paint. Plan your coverage at about 50 sq ft per gallon for two coats, profile smooth areas, and work out of the sun with a dense foam roller. For garages and driveways, use modest build and allow a generous cure—or consider a different system if your traffic is heavy and aggressive. Applied within its wheelhouse, it’s a dependable, good‑looking upgrade that holds up season after season.
Project Ideas
Business
Mobile Concrete Refresh Service
Offer a targeted service for homeowners and small property managers to refresh driveways, porches, patios, and garage floors. Use the one-gallon coverage estimate (≈50 sq ft with two coats) to price jobs and provide fast turnarounds. Market the service as affordable curb-appeal upgrades that fill hairline cracks, add slip resistance, and resist hot tires and grease. Package add-ons: stenciling, color borders, and quick repairs.
Airbnb / Short-Term-Rent Upgrade Packages
Partner with local Airbnb hosts and short-term rental owners to improve exterior spaces quickly and economically. Offer staged upgrades—pool deck safety coatings, entryway refreshes, and garage floor makeovers—to increase booking photos and guest satisfaction. Provide before/after photos and a small maintenance guide to hosts (cleaning, recoat intervals).
Commercial Branding & Walkway Stenciling
Provide custom stenciling and branded walkway services for small businesses (cafés, boutiques, salons). Use the durable, slip-resistant coating as a base and overlay logos, wayfinding arrows, or social-distancing markers. Emphasize durability against foot traffic and weather, and offer seasonal refresh contracts.
DIY Kit & Virtual Coaching Business
Create and sell small DIY kits for homeowners that include a one-gallon can, a 1/4" adhesive roller, disposable gloves, sample stencils, tape, and a concise prep/application guide. Offer optional virtual coaching sessions (video calls) or short how-to videos for an added fee. Kits are ideal for patios, small porches, or sample areas—position them as weekend projects that dramatically boost curb appeal.
Pop-Up Seasonal Outdoor Flooring Service
Run a seasonal business targeting restaurants, market stalls, and event venues that need quick non-slip surface upgrades for patios and walkways. Offer short-term contracts to prep and coat outdoor dining areas or vendor zones with the slip-resistant formula, then provide an affordable refresh service before peak seasons. Emphasize quick application, two-coat durability, and easy maintenance.
Creative
Geometric Patio Makeover
Use painter’s tape or reusable stencils to create bold geometric patterns on a small patio or porch. Prep the concrete (clean, degrease, patch hairline cracks), then apply two coats of the gray decorative coating, using the recommended 1/4" adhesive roller for smooth coverage. After the base coats cure, overlay taped shapes with contrasting concrete-safe paints or dilute the gray for a subtle two-tone effect. Finish with an extra slip-resistant top coat on walk areas.
Custom Garage Floor Zones
Transform a garage floor into a functional, durable workspace by coating designated zones: parking, tool bench, bike area, and a center logo. Use the gray coating as the base, then add stenciled border colors or utility stripes (created with concrete paint or tinted topcoat) to mark zones. The product fills hairline cracks and resists hot tires, making it ideal for garages. Sell or gift as a professional-looking, low-maintenance upgrade.
Pool Deck Refresh with Non-Slip Borders
Refresh a pool deck area by applying two coats of the slip-resistant coating to the entire surface, then add a contrasting horseshoe- or tile-patterned border around the pool using stencils. The coating’s slip resistance is great for wet areas; it fills minor cracks and resists dirt and grease. Use the 1/4" roller to maintain texture and avoid slippery spots.
Concrete Planters & Tabletop Makeover
Give old wooden tabletops, planters, or paver-topped coffee tables a contemporary concrete-look finish. Coat the surface with the decorative concrete product (after proper priming/prepare for adhesion), build up two coats for a durable, textured finish, and distress or seal selectively for a faux-concrete aesthetic. Great for indoor/outdoor furniture that benefits from the coating’s protective properties.
Stepping Stone or Paver Revamp
Refresh or create decorative stepping stones by applying the coating to cast molds or existing pavers. The paint’s crack-filling and durable finish make it suitable for foot-traffic pieces. Add embedded decorative aggregates or stamped textures before the final set to simulate flagstone or terrazzo, then top with an extra slip-resistant coat for safe garden paths.