Features
- RICH EVEN COLOR – Minwax Wood Finish is a deep penetrating, oil-based wood stain that provides beautiful color and enhances the natural wood grain in one coat. It’s perfect for interior staining projects such as wood furniture, cabinets, doors and more.
- QUICK DRYING – Staining interior wood has never been quicker. The special formula allows it to deeply penetrate wood pores within 5 minutes of application, resists lapping, and dries in two hours, making all your wood projects quick, beautiful and easy.
- EASY TO APPLY – Use a clean cloth or wood stain brush to apply this wood stain in the direction of the grain. Wait 5-15 minutes and wipe away excess stain. The longer you wait, the darker/richer the color. Reapply coats for deeper color.
- NATURAL WOOD STAIN – This natural wood stain provides a beautiful, light color with neutral undertones. The light wood stain lets the natural beauty of the wood shine through, and looks great for a variety of projects.
- A BRAND YOU CAN TRUST – Minwax is America’s leading brand of wood finishing and wood care projects. Since 1904, we have been inspiring consumers to Keep on Finishing. We offer consumers a complete line of products to meet every wood finishing need.
Specifications
| Color | Natural |
| Size | 1/2 Pint |
| Unit Count | 1 |
Related Tools
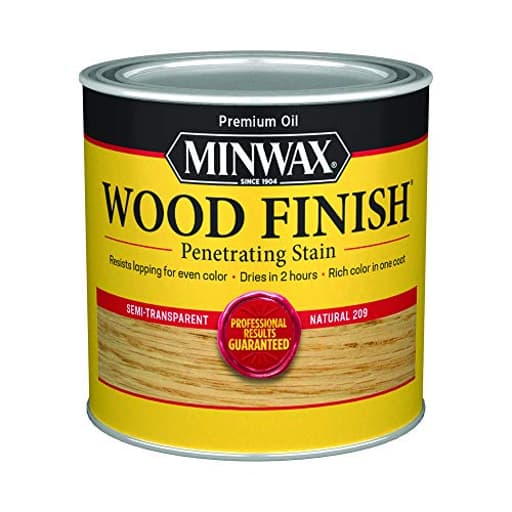
A half-pint oil‑based penetrating wood stain in a natural, light color for interior wood surfaces such as furniture, cabinets, and doors. It penetrates wood within about five minutes and dries in roughly two hours; apply with a cloth or brush along the grain, wipe off excess after 5–15 minutes (longer dwell yields a darker tone), and recoat as needed for deeper color.
Minwax 220904444 Wood Finish, Natural Stain, Half Pint Review
Why I reached for this stain
I like stains that enhance wood rather than mask it, and that’s exactly what I looked for when I picked up Minwax’s natural stain in the half‑pint size. I used it across a handful of small indoor projects—an oak picture frame, a maple cabinet door, and some pine shelving—to see how it behaves on different species. The short version: it’s easy to control, dries faster than many oil‑based stains, and leaves a clean, understated warmth that lets grain take center stage. It’s not a magic wand for blotchy softwoods and it won’t give you dramatic color, but that’s the point of a natural tint.
What it is (and what it isn’t)
This is an oil‑based, penetrating stain designed for interior use. It’s a light, neutral “natural” tone—more about enriching grain and nudging color than reinventing it. The working time is generous: flood it on with a brush or lint‑free cloth, let it sit for 5–15 minutes depending on how much color you want, then wipe off the excess. It penetrates quickly (within a few minutes) and is ready for a second coat or a topcoat relatively fast. The half‑pint can is perfect for small jobs, repair work, or testing color recipes.
If you want a deep, dramatic change in tone, this isn’t the shade to reach for. Think of it as a subtle filter that warms and unifies.
Application: forgiving, with a clear workflow
I prepped each surface to 180–220 grit, vacuumed thoroughly, and wiped down with a clean rag. The stain mixes easily—just stir well to lift pigment off the bottom—and it spreads smoothly with either a foam brush or cloth. On vertical pieces, I prefer a brush to avoid drips; on flat panels, cloth gives better control.
- On oak: Flooded on, waited about 10 minutes, wiped. The grain popped nicely and color stayed even with no lap marks.
- On maple: A shorter dwell (5–7 minutes) kept the look subtle and avoided patchiness. Maple doesn’t take stain as aggressively, so the “natural” tone looked very clean.
- On pine: Pine can blotch with penetrating stains. With a pre‑stain conditioner, the result was significantly more uniform. Without conditioner, it leaned warmer and a bit uneven—some sections grabbed more color than others.
The claim that it “resists lapping” largely held up; keeping a wet edge and working with the grain prevented noticeable overlap marks even on wider panels. I rarely felt rushed, which is not always the case with quick‑dry formulas.
Color behavior across species
How “natural” reads depends heavily on the wood:
- Red/white oak: Adds a light, honeyed warmth and makes early/latewood contrast pop. It’s a good way to unify boards from different lots without changing character.
- Maple/birch: Subtle shift—more clarity than color. It can look almost clear with a hint of warmth, which suits modern pieces where you want grain definition without yellowing.
- Pine/spruce: Warmer and more variable. Expect some boards to go amber; end grain can darken. Use conditioner to tame blotchiness and sand end grain to a higher grit.
- Walnut: Deepens figure slightly and evens tone without muddying. The change is modest but attractive.
I didn’t encounter the “gray” cast some natural/light stains can show on certain softwoods, but I did see how species and sanding sequence affect final tone. Always test on offcuts or the back of a piece.
Dry time and topcoating
It dries to the touch quickly for an oil‑based stain. I could recoat in a couple of hours in a 70°F shop with decent airflow. That said, topcoat timing depends on the finish you’re using:
- Oil‑based polyurethane or wiping varnish: I prefer to wait overnight for complete solvent flash‑off, even if the surface feels dry sooner.
- Water‑based polyurethane: Allow extra time—at least overnight—to avoid pulling stain or trapping odor. A light scuff with a gray pad before topcoat improves adhesion.
- Wax/shellac: No issues if the stain is fully dry and wiped clean.
Once topcoated, the color deepens subtly, as expected with oil finishes.
Finish quality and control
The finish has an even, low‑sheen look pre‑topcoat, and it doesn’t fill grain or muddy figure. Because the shade is light, it’s easy to adjust with dwell time and multiple passes. On oak, one application was enough; on maple, a second coat added just a hair more warmth without streaking. If you’re trying to nudge mismatched boards closer together, this stain behaves predictably.
It’s worth noting that “more time” doesn’t turn this into a dark stain—the pigment load is intentionally light. If you want depth, start with a darker tone or glaze over the natural base.
Coverage, size, and value
The half‑pint goes further than it looks. I covered an 18×24 inch cabinet door, a pair of 8×10 frames, and a small shelf with some left in the can. As a rough guide, expect a few square meters on tight‑grained hardwoods and less on soft/porous woods. For a full kitchen or a large dining table, jump to a quart; the half‑pint is best for small projects or testing color on multiple species.
Per ounce, the half‑pint isn’t the cheapest way to buy stain, but for sampling and one‑off jobs, the convenience outweighs the cost.
Odor, cleanup, and safety
It has the typical solvent smell of oil‑based stains—present but not overpowering with ventilation. I kept a fan running and cracked a window; no lingering odor the next day. Cleanup with mineral spirits is straightforward.
Important safety note: oily rags can self‑heat. Lay them flat to dry outdoors or submerge in water and dispose of them in a sealed metal container. Don’t ball them up in a trash can.
Where it shines—and where it doesn’t
Strengths:
- Easy to apply and wipe, with a comfortable working window
- Consistent, even results on hardwoods; good grain definition
- Quick dry time for an oil‑based formula
- Reliable under a variety of clear finishes
Trade‑offs:
- Softwoods like pine still benefit from a conditioner to avoid blotching
- The “natural” shade is intentionally subtle; it won’t deliver dramatic color shifts
- Color can lean warmer or slightly different across species and sanding grits, so testing is essential
- The half‑pint size is convenient but pricier per ounce than larger cans
Tips for best results
- Stir thoroughly before and during use; pigments settle quickly.
- Sand consistently across boards and raise end‑grain sanding to reduce over‑absorption.
- On pine and other blotch‑prone woods, use a compatible pre‑stain conditioner.
- Work in manageable sections and keep a wet edge to minimize overlap marks.
- Start with a 5–7 minute dwell and adjust in small increments; wipe with the grain using a clean cloth.
- Let it dry longer before water‑based topcoats; overnight is a safe rule of thumb.
- Label test swatches with species, grit, and dwell time for future reference.
Bottom line
This Minwax natural stain earns a spot on my shelf for projects where I want to emphasize wood, not color it. It’s straightforward to apply, dries faster than many oil‑based competitors, and produces a clean, unified look—especially on oak and maple. It’s less foolproof on pine without conditioner, and if you’re chasing a bold color change you’ll need a darker tone. But for subtle warmth and grain clarity, the results are consistently good.
Recommendation: I recommend it for small to medium interior projects where a light, natural finish is the goal and for anyone who values control and predictability during application. If you’re working primarily with softwoods and don’t plan to use a conditioner, or you need a dramatically darker color, consider a gel stain or a deeper shade instead. For everything else, this is a reliable, easygoing stain that lets the wood do the talking.
Project Ideas
Business
Refinish & Flip Small Furniture
Offer a niche service specializing in quick, high‑margin refreshes of small furniture (end tables, nightstands, chairs) for resale. Use the natural stain to brighten interiors and standardize color across mixed pieces. Package services: basic clean + stain, premium (filling, light repairs, topcoat). Market via local buy/sell groups, Instagram before/after, and weekend flea markets.
DIY Stain Kits and How‑To Cards
Create compact kits for hobbyists: 1/2 pint natural stain, a lint‑free cloth, a small brush, sandpaper, and a printed how‑to card showing dwell times for different looks. Sell them at craft fairs, online marketplaces, or bundled with simple raw wood projects (cutting board blanks, small frames). Include clear safety and finishing instructions to reduce user errors.
Micro‑Workshops: Weekend Staining Class
Host a 2–3 hour hands‑on workshop teaching stain techniques (grain direction, wiping, layering, distressing) using the natural stain. Students leave with a finished small project (shelf, frame, tray). Charge per attendee and upsell takeaway kits or private lessons. Promote through local community centers and social media with before/after photos.
Airbnb/Host Prep Service
Position a service for short‑term rental hosts who want consistent, neutral interiors. Offer selective staining and sealing of doors, trim, and small furniture to lighten units and improve photo appeal. Package as one‑day refreshes—quick dry time (≈2 hours) allows minimal downtime. Use testimonials and photo galleries to attract real‑estate managers and hosts.
Small‑Batch Home Decor Line
Design a cohesive line of light‑stained wood goods (floating shelves, cutting board frames, candle holders) that emphasize natural grain and neutral tones. Produce small runs using the half‑pint stain to keep inventory lean. Sell through Etsy, local boutiques, and pop‑ups; highlight 'natural' color and craftsmanship in product copy and use staged photos in neutral interiors.
Creative
Live‑Edge Mini Shelves
Cut small live‑edge slabs or reclaimed boards into 8–12" lengths and apply the natural stain to highlight grain and keep the light, organic look. Use a cloth to apply along the grain, wipe off after 5–10 minutes for a pale tone. Mount with hidden cleats or brass floating brackets for a modern rustic display perfect for plants or small ceramics.
Minimalist Picture Frame Set
Make a coordinated set of thin, natural‑stained picture frames from maple or birch to keep prints looking airy. The stain enhances subtle grain without overpowering artwork. Assemble with mitered corners, sand between coats if applying two, and finish with a clear satin sealer to protect edges.
Inlaid Serving Tray
Build a shallow tray from walnut or oak and use the natural stain to lighten parts of the wood for contrast with an inlaid pattern (wood strip, resin, or brass). Wipe off stain after a shorter dwell in areas you want paler; recoat selectively for depth. Seal with a durable topcoat rated for food contact if the tray will carry food.
Modern Toy Blocks (with safety step)
Create simple geometric toy blocks from hardwoods and use the natural stain to keep a neutral, Scandinavian look. Because oil‑based stains aren’t food‑safe alone, after staining and fully curing, finish with multiple coats of a certified non‑toxic, food‑safe topcoat (or use beeswax/food‑grade oil) and allow full cure before gifting to children.
Tiered Plant Stand
Construct a small tiered stand using dowels and stained plywood or solid wood shelves. The light natural stain helps indoor greenery pop and feels cohesive in modern interiors. Stain with a cloth, wipe excess after 10–15 minutes for slightly richer tone, then seal to resist water from pots.