Features
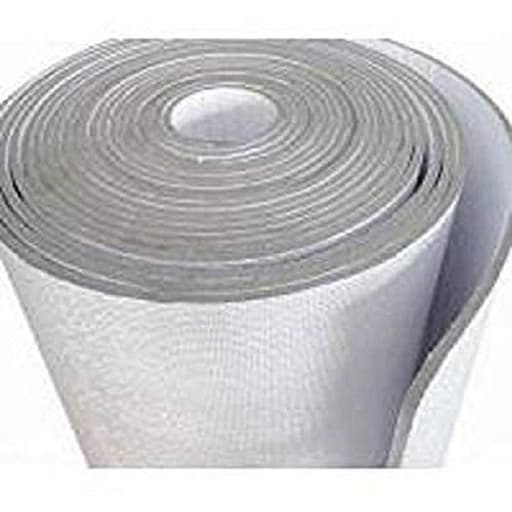
- 1/8 inch thick
- Non-Perforated White Finish
- Prevents Condensation
- Prevents 97% of radiant heat transfer
- Seals around nails (no leak)
Specifications
| Color | Multicolor |
| Size | 400 sqft |
Related Tools
This 400 sq ft, 1/8-inch reflective foam insulation panel is designed as a vapor barrier for warehouse buildings and comes with a non-perforated white finish. It reduces radiant heat transfer by approximately 97%, helps prevent condensation, and seals around nail penetrations to minimize leaks.
AES 400sf (4x100) White Reflective Foam Insulation Vapor Barrier Warehouse Building Review
Why I picked this insulation for a metal building project
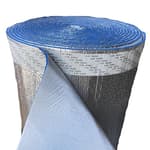
I’ve tried a lot of approaches to tame the temperature swings and condensation in metal structures—fiberglass batts, spray foam, perforated liners, you name it. For a recent retrofit of a small steel-framed workshop, I wanted something I could install solo, that would double as a vapor barrier, and that wouldn’t look like a construction zone if I left it exposed for a while. That’s what led me to this 400 sq ft roll of white-faced reflective insulation from AES. It’s a thin, 1/8-inch product with a clean white surface on one side and a reflective layer on the other, designed to cut radiant heat and control moisture migration.
What it is (and isn’t)
This is a lightweight, closed-cell core radiant/vapor barrier, not a thick thermal batt. Its job is primarily to:
- Reflect radiant heat (specs claim about 97% reduction in radiant transfer)
- Provide a continuous, non-perforated vapor barrier when seams are sealed
- Add a bit of conductive resistance thanks to the thin foam core
- Self-seal reasonably well around fastener penetrations
It’s not a walking surface, a sound-deadening product, or a structural underlayment. Think of it as a smart layer in a system: it works best with an adjacent air space and alongside other insulation when you need higher R-values.
Handling and installation
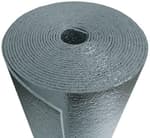
The 4-foot width and 100-foot length are practical for two reasons. First, it’s easy to snake along walls or run across rafters with minimal cutting. Second, it’s light enough to maneuver overhead without a second set of hands. I cut it with a sharp utility knife against a scrap of plywood; scissors also work for quick notches around outlets or purlins.
A few installation notes from my experience:
- Use cap staples or staples with plastic washers to avoid tearing. Regular narrow-crown staples will hold, but cap staples spread the load and make a nicer finish.
- Plan the orientation. If you’re using it as a radiant barrier, you want a small air space on the reflective side. In my case, I ran the reflective side toward the metal skin (with an air gap) and the white side facing the interior.
- Tape matters. Seam-taping with a matching white or foil-faced vapor barrier tape makes a big difference. It locks in the vapor retarder, improves air sealing, and gives a more finished look.
- Work clean. Dust and oil reduce tape adhesion and reflective performance. Wipe framing members where you expect tape to cross.
- Don’t rely on it as your only fastener path near edges. Fold a small hem at edges or staple through furring where possible to reduce pull-through.
The roll has some memory and wants to curl, which is normal. I found it easiest to hang one end, pull it taut, and tack every 12–16 inches before going back to add more staples. For ceilings, I ran 4-foot strips across the joists, stapled on the high points, then taped every seam.
Performance in real use
Radiant barrier products are notoriously hard to evaluate anecdotally because so much depends on installation and surrounding assemblies. That said, the change in surface temperatures in my shop was noticeable the first afternoon. With direct sun on the metal skin, the interior face of the wall panels dropped from “can’t keep your hand on it” hot to warm-to-the-touch after I added the insulation with an air space. Measured with an IR thermometer, I saw 15–25°F lower surface temperatures on the interior skin behind the new barrier compared to uninsulated bays.
On the comfort side, the space felt less “radiantly hot,” and my mini-split cycled less frequently. It wasn’t a magic bullet on its own—radiant barriers don’t replace bulk insulation—but it significantly reduced the radiant load from the hot roof and walls. In cooler weather, the white interior face did a decent job reflecting heat back into the space when I fired up an electric heater. The result is more stable temperatures with smaller swings.
Condensation control is where the non-perforated design shines. Before the retrofit, cold mornings left me with damp purlins and occasional drips from the roof. After installing the barrier and sealing the seams, those drips disappeared in the insulated areas. As always, correct placement of a vapor retarder depends on climate. In mixed and cold climates, you want it on the warm-in-winter side; in hot-humid climates, strategy can vary. If you’re unsure, check local guidance to avoid trapping moisture in the wrong layer.
Build quality and finish
The white face looks clean and brightens a space. It’s robust enough to staple without shredding, and it wipes clean with a damp cloth. The core feels consistent—no thin spots or delamination on my roll—and it cut without crumbling. Puncture resistance is good for a thin product, but it’s still thin; if you bump it with lumber or drag ladders across it, expect scuffs and occasional dings. It’s not a finish wall in the same way drywall is, but I was comfortable leaving it exposed for a few weeks until paneling went up.
The self-sealing claim around nails and staples is fair. Small penetrations don’t create dramatic leaks, and when paired with tape, you can achieve a continuous barrier without heroic measures. For long-term durability, I’d still recommend minimizing unnecessary penetrations and using tape-compatible sealants around larger ones.
Where it fits—and where it doesn’t
This product excels in:
- Metal buildings (shops, sheds, agricultural structures)
- Under-roof applications beneath metal panels (with appropriate air space)
- Over existing batts as a radiant/vapor layer before adding drywall or paneling
- Garage doors and service doors that radiate heat or cold
- Attic kneewalls and bonus rooms with significant radiant exposure
It’s not ideal for:
- Applications requiring high standalone R-value
- Situations where local code prohibits exposed vapor retarders without a thermal barrier
- Floors or areas subject to foot traffic or heavy abrasion
- Assemblies that demand a permeable (perforated) layer for drying potential
Practical tips for better results
- Maintain an air gap (even 3/4 inch) on the reflective side to realize radiant benefits.
- Seal seams, corners, and transitions with matching tape; don’t skip this step.
- Use furring or hat channel if you plan to attach finish panels; it preserves air space and protects the insulation.
- Label bays as you go. It’s easy to lose track of which cavities are taped, especially overhead.
- If covering with drywall, pre-mark studs/joists with a chalk line before the insulation disappears behind white.
Comparisons and value
Spray foam offers better air sealing and R-value in one shot, but the cost and mess can be prohibitive for small projects, and it’s not DIY-friendly. Fiberglass is inexpensive and provides bulk R-value, yet it doesn’t address radiant heat or vapor control unless paired with an additional layer. This AES roll hits a useful middle ground: it’s affordable per square foot, installable by one person, and noticeably improves comfort when used thoughtfully in a system.
Caveats
Two caveats from my experience. First, don’t expect miracles if you staple it tight to a hot roof deck with no air gap; radiant barriers need space to work. Second, think through moisture. Non-perforated means it’s a real vapor retarder when taped. That’s great for condensation control, but misplaced vapor layers can cause problems in some climates. Plan your assembly or talk to a local pro if you’re unsure.
Verdict
I recommend this insulation for anyone tackling a metal building, garage, or retrofit where radiant heat and condensation are the main headaches. It’s easy to install solo, the white face looks tidy if left exposed, and when you tape the seams and maintain an air gap, the performance is immediately noticeable. It won’t replace bulk insulation where high R-values are required, but as a radiant/vapor layer in a layered assembly, it’s a smart, cost-effective upgrade.
Project Ideas
Business
Insulated Shipping Inserts for Temperature-Sensitive Goods
Design and sell custom-cut insulating inserts and liners for shipping boxes carrying perishables, pharmaceuticals, or electronics. The panels' high reflectivity and vapor barrier properties reduce thermal gain/loss and condensation during transit; offer standardized kits or on-demand CNC cutting for volume customers.
Warehouse Ceiling & Door Radiant Barrier Retrofit Service
Offer a service to retrofit small warehouses, workshops, and storage units with the reflective panels as a radiant barrier to cut cooling costs and prevent condensation. Promote quick install, low downtime (panels seal around fasteners), and measurable energy savings with before/after thermal scans.
Event & Production Backdrop Rental
Create a fleet of premium, reusable reflective backdrops and diffusion panels for photographers, film crews, and event producers. Market them for product shoots, pop-up activations, and stage applications where a bright, even surface is needed; provide transport frames and quick-attach systems for rental convenience.
Greenhouse Upgrade Kits for Small Farmers
Assemble and sell retrofit kits that include pre-cut reflective liners, mounting hardware, and installation guides to help small growers boost light efficiency and reduce heating needs. Offer tiered kits (bench, wall, full interior) and add-on consulting to optimize vents and humidity control using the panels' condensation-preventing properties.
Insulated Cooler & Food-Truck Panel Products
Manufacture interior wall and ceiling panels for coolers, catering trucks, and food trailers that need lightweight, hygienic, and condensation-resistant insulation. Emphasize the thin profile (maximizing usable interior space), easy screw-in installation (seal around fasteners), and high radiant heat rejection for climate control efficiency.
Creative
Portable Photo/Video Reflective Backdrop
Cut panels into modular, interlocking sheets to build a lightweight, 8'x8' collapsible backdrop for product photography or video. The high-white reflective surface doubles as a light diffuser/reflector for soft, even illumination; panels can be scored and folded for easy transport and finished edges for a clean studio look.
Insulated Pet House / Outdoor Shelter
Use sections to line and insulate a small dog kennel, cat shelter, or outdoor rabbit hutch. The vapor barrier prevents condensation, the reflective surface returns radiant heat to the occupant, and the thin panels are easy to cut and fasten around frames; finished shelters can be sold as winter-ready pet homes.
DIY Greenhouse / Grow Tent Liner
Line the interior walls of a small greenhouse or indoor grow tent with the reflective panels to bounce light back onto plants and reduce heat loss at night. The condensation-resistant surface helps manage humidity and prevents mold on structural members; panels can be custom-cut to fit shelving or cold frames.
Insulated Picnic/Camping Mat and Sun Shade
Cut and laminate panels to make a foldable insulated ground mat that reflects radiant heat from the ground and resists moisture. Use leftover pieces to create a reflective sunshade for car windshields or campsite awnings that dramatically reduce interior temperatures.
Light-Reflective Art & Decorative Panels
Create modern wall art and installations using geometric patterns cut from the white reflective finish. Paint, laser-cut, or apply vinyl on top of the panels; the reflective base adds depth and changes appearance with lighting, suitable for galleries, cafes, or retail interiors.