Features
- Easy to use: Bio-degradable, Non- Acid formula - just mix with warm water!
- Immediate Results: Quick & Proven! Results in 30 minutes!
- Completely dissolves the cement to produce rinsable mud!
- Removes: Concrete Morter Grout and Stucco LESS than SIX months old!
- Perfect to Prep Concrete for Etching, Staining or Epoxy application!
- NOT effective with self leveling polymer-modified cement or polymer-modified binder system and fillers
Specifications
| Color | clear |
| Size | 128 Fl Oz (Pack of 1) |
| Unit Count | 1 |
Related Tools
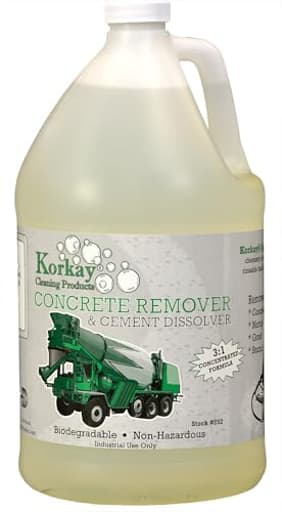
A one-gallon concrete remover concentrate that is biodegradable and non-acid; mix with warm water to dissolve cement, mortar, grout, and stucco less than six months old into a rinsable mud in about 30 minutes. Intended for surface preparation prior to etching, staining, or epoxy application, it is not effective on self-leveling or polymer-modified cement or polymer-modified binder systems and fillers.
Korkay DIY Concrete Remover & Cement Dissolver Heavy-Duty, Great for Tools & Mixers - 1 Gallon Review
A practical way to turn stuck-on cement into rinseable mud
I keep a small roster of “problem solver” chemicals in the shop—things I only reach for when manual scraping or a pressure washer isn’t enough. The Korkay concrete remover has earned a permanent spot on that shelf. It’s a biodegradable, non‑acid concentrate designed to dissolve Portland‑cement based residues (cement, mortar, grout, stucco) into a soft slurry you can rinse or vacuum out. It isn’t a miracle potion, and it has clear limitations, but used with the right expectations and some patience, it’s highly effective.
What it is and what it’s for
This is a clear, one‑gallon concentrate you mix with warm water. The chemistry isn’t acid-based, so you don’t get that nose-burning, corrosive experience you do with muriatic acid or strong mineral acids. It targets the cement binder—the “glue” in concrete—breaking it down so the aggregate releases and the mass turns to a paste. It’s intended for deposits under about six months old and for surface preparation before etching, staining, or epoxy. It does not work on self‑leveling or polymer‑modified systems.
That last point matters. If you’re dealing with modern flexible thinsets, specialty grouts, or repair mortars that rely on polymers for strength, this won’t touch them. For standard, young cementitious material, it does what it claims.
How I used it
I approached three common scenarios:
1) Cleaning tools and equipment
2) Clearing a grout/thinset blockage in a shower drain
3) Spot‑removing mortar and laitance as part of slab prep for a coating
Across all of these, the workflow that produced results was similar:
- Remove loose material first, mechanically if you can.
- Keep the surface wet with the solution during dwell; don’t let it dry out.
- Agitate periodically with a nylon brush or by snaking the area.
- Rinse aggressively—pressure water outside, hot water or a wet/dry vac indoors.
- Repeat for thick buildups.
For heavy deposits, I used it undiluted. For films and light splatter, I followed the label’s warm‑water mix instructions and stepped up only if needed.
Tools and equipment: fast wins, lighter touch on finishes
On steel trowels, margin tools, and a mixer paddle with a few months’ accumulation, a 30–45 minute dwell turned sharp, bonded crust into a soft gray paste. A nylon brush and a hose knocked it off without gouging the steel the way scraping can. On a skid‑steer bucket and a wheelbarrow, I let it sit longer, kept it wet, and pressure‑washed after about an hour. Two passes took care of big freckles of concrete and most of the haze.
Because it’s non‑acid, I didn’t see the immediate metal etching or flash rust I associate with acid cleaners, but I still rinsed thoroughly and dried tools after. Painted and powder‑coated surfaces on equipment weren’t harmed in my use, though I still recommend taping off decals and testing inconspicuous areas—any chemical strong enough to break cement can dull sensitive finishes if it pools or dries.
Clearing a grout‑clogged shower drain: patience pays
My most telling test was a shower drain partially blocked with grout and thinset from a tile job—classic DIY headache. Mechanical snaking alone just polished the plug. Here’s what worked:
- I bailed standing water, then introduced the remover undiluted and kept it in contact with the blockage.
- Over the next couple of days, I agitated with a flexible plastic rod and a small drain auger, then vacuumed out the slurry with a wet/dry vac.
- I refreshed the solution and repeated several cycles.
- The final step was a hot water flush, followed by short bursts with a small pressure wand (careful to shield splashback).
It wasn’t a quick thirty‑minute “pour and done,” but the plug progressively softened until flow returned. If you’re expecting something you pour once and forget, you’ll be disappointed; if you treat it as a chemical assist to mechanical removal, it’s surprisingly effective for cement‑based clogs near the fixture.
A caution: protect your finished surfaces. I had a couple of splashes hit dark grout around the drain; wiping immediately prevented discoloration, but dried residue can mark porous finishes. Mask, tape, and lay down absorbent protection before you start.
Surface prep before coatings
For a garage slab with scattered mortar drips and general laitance, I used a diluted mix as a spot treatment ahead of grinding and coating. Fresh drips turned to putty after a short dwell and lifted cleanly, which reduced the amount of mechanical grinding I needed and kept dust down. It’s not a replacement for profiling a slab, but it’s useful to knock off cement bumps and residues that would telegraph through an epoxy or polyaspartic.
Where it struggles
- Polymer‑modified or self‑leveling materials: per spec, it won’t break these down. In my testing on a polymer‑rich patching compound, it did essentially nothing.
- Fully cured, very old concrete: expect slow results or no meaningful change without long dwell cycles and repeated applications. You’re fighting a tough, dense matrix that’s past the “young cement” window this chemistry targets.
- Deep, inaccessible plugs: in a 3/4‑inch electrical PVC conduit that was fully packed with hardened material, soaking didn’t restore flow. Without agitation and a way to refresh the solution, there’s no path for the chemistry to penetrate. Conduits, long runs, and elbows are the toughest use case and may still require mechanical removal.
Safety, odor, and cleanup
One of the best traits here is usability. It’s low‑odor, produced no noticeable fumes for me, and didn’t sting the eyes or nose the way acids do. Still, treat it with respect:
- Wear gloves and eye protection; the slurry is messy and you don’t want it in your eyes.
- Ventilate if you’re in a small bathroom or crawlspace.
- Protect adjacent finishes (stone, painted trim, metals) and wipe splashes quickly.
- Do not let the solution dry on surfaces—keep it wet during dwell and then rinse thoroughly.
Because the residue turns to a mud, plan your cleanup. A wet/dry vacuum is the easiest way to pull slurry out of drains or off floor surfaces. Outdoors, a pressure washer speeds things along and leaves less film behind.
Coverage and efficiency
A gallon goes a long way for tool cleaning and light film removal; I barely dented the jug in those scenarios using a diluted mix. Clogs and thick deposits consume more—especially if you use it undiluted and repeat cycles. If you’re tackling a drain or heavy buildup, expect to use a meaningful portion of the container.
Tips to get better results
- Warmth helps. Mix with warm water and keep the area above room temperature if possible.
- Agitate. Even gentle brushing or snaking speeds the breakdown dramatically.
- Keep it wet. Reapply or tent with plastic to prevent drying during longer dwell times.
- Rinse aggressively. Pressure water outside; hot water and a shop vac inside.
- Test first. On colored grout, anodized metals, or coated surfaces, try a small spot and wipe quickly.
Value
Compared to acids, the Korkay remover is far more user‑friendly and less risky to surrounding materials, which makes it viable indoors and mid‑project without full hazmat choreography. Compared to purely mechanical removal, it saves time and reduces damage to substrates and tools. For a contractor cleaning equipment daily or a homeowner dealing with a specific cement mishap, it’s a justified purchase.
The bottom line
The Korkay concrete remover does what it promises within its lane: it softens and dissolves young, cement‑based residues into a manageable slurry with minimal odor and fuss. It excels at cleaning tools and equipment, spot‑removing mortar splatter, and assisting with drain clogs caused by standard grout or thinset—provided you give it dwell time, agitation, and a thorough rinse. It won’t touch polymer‑modified systems, and it’s not a magic bullet for deep, fully cured blockages you can’t access.
Recommendation: I recommend it for pros and DIYers who need a non‑acid, indoor‑safe way to remove recent cement residues, clean tools, and prep spots prior to coatings. Pair it with a nylon brush, a wet/dry vac, and a pressure washer for best results, protect surrounding finishes, and approach stubborn blockages with patience. If your problem is polymer‑modified material or a long, inaccessible plug, skip it and plan on mechanical remediation.
Project Ideas
Business
Epoxy/ Stain Surface-Prep Service
Offer a fast subcontracted pre-treatment for flooring contractors and epoxy installers: use the remover to dissolve and rinse off weak cement laitance and recent mortar to ensure proper adhesion for epoxies and stains, reducing mechanical grinding time and job delays.
DIY Prep Kits for Homeowners
Package the concentrate with clear instructions, measuring cups, a pump sprayer, gloves, goggles, and a small scrub brush. Sell kits online or at hardware stores targeted at DIYers preparing patios, driveways, and garage floors for staining or sealing.
Mobile Concrete Cleanup & Restore
Run a on-call service for property managers and contractors to remove recent mortar, grout and stucco from curbs, sidewalks, storefronts and landscaping projects. Market quick turnaround and biodegradable, non-acid formulas as safer for urban jobsites.
Trade Workshops & Certification
Host short paid workshops for contractors, epoxy installers, and property renovators teaching best practices for chemical surface prep, when to use chemical vs mechanical methods, safety procedures, and product limitations (e.g., not effective on polymer-modified cement). Offer certification and partner with local supply stores.
Co-Branded Prep Bundles
Partner with epoxy, concrete stain, and sealant brands to create co-branded starter bundles (remover + stain + sealer + instructions). Sell to flooring contractors and retailers as an end-to-end surface-prep and finishing solution, increasing average order value.
Creative
Revealed-Aggregate Wall Panels
Cast thin concrete panels or pour a shallow patch, let cure, then use the remover to dissolve the top cement matrix and expose aggregate for a terrazzo/aggregate look. Seal and mount as decorative wall art or backsplashes. (Works best on fresh concrete under six months; not for polymer-modified mixes.)
Distressed Concrete Tabletops
Apply a thin concrete overlay to a wood or MDF tabletop, then selectively dissolve areas to produce controlled pits and texture. Finish with stain and protective sealer for a modern, industrial coffee table with bespoke weathering.
Restored Vintage Tools & Mixers Display
Safely dissolve recently adhered mortar and grout from salvaged buckets, paddles and mixing tools to restore form and reveal patina. Cleaned pieces can be turned into wall hooks, lamp bases, or workshop décor.
Planter & Terracotta Revival
Remove old stucco, mortar splatters and fresh concrete deposits from planters and stone pots to restore texture for repainting, sealing, or mosaic rework. Great for upcycled garden displays and multi-material planters.
Partial-Etch Mural Panels
Create multi-layer concrete murals by casting layers and using the remover selectively to etch away top layers into a rinsable mud, producing depth and contrast. Combine with stains or pigments to highlight the revealed layers for gallery-quality panels.