Features
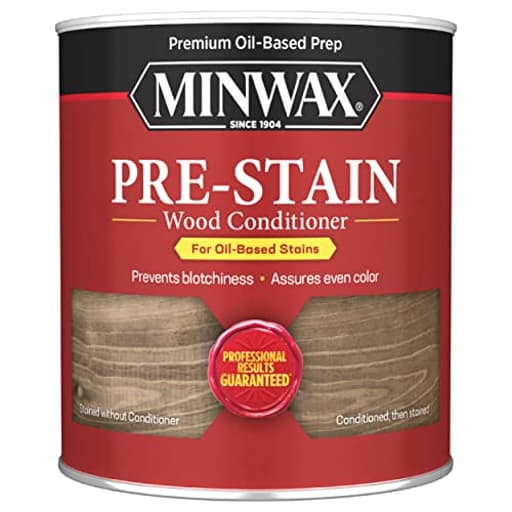
- PRE-STAIN TREATMENT FOR ALL WOOD – Ensure wood projects look great with Minwax Pre-Stain Wood Conditioner. Use prior to applying oil-based wood stains to help prevent streaks and blotches. It works by evening out the absorption of oil-based wood stain.
- PREVENT BLOTCHES – By Minwax Pre-Stain Wood Conditioner prior to staining with oil-based wood stains, you can prepare the wood to avoid blotching and streaking, ensuring beautiful results.
- ASSURES EVEN STAIN PENETRATION – Wood is porous, and tends to absorb stain unevenly. But this wood conditioner for staining evens out the absorption of oil-based stains for natural, even results. Wood may be stained immediately after application.
- USE ON SOFT AND HARD WOOD – Use this on all your unfinished wood projects, on both hard and soft wood. The pre stain conditioner is especially necessary when working with soft or porous woods like pine, alder, birch, and maple.
- A BRAND YOU CAN TRUST – Minwax is America’s leading brand of wood finishing and wood care projects.* Since 1904, we have been inspiring consumers to Keep on Finishing. We offer consumers a complete line of products to meet every wood finishing need.
- Assures even stain penetration on soft woods such as pine, fir and spruce
- Prepares the wood to avoid blotching and streaking
- Wood may be stained immediately after application
- Coverage is approximately 75-Square Feet per quart
- 1 quart
Specifications
| Color | Quart |
| Size | Quart |
| Unit Count | 1 |
Clear, 1-quart pre-stain wood conditioner that evens the absorption of oil-based stains to reduce blotching and streaking on soft and hard woods. Apply before staining (stain may be applied immediately after); covers about 75 square feet per quart and is suitable for porous species such as pine, alder, birch, and maple.
Minwax 61500444 Pre-Stain Wood Conditioner, Clear, 1 Quart Review
What this product does well
I reach for Minwax’s pre-stain conditioner any time I’m staining woods that are prone to blotching or uneven absorption. Pine, alder, birch, and maple are the obvious candidates, but it’s also helpful on tricky end grain and in areas where grain density changes abruptly (think flatsawn panels or knotty stock). The conditioner’s job is simple: partially fill and equalize the wood’s thirsty areas so your oil-based stain doesn’t dive into some spots and sit on top of others. Used correctly, it noticeably reduces streaks, halos around knots, and those “zebra” stripes you sometimes see on pine plywood.
It’s clear, so it doesn’t alter the base color of the wood, and it plays nicely with both liquid and gel oil-based stains. Coverage is roughly 75 square feet per quart in real-world use—more on tight-grained hardwoods, less on end grain and porous softwoods.
What it isn’t
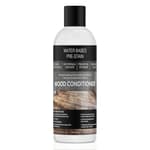
This isn’t a sanding sealer, a topcoat, or a magic eraser for every finishing flaw. It won’t eliminate grain contrast (nor should it), and it doesn’t make blotch-prone woods behave exactly like straight-grained walnut. It’s a control tool—one that narrows the highs and lows so your stain lays down more predictably. It also isn’t a universal conditioner; it’s designed to precede oil-based stains. If you’re using a water-based stain, Minwax makes a separate water-based conditioner and that’s the better choice.
Application and technique that actually works
I’ve had consistently good results with this workflow:
1) Surface prep
- Sand to 150 or 180 grit. Going higher on blotchy species (like birch or maple) can burnish the surface and reduce the conditioner’s effectiveness.
- Vacuum and tack off dust thoroughly.
2) Flood it, don’t starve it
- Apply liberally with a natural-bristle brush or a clean lint-free rag. I prefer brushing on flat panels and ragging in for frames/edges.
3) Open time
- Let it sit 5–10 minutes to soak into the thirsty areas. Keep an eye out for pooling around knots and edges—don’t let it sit there.
4) Wipe the excess
- Wipe the entire surface thoroughly. You want the surface uniformly damp, not wet or greasy. Excess left on the surface can bleed back and complicate the next steps.
5) Stain window
- Stain within 15–120 minutes for best results. If I’m after maximum evening on pine or alder, I stain near the earlier side of that window while the wood still feels “conditioned” but not wet. If I need sharper contrast on an open-pored hardwood like red oak, I’ll wait closer to an hour.
A note on red oak and other open-pored hardwoods: if you saturate the surface and don’t wipe completely, the conditioner can migrate up out of the pores for a while. I avoid that by applying enough to wet the surface, wiping thoroughly at the 5–10 minute mark, and giving it a little extra time before staining. The goal is even penetration without leaving pools in the pores.
Cleanup is with mineral spirits, and like any oil-based product, rags should be laid flat to dry completely before disposal to avoid spontaneous combustion.
Performance across different species
Pine and alder: This is where the conditioner earns its keep. It dramatically reduces streaks and dark blotches around knots and earlywood bands. I’ll often step my stain color one shade darker than I’d use on unconditioned pine because the conditioner moderates the deepest absorption—worth it for the evenness.
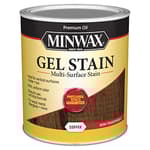
Birch and maple: Both can go muddy-blotchy with penetrating stains. The conditioner delivers a more uniform, natural look and keeps the color out of those cloudy patches. I prefer a gel stain on these woods for added control; the conditioner still helps with edge and end-grain management.
Oak (red and white): Less critical, but still useful depending on the look you’re after. On red oak panel work where I want to tame extreme earlywood/latewood contrast, a light application can smooth transitions. If you want every pore to pop, you can skip it. With heavy-grain fills or pore-highlight finishes, I usually leave the conditioner out.
Plywood and veneered panels: On pine and birch plywood, it significantly reduces telegraphed glue lines and stripey absorption. Always test on an offcut from the same sheet; thin face veneers can behave differently.
End grain: It does a good job preventing end grain from going two shades darker than the face. I’ll often give end grain a quick extra wipe of conditioner and sand it one grit higher to help even things out.
Coverage, drying, and workflow
The quart can is a sensible size for most shops. I routinely see about 75 square feet of coverage per quart on mixed projects. Because it’s clear and fast to apply, adding it to your workflow doesn’t feel like a big penalty—especially given that you can move to stain as soon as 15 minutes later. In a small-shop setting, that means I can condition in the morning and be fully into staining before lunch.
One practical note: it’s packaged in a standard metal can with US customary sizing. If you’re used to metric, double-check the volume you’re buying; a quart is roughly 946 mL.
Color impact and stain choice
Conditioning inevitably reduces the deepest bite of a penetrating stain. That’s the point. Expect a slightly lighter, more controlled color at the same number of coats. You can address this in a few ways:
- Choose a stain one shade darker than your target when conditioning.
- Apply a second stain coat to build to your color.
- Use a gel stain for even more control on blotch-prone species.
If you’re chasing a very dark color on pine, you may find that conditioning plus a gel stain gives you the depth you want without the tiger-striping that plagues liquid stains on that wood.
Limitations and quirks
- It adds a step. The time cost is small, but it’s there.
- You must remove all excess. Leaving it on the surface can create adhesion issues and, on very porous woods, bleeding.
- Not for water-based stains. There’s a dedicated water-based version for that.
- Solvent odor and cleanup. Ventilation is a must, and sensitive users may prefer water-based systems end-to-end.
Alternatives
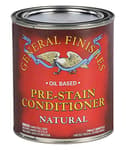
A common alternative is a “washcoat” of dewaxed shellac or a purpose-made sanding sealer thinned to reduce solids. Those work, but they can seal more than you want, making color harder to build and risking adhesion nuances with certain topcoats. The Minwax pre-stain conditioner is simpler to deploy and tuned for oil-based stains; for many projects, that’s the more forgiving path.
Tips for best results
- Always test on scrap from the same stock or sheet.
- Don’t over-sand blotch-prone woods; stop at 150–180 grit.
- Flood and wipe thoroughly—err on the side of removing more.
- Stain within the active window; if you miss it, reapply a light coat of conditioner and try again.
- Manage oily rags safely.
The bottom line
As a control tool for oil-based staining, this conditioner is reliable, predictable, and easy to integrate into a shop workflow. It won’t turn pine into cherry, but it will reduce the surprises—those jarring dark bands, uneven patches, and blotchy clouds that make a finish look amateurish. The effect is subtle but significant: more even color, more professional results, and fewer do-overs.
Recommendation: I recommend the Minwax pre-stain conditioner for anyone staining softwoods or blotch-prone hardwoods with oil-based products, and for detail work like end grain management on almost any species. It adds a small step and a bit of solvent handling, but the payoff in consistency and appearance is real. If you’re all-in on water-based stains, look to the water-based counterpart. Otherwise, keep a quart of this on the shelf—you’ll use it, and your finishes will look better for it.
Project Ideas
Business
Refinishing Service for Softwood Furniture
Offer a niche refinishing service focused on softwood pieces (pine, fir, alder) that typically blotch. Use pre-stain conditioner as a standard step to deliver consistently even stain results and charge a premium for guaranteed non-blotchy finishes.
DIY Stain Kits with Conditioner
Assemble and sell small DIY kits that include pre-stain wood conditioner, a sample oil-based stain, sandpaper, applicators, and instructions. Market them to homeowners and crafters who want professional-looking results on soft woods.
Staining Workshops & Classes
Host local workshops teaching attendees how to properly prepare wood and use pre-stain conditioner, including hands-on projects like making a cutting board or sign. Charge per attendee and sell product bundles at the class for added revenue.
Contract Finishing for Small Builders
Partner with small-scale furniture makers or custom cabinet shops that use affordable hardwoods and softwoods. Offer contract finishing that includes pre-stain conditioning to guarantee uniform appearance across batches—helping builders upgrade perceived value with minimal cost increase.
Etsy Line of Stain-Perfected Home Goods
Create a product line of stained home goods (shelves, picture frames, cutting boards) made from softwoods but finished with conditioner to achieve shop-quality color uniformity. Market them as 'no-blotch' hand-finished pieces and highlight the use of professional pre-stain treatment.
Creative
Smooth Pine Dining Table
Build a farmhouse-style dining table from affordable pine boards. Use the pre-stain conditioner to eliminate blotchy patches common in pine, then apply an oil-based stain for an even, rich finish. The conditioner lets you achieve a furniture-grade look on a budget wood species.
Ombre Wood Wall Art
Create a multi-plank wall panel with graduated stain tones. Apply pre-stain conditioner to each plank so the color gradation reads smoothly rather than showing random light/dark spots. Finish with a satin topcoat for a gallery-quality piece.
Two-Tone Cabinet Doors
Refinish or build cabinet doors from maple or birch and use the conditioner to ensure consistent stain absorption before blocking off areas for a two-tone effect (e.g., stained center panels and painted frames). The result is crisp contrast without blotchy panels.
Reclaimed Pallet Coasters & Trays
Make small giftable items like coasters, serving trays, and charcuterie boards from softer reclaimed woods. Use the pre-stain conditioner to even out the old wood’s variable porosity, then stain, sand lightly, and seal for a rustic yet refined look perfect for markets or gifts.
Hand-Lettered Signs with Even Finish
Cut signs from alder or poplar, apply conditioner before staining to get an even base color, then paint hand-lettering or apply vinyl. The even stain prevents the background from distracting from fine lettering and gives clean, professional results.