Features
- Steel construction with bright finish
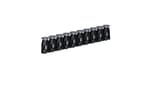
- Glued (plastic) collation in strips
- Chisel point to reduce splitting
- Intended for finish applications such as trim, casing and crown molding
- Pack quantity: 2500
- Smooth shank with round head
- Rated for interior use
- Compatible with 16‑gauge straight finish nailers
Specifications
| Fastener Type | Collated finishing/casing nail |
| Nail Length (In.) | 2.00 |
| Nail Gauge | 16 gauge |
| Collation Material | Plastic (glued strips) |
| Fastener Material | Steel |
| Nail Coating | Bright finish |
| Point Type | Chisel point |
| Nail Head Style | Round head |
| Shank Type | Smooth shank |
| Nail Angle | Straight |
| Nail Penny Size (D) | 6d |
| Loading Type | Strip |
| Package Quantity | 2500 |
| Product Weight (Lb) | 4.26 lb |
| Returnable | 90-Day |

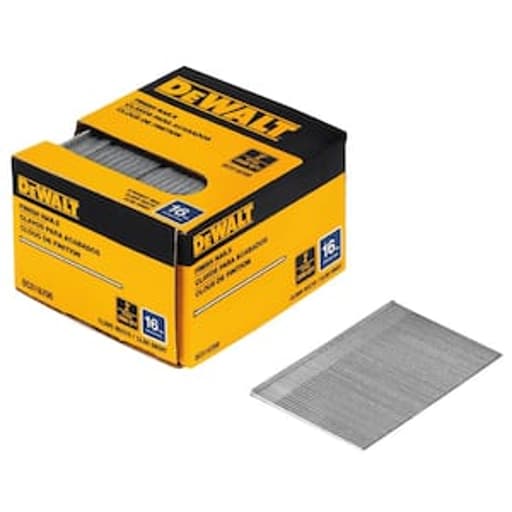
16-gauge straight finish nails for finishing applications (trim, casing, crown molding). Steel nails with a bright finish supplied in glued plastic strips for use with compatible 16‑gauge straight finish nailers. Pack of 2500 nails.
DeWalt 2 in. x 16-Gauge Bright Finish Straight Collated Finishing/Casing Nail (2500 per Box) Review
What these nails are meant to do
For interior trim, casing, and crown work, I keep a few staple consumables on hand: 16-gauge straight finish nails at 2 inches is one of them. This size reaches through typical 5/8–3/4 inch stock and still gets solid bite into framing or blocking without blowing out delicate profiles. DeWalt’s 16-gauge straight finish nails in the 2-inch length hit that spec squarely. They’re steel with a bright (uncoated) finish, chisel point, smooth shank, and come in glued plastic strips to feed a straight 16-gauge finish nailer. The box holds 2,500—enough for a multi-room trim job.
Build and compatibility
I ran these in two straight 16-gauge nailers—one pneumatic and one cordless—and they seated and fed without any special shimming or persuasion. The strips load cleanly, the heads align with the magazine rails, and the length tolerance felt consistent from strip to strip. A chisel point on finish nails is important; it encourages the nail to track straighter and helps reduce splitting in narrow casing and small returns. These have a defined chisel point that left clean entries across pine, poplar, and MDF.
As expected for bright-finish steel, there’s no corrosion protection. That’s absolutely fine for interior work but a non-starter for exterior trim or any damp location. If you need moisture resistance, grab galvanized or stainless.
In-use performance
- Depth of drive: With the cordless set to its mid setting and the pneumatic at 95–105 PSI, the nails consistently buried just sub-flush in pine and poplar, flush in oak, and sometimes shy in extremely dense hickory unless I nudged pressure or depth up. That’s normal for 16-gauge at this length.
- Split resistance: In pre-primed finger-jointed casing and small 5/8-inch stops, the chisel point helped. I purposely shot near edges and end grain; splits were rare and generally tied to poor grain or me pushing too close to the edge.
- Exit blowouts: Minimal. The shank is smooth and the points are not needle-sharp, which can help keep the nail from wandering out a side wall in thin stock.
One thing I watch closely is hole quality. These leave a small, tidy recess that takes filler well and sands clean, which is exactly what you want for paint-grade trim. In stain-grade poplar and oak, I could set them just shy and kiss them with a nail set without crushing surrounding fibers.
Collation and feeding
Plastic collation comes with pros and cons. The upside is smooth feeding and lighter dust compared with paper that sometimes mushes when humid. The downside is that plastic shards can collect in the nose over a long day, especially when you’re bump-firing. I didn’t have to stop frequently to clean, but I did brush out the nosepiece once per room to keep the driver path clear.
Strip integrity was acceptable. Most strips arrived intact and straight; a few had fractured into partial segments after riding around in my tote. They still loaded and ran, but broken sticks are more likely to misfeed if you don’t keep tension on the follower. If you take these to a jobsite, keep them boxed rather than loose in a bag—plastic-collated strips don’t appreciate being tossed around.
Across about five hundred fasteners, I logged one jam. Tracing it back, I found a single nail that was slightly skewed in the strip, enough to bind against the magazine rail. It’s not unheard of with collated finish nails. My rule: if a strip looks wavy or the heads don’t line up cleanly, toss it and move on.
Material-specific results
- Pine and poplar: Excellent. Drive is predictable, blowouts are rare, and holding power is more than adequate for casing, base, and light cabinet scribe work.
- MDF: Good. The smooth shank doesn’t bulldoze MDF fibers excessively, so edges stay clean. As always with MDF, keep fasteners at least 3/4 inch from an edge.
- Oak and maple: Good with proper air pressure and depth. I bumped pressure to 105 PSI on the pneumatic and went full depth on the cordless to set nails just below the surface.
- Hickory and other very dense hardwoods: Marginal for certain tasks. For attaching trim to hickory panels, they’re fine if you set the driver aggressive. For fastening into end grain or in any application that doubles as a structural hold, I prefer a 15-gauge nail or a dedicated cleat/staple system. If a 16-gauge nail stalls proud in extremely dense stock, resist the urge to whale on it; finish nails can snake into an S bend if you hammer them hard. Back it out and shoot again with more drive or a thicker gauge.
Holding power and surface finish
A 16-gauge smooth-shank nail is a sweet spot for trim: less visible than 15-gauge but with more bite than 18-gauge brads. In crown and casing, these held miters tight to the wall and survived a few “nudge the reveal” adjustments without loosening. Where you need extra mechanical hold—like heavy back-banded casing—I’ll add construction adhesive or step up to a 15-gauge for the main holds and use 16-gauge to pin the edges.
The heads leave a small, round fill point. On paint-grade work, a lightweight spackle hides them in one pass. On stain-grade, go conservative on depth and use a tinted filler; the holes are small enough to disappear convincingly.
Interior-only limitations
Because these are bright-finish steel, they’re strictly indoor fasteners. They’ll rust in exterior trim or even in damp basements and bathrooms if exposed to persistent humidity. Keep them to conditioned spaces, and if you’re trimming around showers or utility sinks, step up to galvanized or stainless to avoid telegraphed rust spots later.
Value and box size
A 2,500-count box makes sense for pros and serious DIYers taking on a whole-house trim package or a kitchen built-in. For a single room, it’s more than you need, but the strips store fine if you keep them in the carton, away from heat that can soften the plastic collation. Weight is reasonable for the quantity, and I appreciate that the box footprint fits neatly on a shelf without spilling strips everywhere.
Tips for best results
- Dial in depth and pressure on scrap of the same material before committing to work pieces.
- Keep the magazine clean; a quick brush-out reduces plastic shard accumulation.
- Store the strips in the box; plastic-collated sticks don’t like impact or high heat.
- For dense hardwoods or any fastening that carries load, consider a 15-gauge nailer for the primary holds.
- If a strip looks misaligned or wavy, discard it rather than risk a jam.
Where they fit in my kit
These DeWalt 16-gauge straight finish nails have become my “default” for interior trim and cabinet face-frame attachments where a straight 16-gauge nailer is the tool on hand. They’re predictable in common trim woods, play nicely with both pneumatic and cordless straight nailers, and leave clean, easy-to-fill holes. They’re not a universal solution—no bright-finish 16-gauge nail is—but within their lane, they perform as they should.
Recommendation
I recommend these for interior trim, casing, crown, and general finish carpentry with a straight 16-gauge nailer. They drive consistently in typical trim materials, the chisel point helps keep splits at bay, and the hole profile is easy to hide. If you routinely work in very dense hardwoods or need exterior durability, look elsewhere—step up to a 15-gauge for hardwood holding power and use galvanized or stainless for moisture. For the intended use, though, these are a reliable, job-ready consumable that earns a spot on the shelf.
Project Ideas
Business
Trim Package Installations
Offer per‑foot installation of baseboards, door/window casing, and crown molding using 2 in. 16‑ga finish nails. Include caulking and hole filling as a standard finish, with tiered packages (good/better/best profiles).
Door Casing Refresh Service
Specialize in fast upgrades of dated door casings to modern Craftsman or colonial profiles. Market fixed per‑door pricing, bundle with paint touch‑ups, and complete most homes in a day.
Real Estate Make‑Ready Finishing
Provide pre‑listing polish: reattach loose trim, add shoe molding/quarter round, repair split casings, and tighten visual lines. Quick turnaround using finish nails, filler, and caulk to elevate listing photos.
On‑Demand Picture Framing Pop‑Up
Set up at markets or partner with photographers to build custom frames on site. Cut molding, assemble with glue and 16‑ga nails, and offer standard sizes with same‑day pickup.
Feature Wall Specialist
Design and install slat walls, board‑and‑batten, and wainscoting packages. Use finish nails for clean attachment, provide mood boards and 3D mockups, and price per wall with upsells for paint and LED accents.
Creative
Board-and-Batten Accent Wall
Create a classic accent wall by attaching vertical 1x3 or 1x4 MDF/pine battens to drywall with construction adhesive and 2 in. 16‑ga finish nails driven into studs. Add a top cap, fill nail holes, caulk seams, and paint for a polished, custom look.
Custom Picture Frames Set
Cut decorative casing at 45° to build frames in multiple sizes. Glue and pin corners with 2 in. 16‑ga nails, then add a thin backing panel and hangers. Stain or paint for a cohesive gallery wall.
Crown Molding with LED Cove
Install crown molding and a simple upper cleat to form a hidden channel for LED strip lights. Secure molding to studs/ceiling joists with 2 in. 16‑ga nails, then caulk and paint for a soft, indirect glow.
Modern Slatted Feature Wall/Headboard
Attach evenly spaced 1x2 or 1x3 slats over level furring strips using 2 in. 16‑ga nails. Stain in warm tones or paint black for a bold, modern texture behind a bed or media console.
Craftsman-Style Casing Upgrade
Replace plain door/window trim with a Craftsman stack-up (flat side casings, head cap, and stool/apron at windows). Tack components with adhesive and 2 in. 16‑ga nails, fill and paint for a high-impact update.