Features
- 100% Waterproof and Weatherproof: 100% silicone formula offers protection against water damage, providing a reliable seal in areas prone to harsh weather
- Durable: Rain-ready in as little as 30 minutes, and resistant to shrinking and cracking due to temperature fluctuations
- Compatible with Most Materials: Adheres to most metals and woods; aluminum, composites, brick, stone, stucco, masonry, cement board, glass, drywall, ceramic and porcelain tile; and more
Specifications
| Color | Clear |
| Size | Pack of 1 |
| Unit Count | 1 |
Related Tools

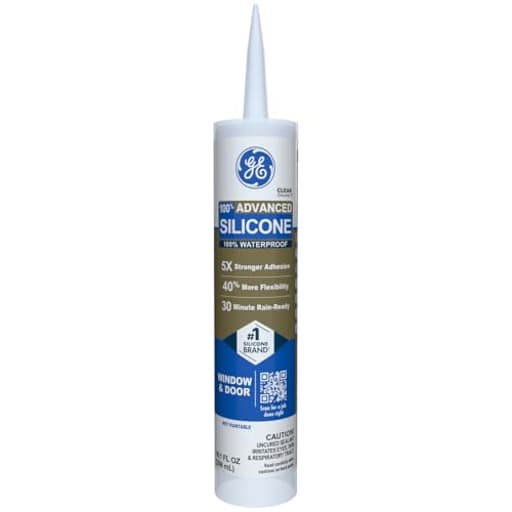
This clear 100% silicone caulk is a waterproof sealant for sealing windows, doors, and other joints to prevent water and weather intrusion. It becomes rain-ready in about 30 minutes, resists shrinking and cracking from temperature changes, and adheres to common materials such as metal, wood, glass, masonry, tile, and drywall.
GE Advanced Silicone Caulk for Window & Door, Clear, 10 fl oz Cartridge, 1 Pack - 100% Waterproof Silicone Sealant, 5X Stronger Adhesion, Shrink & Crack Proof Review
What I used it for
I put the GE Advanced Silicone Caulk to work on two jobs: re-sealing drafty exterior window trim (aluminum frame to painted wood) and closing up a small gap at a door threshold where wind-driven rain had been sneaking in. Both are tough asks—movement, UV exposure, and frequent wet/dry cycles tend to make lesser sealants fail quickly. I chose the clear version to blend into mixed materials without calling attention to the joint.
Cartridge and setup
The 10 oz cartridge drops into a standard caulk gun without drama. The nozzle has clear cut lines, and the inner seal punctures cleanly. That may sound trivial, but a ragged tip or half-punctured foil can turn a bead into a lumpy mess. I cut a small 1/8-inch opening for most of my runs, then widened it slightly for a wider gap at the threshold. Flow is predictable and not overly stiff; I didn’t have to muscle the trigger to keep a steady line.
One note on clear silicone: it often looks milky as it goes on and clears as it cures. That was true here. If you’re expecting glass-like clarity right out of the nozzle, give it time.
Application and tooling
Silicone isn’t as forgiving to tool as acrylic or hybrid caulks, but this one strikes a good balance. I had about 5–7 minutes of comfortable working time at 72°F before it started to skin. That’s enough to run a few feet, tool the bead, and pull tape. On hotter days, plan for shorter windows.
I prepped by scraping out old, failed caulk, vacuuming, and wiping with isopropyl alcohol on non-porous areas and a damp cloth on painted wood. Dust is the enemy; silicone will not bond through it. I ran a backer rod where gaps exceeded about 1/4 inch to keep the bead the right shape and avoid wasting material.
Tooling was easiest with a caulk tool lubricated with a light mist of soapy water. A wet, gloved finger works too, but this particular silicone strings a bit if you move too fast. Masking tape on both sides of the joint gave me crisp lines; I pulled tape immediately after tooling, and the edges stayed clean.
Cleanup while wet requires mineral spirits or a commercial caulk remover—water doesn’t touch 100% silicone. Once cured, mechanical removal is the only option. If you’re used to water-based sealants, budget a little extra time and keep a solvent rag handy.
Adhesion and compatibility
Adhesion is the standout. On glass, aluminum, vinyl, and painted wood (fully cured paint), it bit hard with just basic cleaning. On a short test patch of masonry, it also grabbed well once I brushed away dust and let surface moisture flash off. I wouldn’t try to stick it to polyethylene, polypropylene, or anything oily—few sealants bond to those plastics—but for the typical window and door materials, it’s a confident performer.
The bead stays where you put it. Over the first few hours, I saw no slumping, even on vertical joints. It also didn’t shrink back as it cured, which kept the fillet profile intact.
A quick caution: 100% silicone is not paintable. If the joint will be topcoated, choose a paintable hybrid or acrylic. For clear, bare joints you intend to leave as-is, this is the right chemistry.
Weatherproofing and cure
The promise here is “rain-ready” in around 30 minutes. I timed my first application and hit it with a garden hose after 45 minutes. The surface had skinned, shed water, and didn’t wash out. That doesn’t mean fully cured; full cure took roughly 24 hours for my 1/8-inch bead and longer on the thicker threshold joint. If you’re sealing ahead of a forecast, give it at least that half-hour buffer and avoid touching it until the next day.
Once cured, the bead is firm yet resilient. Over a few weeks of late-summer heat and a couple of cooler nights, I saw no cracking or edge pull. I came back after a month of sun and a handful of storms and found the joints still tight and the clear bead…still clear. Clear silicones can pick up a slight haze over very rough surfaces or dusty work, which is another argument for meticulous prep, but the finish here remained transparent enough to disappear against glass and metal.
Durability under movement
Window and door joints move—a lot. You get seasonal expansion/contraction and day-to-night cycling. Silicones excel at handling that without breaking seal, and this formula lived up to expectation. The narrow trim joint I sealed moves subtly when the sun hits one side of the window. The caulk flexed with it without whitening or cracking. I can’t compress a year of seasons into a weekend, but the early signs—elasticity, no signs of adhesion loss, and no surface checking—are what I want to see.
Appearance
Clear was the right choice for mixed-material joints. On glass and aluminum, it nearly disappears after cure. On painted wood, you still see a gloss line at certain angles. If you want a fully invisible look on wood, choose a color-matched sealant instead. The finish is smooth if tooled carefully; if you overwork it, you’ll trap tiny bubbles that remain visible until cure. Masking helps.
Odor and indoor use
There’s a noticeable silicone odor during cure—typical for this chemistry—but it wasn’t overpowering outdoors. Indoors, crack a window or run a fan. The smell dissipated by the next day for me.
Quantity and value
One cartridge covered an exterior door perimeter with some left over for the threshold gap and a window mullion. Coverage will vary with bead size, but 10 oz goes farther than you think if you size the bead properly and use backer rod on deeper gaps. Given the performance and the fact that a failed seal costs more in time and frustration, the cost feels very reasonable for a true 100% silicone.
Limitations and quirks
- Not paintable. If that’s a requirement, this isn’t the product.
- Messier to handle than acrylics. Plan for solvent cleanup and careful masking.
- Clear looks cloudy out of the tube and clarifies as it cures—don’t judge the final appearance too early.
- Won’t bond to certain plastics or through dust/grease. Surface prep matters.
None of these are flaws so much as realities of working with silicone. If you account for them, the end result is excellent.
Tips for best results
- Prep thoroughly: remove old caulk, clean, and dry the joint. A final wipe with alcohol helps on non-porous surfaces.
- Use backer rod for gaps deeper than 1/4 inch to control bead shape and avoid three-sided adhesion.
- Mask both sides of the joint for crisp edges; pull tape immediately after tooling.
- Cut the nozzle small and enlarge as needed. It’s easier to make a bead bigger than smaller.
- Tool with a dedicated caulk tool lightly misted with soapy water for a smooth finish.
- Respect the clock: allow at least 30 minutes before exposure to rain and 24 hours for full cure.
Where it fits in the lineup
For exterior windows, doors, glass-to-frame joints, and other non-paintable, weather-exposed seals, this GE Advanced Silicone Caulk makes a strong case as a go-to. If you’re sealing interior trim you plan to paint, or you want a sandable, paintable joint, stick with a high-quality paintable hybrid. For pure waterproofing and movement accommodation outdoors, silicone remains the benchmark.
Recommendation
I recommend the GE Advanced Silicone Caulk for anyone tackling exterior window and door sealing where paintability isn’t required. It lays a consistent bead, tools cleanly with reasonable working time, bonds tenaciously to common fenestration materials, and shrugs off early rain exposure once skinned. After cure, it stays elastic and resists the shrinking and cracking that make lesser sealants fail. If you need a robust, clear, long-lasting weather seal and you’re comfortable with solvent cleanup, this is a dependable, good-value choice. If you must paint over the joint, choose a different chemistry; otherwise, this one does exactly what a window and door silicone should.
Project Ideas
Business
Seasonal Window & Door Sealing Service
Offer a mobile service focused on energy-efficiency and weatherproofing: inspect homes for failing seals, remove old caulk, and reinstall 100% silicone seals around windows and doors. Package services (spring checkup, pre-winter reseal) with guarantees on workmanship. Upsell: draft proofing, minor frame repairs, and a maintenance subscription.
Custom Waterproof Outdoor Decor Line
Design and sell a small product line of weatherproof patio items—sealed planters, sun-catchers, lanterns, and decorative panels—made using clear silicone caulk techniques. Market to homeowners, garden stores, and short‑term rental hosts who want durable, low-maintenance decor. Offer personalization (initials, colors) and bundled sets for gifting.
DIY Caulk Craft Kits & Workshops
Package beginner-friendly kits (sun-catcher kit, mold kit, waterproof planter kit) that include a cartridge of clear caulk, disposable tools, pigments, and instructions. Host local hands-on workshops or online classes teaching caulk-based crafts—charge per seat and sell follow-up supply bundles. This leverages materials people already need and builds a community around repeat purchases.
Small‑Batch Mold & Prototype Service
Provide a rapid prototyping service for local artisans and product designers who need inexpensive, flexible molds for limited runs. Use clear silicone caulk for quick one‑off or small-series molds, offer finishing services (trim, seal, release coating), and present an option to upgrade to professional platinum-cure silicone for higher fidelity. Target soap/candle makers, resin artists, and Etsy sellers.
Creative
Sealed Sun-Catchers
Use clear silicone caulk as a translucent, textured medium to make window art. Spread a thin layer of caulk on a non-stick surface (plastic sheet or silicone mat), tint with mica powder or alcohol inks, press a lightweight clear acrylic or glass sheet into the caulk, then peel when cured to create a flexible sun-catcher. Embed small items (dried flowers, tiny shells) for depth. Tips: use a release agent or parchment, work in a ventilated area, and allow full cure (24–48 hrs) before hanging.
Waterproof Planter Liners
Turn porous or vintage pots into waterproof planters by coating the interior with clear silicone caulk. Apply beads along seams and thinly spread over the inside surface with a disposable spatula or a caulk-smoothing tool to create a water-resistant membrane. Great for wood, terracotta, or decorative containers where you want to avoid plastic liners. Let cure fully and add a drainage layer before potting.
One‑Off Silicone Molds
Make simple low-cost molds for resin, plaster, or soap by building a dam around a small object and brushing or piping clear silicone caulk to form a flexible mold. Cured caulk can release many castings for hobby use. Ideal for makers wanting quick prototypes or unique mold shapes without buying professional silicone. Note: surface finish and detail may be less sharp than commercial mold silicone; use a mold release for sticky resins.
Weatherproof Lanterns & Outdoor Fixtures
Create durable outdoor lanterns and waterproof luminaries by sealing jars, seams, and wiring holes with clear silicone caulk. You can also sculpt decorative 'frosted' or 'frozen' textures on glass by stippling cured caulk and embedding tiny glass chips or glitter for sparkle. These make great patio accents that stand up to rain and temperature swings.