Maintaining tool accuracy is key to achieving high-quality results in any project. Accurate tools ensure precise measurements, save time, reduce waste, and prevent costly errors. This guide covers everything you need to know about keeping your tools in top condition, including:
- What tool accuracy means: Accuracy is how close a tool's measurement is to the true value, while precision refers to consistent results.
- Why it matters: Accurate tools improve quality, save resources, and ensure safety in professional and DIY projects.
- Basic maintenance steps:
- Calibration: Regularly adjust tools to match known standards.
- Cleaning: Use proper materials to remove dust, debris, and moisture.
- Lubrication: Apply small amounts of oil to moving parts to prevent wear.
- Storage: Keep tools in stable environments and protective cases.
- Inspection and troubleshooting: Check for damage, inconsistent readings, or calibration drift, and decide whether to recalibrate, repair, or replace.
- Using digital solutions: Platforms like Toolstash simplify maintenance tracking and scheduling.
CALIBRATE YOUR TORQUE WRENCH IN UNDER 5 MINUTES (NO SPECIAL TOOLS REQUIRED!)
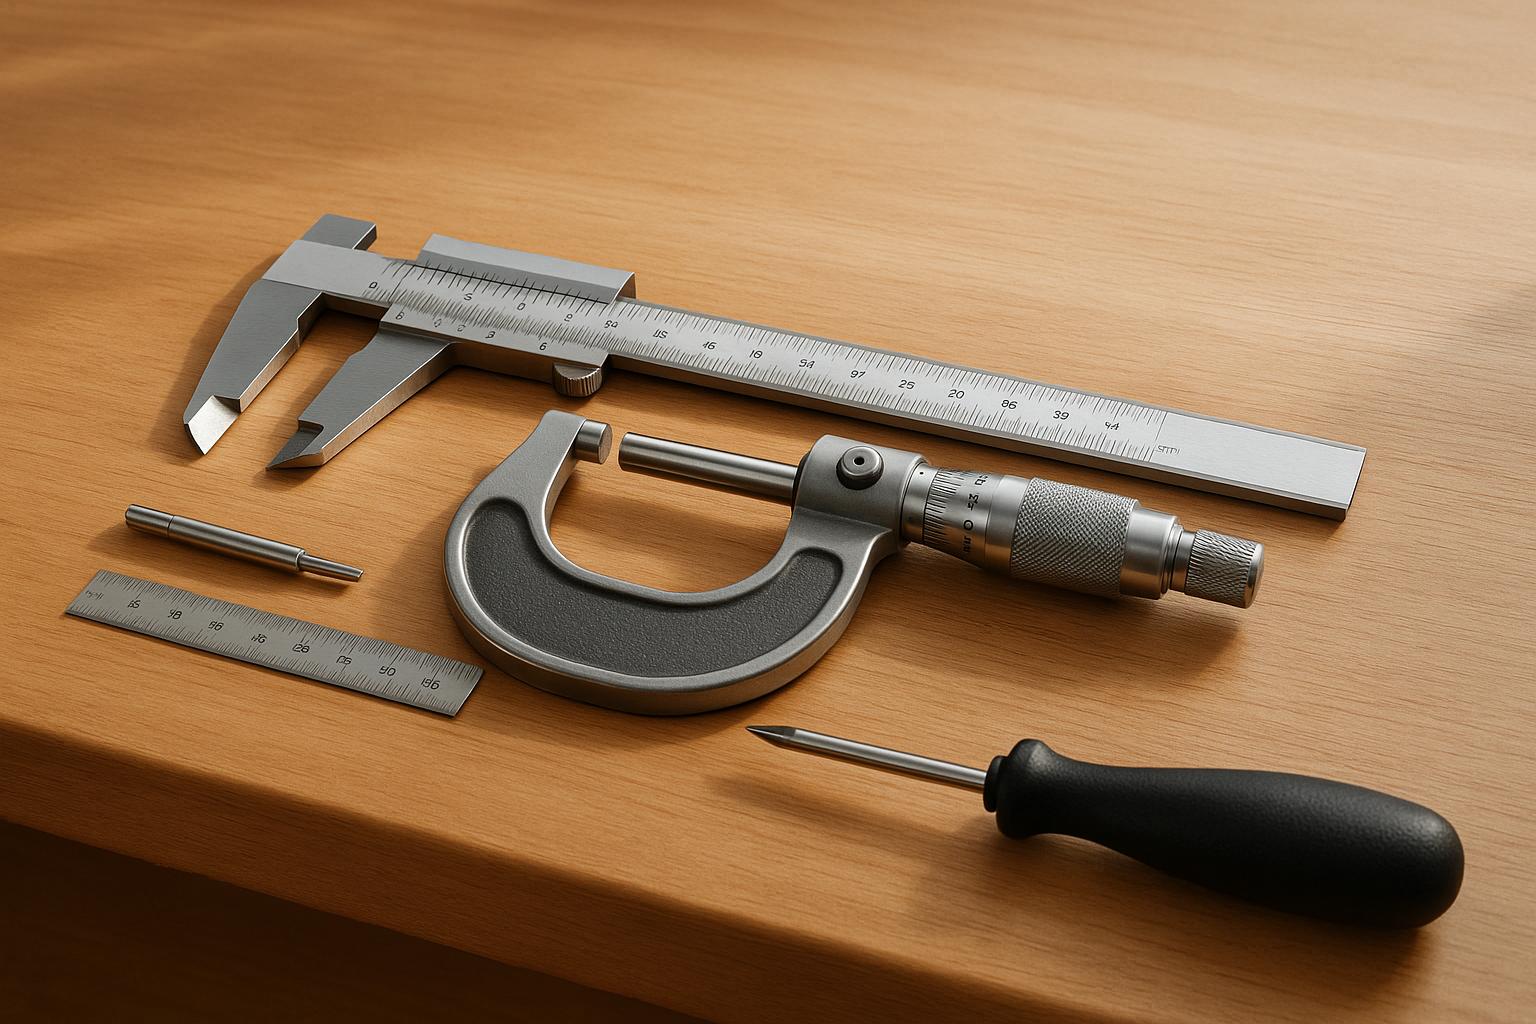
Basic Principles of Tool Accuracy Maintenance
Keeping your tools accurate boils down to consistent care and attention. Whether you're working with a simple tape measure or a high-tech digital micrometer, these straightforward practices ensure your tools perform as they should.
Calibration: The Key to Accuracy
Calibration is all about comparing a tool's measurements to a known standard and making adjustments to keep it accurate. Think of it like tuning a musical instrument - it needs to be done regularly to maintain precision.
For digital tools, many come with built-in calibration features. For instance, digital calipers often have a zero-reset button. Before starting a measurement session, close the jaws, press the zero button, and you're good to go. Digital levels typically include a calibration mode that lets you reset their sensors by placing them on a flat surface.
Analog tools require a bit more effort. Take a bubble level, for example: place it on a surface, note the bubble's position, then flip it 180 degrees. If the bubble shifts, the level might need adjustment or replacement. Similarly, steel rulers and tape measures should be checked against certified reference tools, which many hardware stores provide for comparison.
How often should you calibrate? It depends on how frequently you use the tool. Tools used daily might need weekly checks, while those used less often could be checked monthly. Environmental factors like temperature swings, humidity, and vibrations can also affect calibration over time, so keep an eye on those as well.
Next up: cleaning and handling - two simple ways to keep your tools in top shape.
Maintenance Basics: Cleaning and Handling
Clean tools work better, plain and simple. Dust, debris, and moisture can mess with moving parts and measurement surfaces, especially in precision tools like calipers and micrometers. Even tiny particles can throw off your readings.
Use lint-free cloths and appropriate solvents to clean your tools. Avoid harsh chemicals that might damage protective coatings or plastic parts. For tools with electronic displays, a slightly damp cloth works well - just don’t spray liquids directly onto the device.
Lubrication is another often-overlooked step. A small drop of oil on pivot points, sliding mechanisms, or threads can keep things running smoothly and prevent binding. Precision instruments don’t need much - just enough to keep the parts moving freely.
Handling matters, too. Don’t drop your tools or use them for things they weren’t designed for, like prying. Store them in protective cases or padded storage when not in use. Be cautious about temperature changes - moving tools quickly between hot and cold environments can affect their performance, especially digital ones. A stable, climate-controlled storage space can make a big difference in extending their life and maintaining accuracy.
Regular Inspections
Regular inspections are just as important as cleaning and calibration. Before using a tool, give it a quick visual check. Look for bent parts, cracks, or worn measurement scales. Make sure moving parts operate smoothly without sticking or feeling loose.
Functional tests are a great complement to visual inspections. Use a known reference standard, like a 1-inch gauge block, to quickly verify accuracy. If your calipers don’t register exactly 1.000 inches or your tape measure gives inconsistent readings, that’s a sign the tool may need recalibration or replacement.
Inspections also help you spot gradual wear over time. Keeping records of your findings is a smart move. If you notice a tool drifting out of calibration or showing signs of wear, you’ll know when it’s time to recalibrate or replace it. Digital platforms like Toolstash (https://toolstash.com) can simplify this process by tracking calibration dates and sending reminders, so no tool slips through the cracks.
Step-by-Step Guide to Tool Accuracy Maintenance
Maintaining the precision of your tools isn't just about keeping them clean - it's about establishing a consistent routine that ensures they perform as expected for years to come. Whether you're working with a simple measuring tape or a high-tech digital instrument, these steps lay the groundwork for dependable accuracy.
How to Clean Tools Properly
Before diving into cleaning, gather the right supplies: lint-free cloths, 70% isopropyl alcohol, cotton swabs, and a soft-bristled brush. Avoid using paper towels or abrasive materials that could damage delicate surfaces.
When it comes to digital tools, always turn them off first. Lightly dampen a lint-free cloth with isopropyl alcohol and carefully wipe the exterior, steering clear of displays and electronic components. For tight spots, cotton swabs can help remove debris. Never immerse digital tools in liquid or spray cleaners directly onto them.
Analog tools, on the other hand, can withstand a bit more elbow grease. Use a soft brush to remove loose particles, then clean with an alcohol-dampened cloth. Pay special attention to measuring surfaces like those on calipers or micrometers - scratches, even tiny ones, can throw off accuracy.
Optical instruments, such as levels with bubble vials, require a delicate touch. Clean glass surfaces with alcohol and a lint-free cloth, using circular motions to avoid streaks. Make sure the bubble vials are clear and free from condensation, as foggy vials can make readings difficult.
Once cleaned, allow tools to air dry completely before storing them. Trapped moisture can lead to rust, so this step is crucial. After cleaning, move on to lubrication to keep your tools running smoothly.
Lubrication Best Practices
Proper lubrication is all about balance - too much attracts dirt, while too little leaves parts vulnerable to wear.
Choose the right lubricant for the job. Light machine oil works well for most mechanical tools, while synthetic lubricants are better suited for extreme temperatures. Avoid heavy greases, as they can interfere with precise movements.
Apply a small amount of lubricant to pivot points, sliding mechanisms, and threaded components. A precision oiler or even a toothpick can help you control the application. Wipe off any excess immediately with a clean cloth to prevent buildup.
Pay special attention to high-wear areas like the rack and pinion in calipers, spindle threads in micrometers, or adjustment screws in levels. These parts endure the most movement and benefit greatly from regular lubrication.
Once lubricated, test the tool to ensure smooth operation. If it feels sluggish, you may have overdone it - clean off the excess and reapply sparingly. With lubrication complete, it's time to recalibrate your tools.
How to Calibrate Tools Effectively
The frequency of calibration depends on how often you use your tools and the level of precision required. Daily-use tools may need weekly checks, while those used occasionally can be calibrated monthly or before critical projects.
For digital tools like calipers and micrometers, start by closing the measuring faces and pressing the zero button to confirm the display reads 0.000 inches. For span calibration, use certified gauge blocks. For example, a 1.000-inch block should read exactly 1.000 inches. If it doesn't, consult the tool's manual for adjustment steps.
Analog tools require comparison against known standards. For instance, check a tape measure against a certified steel rule at multiple points, such as 6, 12, and 24 inches. If the deviation exceeds 1/32 inch, it may be time to replace the tape.
Levels require a simple two-step process. Place the level on a flat surface and observe the bubble position. Then, rotate the level 180 degrees. If the bubble doesn't return to the same position, the level may need professional adjustment or replacement.
For torque wrenches, professional calibration is essential - ideally once a year or every 5,000 cycles, whichever comes first.
Safe Handling and Storage
Proper storage plays a huge role in maintaining tool accuracy. Temperature changes, humidity, and vibrations are the main culprits when it comes to wear and tear.
Create a stable environment for your tools. The ideal conditions are between 65-75°F with 45-55% relative humidity. Avoid storing tools in places like garages or basements where conditions fluctuate dramatically.
Use protective cases whenever possible. Manufacturer cases are designed to shield tools from damage, but foam-lined toolboxes are a good alternative. Custom foam inserts can also keep tools secure during transport.
Separate tools by type to avoid accidental damage. For example, don't store precision instruments alongside heavy hand tools that could cause dents or scratches. Cutting tools should always be stored with blade guards to protect their edges.
Handle tools with clean, dry hands, and avoid touching measurement surfaces unnecessarily. Skin oils can lead to corrosion, especially on steel components. If you're moving tools between environments with different temperatures, give them 15-20 minutes to acclimate to prevent condensation.
Using a Maintenance Log
After cleaning, lubricating, and calibrating, the final step is to document everything in a maintenance log. This helps you track performance, identify patterns, and stay on top of future maintenance tasks.
Record key details for each tool, such as its serial number, purchase date, and calibration history. Include notes about any repairs or adjustments, as well as environmental conditions like high humidity or dust exposure, which can impact tool performance.
Track calibration results over time. If a tool consistently drifts in one direction, it could signal wear or damage that needs attention.
Set reminders for routine maintenance. Spreadsheets with color-coded alerts are a popular choice, but digital platforms like Toolstash (https://toolstash.com) can automate this process by sending email notifications and maintaining a full history of your tools.
Finally, document any unusual behavior or accuracy issues. This information can guide decisions about repairs or replacements and adds value for warranty claims or resale. A well-kept log not only ensures your tools are reliable but can also enhance their long-term value.
Using Digital Solutions for Tool Management
Once you’ve established a maintenance routine, the next step is to simplify the process with digital tools. These platforms bring all your maintenance data into one place, doing away with the hassle of spreadsheets and paper logs. This shift to digital tools makes tracking and managing maintenance tasks far easier and more efficient.
How Tool Management Platforms Help
Tool management platforms tackle some of the biggest headaches in keeping tools accurate and well-maintained. They consolidate maintenance schedules, calibration dates, and important documentation into a single, easy-to-access system.
With AI-powered inventory tracking, adding new tools to your system is a breeze. Just snap a photo, and the platform identifies the tool, fills in its details, and updates your inventory - no more time wasted on manual data entry.
Smart categorization takes organization to the next level, grouping tools by type or how frequently they’re used. Need to round up all your measuring tools for calibration? Done. Looking for items that need lubrication? No problem.
Location tracking ensures you always know where your tools are, which is especially helpful when managing multiple sites. Assigning specific storage locations helps keep sensitive instruments in the right environments to maintain their condition.
For tools that are shared, lending and borrowing features track who has what and when it’s due back. For instance, if a colleague borrows a calibrated torque wrench, the system logs the transaction, reducing the risk of loss or unexpected replacement costs.
Cloud-based storage adds another layer of convenience by safeguarding maintenance records and warranty information. Even if your device gets lost or damaged, your data remains secure and accessible from anywhere.
Benefits of Digital Maintenance Tracking
Digital tracking doesn’t just streamline tool management - it also boosts efficiency. Updates and record retrieval take mere seconds. Platforms like Toolstash simplify the process even further with automated reminders for maintenance and calibration. Everything is centralized, so you can stay on top of schedules and keep your tools in top shape when you need them the most.
Troubleshooting Common Tool Accuracy Problems
Even with regular cleaning and calibration, tools can sometimes lose their precision. Troubleshooting these issues is key to maintaining quality, saving time, and avoiding unnecessary expenses. Over time, even well-maintained tools may experience wear or calibration drift, making early detection essential.
How to Spot Accuracy Problems
Look out for inconsistent measurements. For example, if a digital caliper gives varying readings for the same object or a torque wrench produces different results on identical fasteners, it’s a sign the tool’s accuracy might be off.
Check for physical damage. Bent measuring surfaces, cracked digital displays, or loose components can all affect precision. Tools that have been dropped are especially prone to damage, which can compromise their function.
Environmental factors can also play a role. Rust or corrosion on metal parts weakens performance, while moisture can disrupt digital displays and lead to erratic readings. Extreme temperatures may warp components or interfere with sensitive electronics. Additionally, weak batteries or corroded contacts in digital tools can cause issues.
Calibration drift can happen gradually, even if the tool looks fine. Regular recalibration is crucial to catch these subtle shifts in accuracy. A tool might seem aligned but fail to meet required tolerances.
Lastly, listen to user feedback. If coworkers notice measurements are off or components aren’t fitting as expected, it could indicate a problem with the tool’s accuracy.
Once you identify the issue, decide whether recalibration, repair, or replacement is the best course of action.
Repair, Recalibrate, or Replace?
When deciding how to address a tool’s accuracy problems, consider the cost, condition of the tool, and how critical its performance is to your work.
Recalibration is often the first step for tools that are structurally sound but delivering inaccurate readings. Digital instruments may need their internal settings adjusted, while mechanical tools like torque wrenches or pressure gauges can often be recalibrated by professionals. This is typically more cost-effective than replacing the tool.
Repair is a good option for tools with minor physical damage but intact measuring capabilities. For example, a precision tool with a loose component or a slightly bent part might be restored through repair. However, structural damage should be carefully assessed, as it can impact long-term reliability.
Replacement becomes necessary if repair or recalibration costs are close to the price of a new tool, or if the tool can no longer perform its function reliably. Tools with severely damaged housings, corroded mechanisms, or compromised electronics should be replaced to ensure safety and accuracy. Additionally, older digital tools that rely on outdated components may not be worth recalibrating.
Downtime is another factor to consider. If a repair will take too long, immediate replacement might be the better choice. Sometimes, a hybrid approach works best - routine checks and maintenance for less critical tools can be handled in-house, while precision instruments are sent to certified labs for professional calibration.
Keeping digital maintenance logs can help track recurring issues and simplify decisions about repairing or replacing tools.
Comparison Table: DIY vs. Professional Calibration
Here’s a quick comparison to help decide between DIY and professional calibration:
| Factor | DIY Calibration | Professional Calibration |
|---|---|---|
| Cost | Lower upfront costs but requires investment in quality tools | Higher service fees but includes certified calibration |
| Accuracy | Depends on your equipment and technique | Offers higher precision with traceable standards |
| Time | Faster for individual tools | Requires scheduling and longer turnaround times |
| Documentation | Basic records kept by the user | Detailed, certified reports provided |
| Equipment Needs | Requires calibration tools | No additional equipment needed |
| Skill Level | Requires moderate expertise and practice | Handled entirely by trained technicians |
| Liability | User is responsible for calibration quality | Service provider guarantees accuracy |
| Compliance | May not fully meet industry standards without extra validation | Meets recognized standards like ISO or ANSI |
The choice between DIY and professional calibration depends on your tools and how critical their accuracy is. In many cases, combining both methods strikes the ideal balance between cost and precision.
Summary and Best Practices
Key Takeaways
Maintaining tool accuracy is essential for protecting your investment and ensuring consistent, high-quality results. When tools deviate from their specifications, it can lead to poor project outcomes, increased safety risks, and unnecessary costs from rework and wasted materials.
Stick to a regular calibration schedule to avoid accuracy issues. Tools like digital calipers, torque wrenches, and pressure gauges need periodic adjustments to stay precise.
Simple habits like proper cleaning and storage can significantly extend the life of your tools. Exposure to moisture, dust, or extreme temperatures can damage sensitive parts and affect measurements. Wiping tools after use and storing them in stable environments can make a big difference in their long-term performance.
Address issues early and keep a detailed calibration history to prevent costly delays. Look out for inconsistent readings, physical wear, or environmental damage. These are red flags that may require immediate action. Deciding whether to repair, recalibrate, or replace a tool depends on its importance to your work and the cost involved.
These practices form the foundation of a strong maintenance system.
Creating a Regular Maintenance System
Building a consistent maintenance routine starts with categorizing your tools by their precision needs and usage frequency. Tools critical to precise measurements will need more frequent attention compared to general-purpose equipment.
Schedule inspections based on manufacturer guidelines and adapt them to your working conditions. The frequency should match how often the tools are used and the environment they’re exposed to. Mark these dates on your calendar and treat them as essential appointments.
Standardize cleaning, calibration, and storage procedures to ensure consistent care, regardless of who handles the tools. Document these steps and make them accessible to your entire team.
Using digital platforms can simplify this process. For example, Toolstash offers features like inventory tracking and maintenance scheduling, helping you stay organized without relying on manual records. Its AI features can guide you through proper upkeep and flag when professional calibration might be needed.
Assign specific team members to monitor tool conditions and maintain records. This accountability ensures that no steps are missed and fosters a culture of care within your organization.
Plan for maintenance costs as part of your overall tool budget. Routine calibration and occasional repairs are far more cost-effective than replacing tools or dealing with project failures caused by inaccuracies.
The best maintenance systems become a natural part of daily workflows rather than an afterthought. Digital scheduling tools can help integrate these practices seamlessly. When tool care becomes second nature, it transforms from a chore into a competitive edge, ensuring professional and consistent results every time.
FAQs
How often should I calibrate my tools to maintain their accuracy?
To maintain the accuracy of your tools, it's a good idea to calibrate them at least once a year. If you rely on them heavily or use them for precise, critical measurements, you might want to calibrate them more often - perhaps every six months or even monthly, depending on how much wear and tear they endure and the level of accuracy you need.
Routine calibration not only ensures consistent performance but also helps reduce errors and prolongs the life of your tools. Be sure to check the manufacturer's recommendations and factor in how you use your tools when setting up a calibration schedule.
How can I store my tools to maintain their accuracy?
Proper storage plays a key role in maintaining the accuracy and longevity of your tools. Always keep them in a clean, dry, and temperature-controlled space to avoid problems like rust, moisture damage, or warping. Exposure to extreme temperatures or high humidity can affect their precision, so it's best to steer clear of such conditions.
Consider using protective cases, humidity-controlled cabinets, or well-ventilated storage areas to shield your measurement and precision tools. Organize them neatly, label them clearly, and store them separately to prevent damage or losing track of them. A stable, dust-free environment ensures your tools are always ready to deliver accurate results.
How can a platform like Toolstash improve my tool maintenance process?
A platform like Toolstash takes the hassle out of tool maintenance by providing real-time updates on tool health. This allows you to anticipate problems before they arise, reducing downtime and keeping operations running smoothly. It also handles key tasks like tracking calibration schedules, managing tool lifecycles, and ensuring tools are stored correctly - critical steps for maintaining precision and meeting compliance standards.
With features like inventory tracking, smart categorization, and location monitoring, Toolstash helps you stay organized and keeps your workflows efficient. The result? Improved productivity, safer operations, and smoother day-to-day processes.