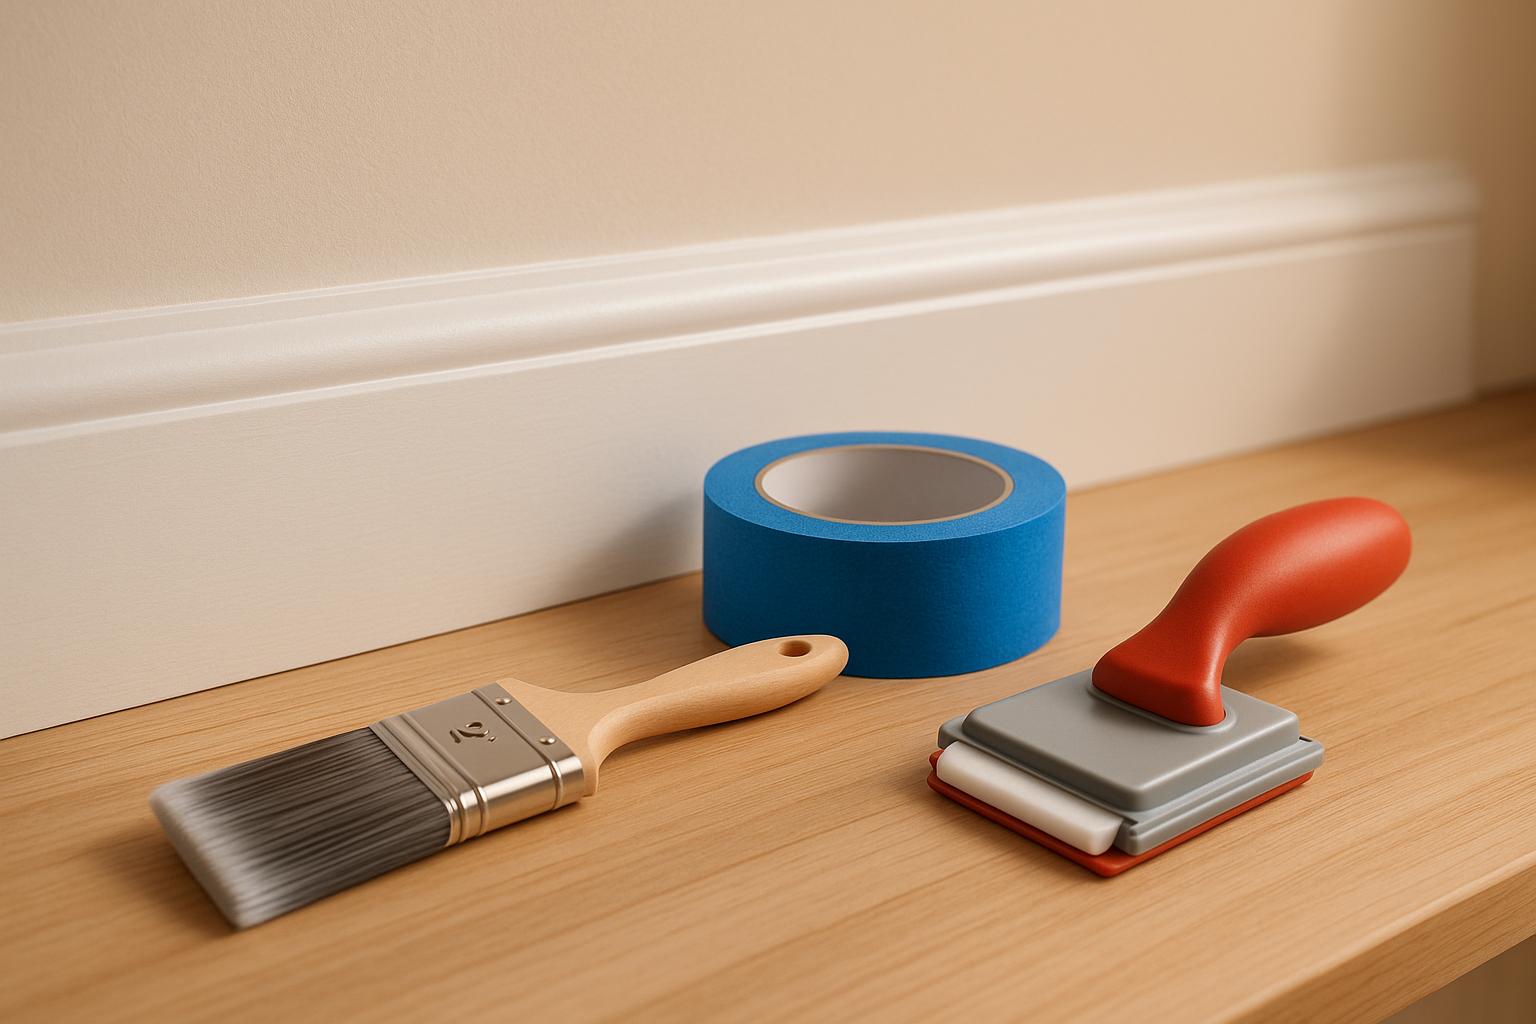
When painting trim, precision is critical, and edging tools can save you time and ensure clean, straight lines. This guide reviews eight top-rated edging tools, each suited for different needs:
- Accubrush MX Jumbo Kit: Combines a roller and edge guide for faster edging on smooth surfaces. Best for baseboards and crown molding.
- Shur-Line Edger Pro Kit: A pad edger with guide wheels for consistent lines. Great for flat trim but less effective on textured surfaces.
- Wagner SMART Edge Roller: Includes a built-in paint reservoir for efficient edging. Ideal for smooth trim but not suited for intricate details.
- Luigi's Mini Foam Roller Set: Compact foam rollers for detailed trim and corners. Works well on smooth surfaces but limited in coverage.
- Mr. LongArm Trim Smart Edger: Features a dual-wheel system for precise edging. Best for standard trim but struggles with textured surfaces.
- Richard Goose Neck Angular Brush: Angled bristles and a flexible handle for detailed work. Excellent for corners and decorative molding.
- Emery Edger Trim Tool: A pad-based tool with an edge guide for clean lines. Works well on flat trim but needs touch-ups on textured areas.
- Cut-N-Edge Pro Tool: Adjustable bristle system for controlled paint application. Effective on various trim profiles but requires practice.
Each tool has strengths depending on trim type, surface texture, and user skill. Below is a quick comparison to help you choose the right one.
7 Best Paint Edger Tools for Perfect Edges Every Time
Quick Comparison
| Tool Name | Type | Best For | Price (USD) | Strengths | Weaknesses |
|---|---|---|---|---|---|
| Accubrush MX Jumbo Kit | Roller/Guard | Baseboards, crown molding | $35–$45 | Speeds up edging, reusable parts | Struggles on textured surfaces |
| Shur-Line Edger Pro Kit | Pad | Flat trim, ceilings | $10–$15 | Precise lines, ergonomic handle | Limited paint capacity |
| Wagner SMART Edge Roller | Roller | Smooth walls and trim | $20–$30 | Built-in reservoir, smooth application | Bulky, not for intricate details |
| Luigi's Mini Foam Roller | Foam Roller | Small trim, corners | $12–$18 | Compact, smooth finish | Small coverage area |
| Mr. LongArm Edger | Pad/Edger | Standard trim, corners | $15–$25 | Precise, ergonomic handle | Not for textured surfaces |
| Richard Goose Neck Brush | Brush | Detailed trim, corners | $8–$15 | Great for intricate work | Requires skill for straight lines |
| Emery Edger Tool | Pad/Edger | Flat trim, edges | $12–$20 | Easy to use, clean lines | Needs touch-ups in corners |
| Cut-N-Edge Pro Tool | Brush/Edger | Various trim profiles | $10–$18 | Adjustable bristle exposure | Learning curve for setup |
Choose based on your project's requirements, surface type, and desired level of control. Proper cleaning and maintenance will also extend the life of these tools.
How to Choose the Right Edging Tool for Trim
When selecting an edging tool, the shape of your trim and the specifics of your project are key factors. The trim's profile determines which tool will give you the best results. For flat trim, pad edgers or roller edgers are great for creating clean, straight lines [1]. On the other hand, if your trim features intricate molding, grooves, or curves, you'll need a tool designed for detail work. In these cases, angled sash brushes or other specialty tools are better suited to navigate those tricky areas [1].
The wall texture is another important consideration. On smooth walls, pad and roller edgers deliver sharp and professional-looking edges [1]. But if you're working on textured surfaces like orange peel, knockdown, or popcorn finishes, these tools may not make full contact, leading to uneven results. For such surfaces, angled sash brushes are more effective, as they can reach into crevices and provide consistent coverage.
Paint type also plays a role in tool selection. Most edging tools are compatible with both latex and oil-based paints, but it's always smart to check the manufacturer's recommendations. Synthetic bristles work well with either paint type, while natural bristles tend to perform best with oil-based paints.
For larger projects or areas with high ceilings, consider tools with ergonomic handles. These reduce hand fatigue and improve control during extended use. Many edging tools also work with U.S. extension poles, making it easier to reach higher spots safely.
Here’s a breakdown of the four main types of edging tools to help you decide:
- Pad edgers: These feature a flat pad with guide wheels, perfect for smooth surfaces and long, straight trim sections. For example, the Shur-Line Edger Plus is known for its comfort and ease of use, though it may struggle on textured walls.
- Roller edgers: Combining a small roller with an edge guide, these tools are great for covering large areas quickly on smooth or lightly textured walls. They work especially well on baseboards and around windows or doors where speed is essential.
- Angled sash brushes: With their slanted tips, these brushes offer precision and control, making them ideal for detailed trim work, corners, and uneven or intricate profiles.
- Specialty tools: These include designs like adjustable bristle exposure systems or custom guides tailored to specific trim profiles. They’re designed to handle challenges that standard tools might not address effectively.
Finally, staying organized and informed can make your project smoother. Platforms like Toolstash offer features like inventory tracking, AI-based tool recommendations, and DIY guides to help you pick the perfect edging tool for your needs while keeping your tools in order.
1. Accubrush MX Jumbo Paint Edger Kit
The Accubrush MX Jumbo Paint Edger Kit combines a 4-inch roller, a hinged edge guide, and a miniature following brush to create clean, straight trim lines - no tape required. Priced between $40 and $50, the kit includes five roller heads and five mini brushes. Here's a closer look at its precision, ease of use, and other key details.
Precision and Edge Quality
When it comes to painting trim, precision is everything, and this tool is designed to deliver. The hinged edge guide and miniature brush work together to create crisp lines around baseboards, crown molding, and door or window trim. On smooth surfaces, it performs consistently well, earning a 4/5 edge quality rating and a 5/5 for ease of use in tests by Bob Vila's team [1]. However, textured surfaces like orange peel or knockdown finishes can pose a challenge, as the low-nap roller may not maintain full contact. For best results, clean the guide's inner edge after each use to avoid paint buildup. One thing to keep in mind: the Accubrush MX edges only on the left side, so you might need to tweak your technique slightly.
Ease of Use and Handling
The Accubrush MX can cut your edging time by more than half compared to traditional methods, especially for long stretches of trim. It's beginner-friendly, but a little practice can help when navigating corners or textured areas. With multiple roller heads and mini brushes included, you have added flexibility, and since the components are washable and reusable, you won’t need to constantly buy replacements.
Compatibility with Trim Profiles and Surfaces
This tool shines on standard trim profiles like baseboards, door casings, and crown molding. It’s most effective on flat surfaces where the roller and guide maintain steady contact. However, for intricate or highly textured trim, you may need to do some touch-ups with a traditional brush. While it’s not perfect for every surface, its durability and consistent performance make it a reliable choice for most projects.
Durability and Maintenance
The Accubrush MX is built to last, featuring synthetic rollers and a sturdy plastic handle that can handle repeated use. Its washable parts make it a cost-effective option for frequent painters. To keep it in top shape, always wipe the guide’s inner edge clean after use - this simple step helps maintain its precision and performance over time.
For additional tips on tool care and organization, platforms like Toolstash can be a handy resource [1].
2. Shur-Line Edger Pro Kit
The Shur-Line Edger Pro Kit is a 5.75-inch fabric pad edger, priced between $8 and $15, designed with wheel spacers and retractable guide wheels to help make painting edges a breeze.
Precision and Edge Quality
This tool is all about creating clean, consistent lines on trim. The wheel spacers keep the edger aligned and help prevent paint from smudging, while the retractable guide wheels stay clean even when the pad is fully loaded with paint. This clever design reduces the risk of those dreaded smudges that can ruin an otherwise perfect edge.
To get the best results, flip the guide wheels up when dipping the pad into paint, and lower them when you're ready to edge. The combination of the flip-up wheels and edge guide system ensures precise lines with minimal effort.
Ease of Use and Handling
Bob Vila's review team gave this tool a 5/5 rating for ease of use and comfort [1]. Its ergonomic handle is comfortable to hold, even during long painting sessions, and the flexible swivel makes it easy to maneuver in tight spaces. The quick-release button for changing pads is a time-saver, especially for larger projects.
The Shur-Line Edger Pro Kit makes edging faster, cutting down on the time you'd typically spend taping or fixing mistakes. Even if you're new to painting, you'll find this tool easy to master with just a little practice.
Compatibility with Trim Profiles and Surfaces
This edger performs best on flat, smooth surfaces and standard trim profiles like baseboards, door casings, and window trim. However, it’s not as effective on deeply textured walls or intricate molded trim. The fabric pad doesn’t hold as much paint as some other tools, which can make it harder to reach into grooves or detailed corners.
For added convenience, you can attach the tool to a paint pole. This makes it easier - and safer - to work on high areas like ceiling edges or tall trim without needing a ladder.
Durability and Maintenance
The Shur-Line Edger Pro Kit is built with durable plastic housing and features a quick-release mechanism for easy pad changes and cleaning. Replacing the fabric pads as needed will help maintain smooth, streak-free results. While the cost is similar to a high-quality paintbrush, the time you save and the reduced need for taping make it a worthwhile investment for most DIY painters.
If you're juggling multiple painting projects or looking for tips on tool care, platforms like Toolstash offer practical advice to help you get the most out of tools like this one. Up next, check out the Wagner SMART Edge Paint Roller for another handy edging solution.
3. Wagner SMART Edge Paint Roller
The Wagner SMART Edge Paint Roller offers a practical solution for DIY painters with its built-in paint reservoir system, typically priced between $15 and $25. This clever design allows you to load paint directly into the handle, saving you the hassle of repeatedly dipping into a paint tray during longer edging tasks.
Precision and Edge Quality
This roller is designed to produce clean, straight lines on smooth and lightly textured surfaces, making it a solid choice for baseboards and window trim. While it may not match the precision of an angled brush, it delivers results that are more than adequate for most DIY trim work. Occasionally, you might need minor touch-ups, but the overall finish is smooth and professional-looking when used correctly.
To get the best results, apply consistent pressure and maintain the proper angle. Unlike traditional brushes, which can leave visible marks, this roller creates an even, polished finish that stands out.
Ease of Use and Handling
With its lightweight build and ergonomic handle, this tool is comfortable to use, even during extended painting sessions. The built-in reservoir holds enough paint to cover several feet of trim before needing a refill, which helps minimize interruptions and keeps the workflow smooth.
Although beginners might need a little practice to master the right pressure and angle, the roller mechanism is intuitive for most users. Its balanced design ensures ease of use, even for longer projects.
Compatibility with Trim Profiles and Surfaces
The Wagner SMART Edge Paint Roller works best on flat, standard trim profiles and smooth surfaces. It’s particularly effective for baseboards, door casings, and simple window trim. However, it’s less suited for ornate or deeply grooved trim and cannot be attached to an extension pole, which limits its use for higher areas.
Durability and Maintenance
Built with a sturdy plastic body and equipped with replaceable roller covers, this tool is designed for repeated use. Proper cleaning of the roller and the reservoir after each session is essential to prevent paint buildup and maintain its performance. With routine care, this roller can handle multiple painting projects with ease.
Replacement rollers are easy to find, making it a cost-effective option for those tackling several painting tasks. Its mid-range price point offers good value, especially when factoring in the time saved and the reusable design. For longer-lasting performance, be sure to clean it promptly and store it properly.
For DIY enthusiasts juggling multiple projects, staying organized and keeping tools in good condition is key. Platforms like Toolstash provide helpful DIY guides and maintenance tips to ensure you get the most out of your painting tools. Ready to explore more options? Up next is another edging tool to add to your painting arsenal.
4. Luigi's Mini Foam Paint Roller Set
The Luigi's Mini Foam Paint Roller Set is a budget-friendly option for DIY painters, typically priced between $12 and $18. This compact tool combines the smooth application of a roller with the precision needed for detailed trim work, making it a go-to choice for tackling baseboards, door frames, and window casings.
Precision and Edge Quality
This mini foam roller is all about accuracy. Its compact size and dense foam texture help deliver clean, straight lines on trim. The fine foam material minimizes paint seepage, ensuring crisp edges that look professional. Many users find foam rollers provide better precision than standard-sized rollers, especially on narrow or intricate trim profiles. While it may not entirely replace a high-quality angled brush for tight corners, it produces excellent results for most DIY tasks.
Ease of Use and Handling
Lightweight and easy to handle, this roller is designed for comfort during extended painting sessions. Its compact design provides great control, reducing fatigue and making detailed trim work more manageable. Even beginners quickly get the hang of it. Loading paint is straightforward - the foam holds just enough to prevent drips while ensuring smooth, even coverage.
Compatibility with Trim Profiles and Surfaces
This tool shines on smooth, flat trim surfaces like standard baseboards, door frames, and simple window casings. It delivers consistent coverage and sharp edges on these common profiles. However, it may struggle with deeply textured or ornate trim, where achieving even coverage and crisp edges can be tricky. For these more detailed surfaces, pairing the roller with an angled brush is a smart approach. It works well with both latex and acrylic paints, making it a versatile choice for most interior trim projects.
Durability and Maintenance
With proper care, these foam rollers can be reused for multiple painting sessions. Cleaning is simple - use warm water and mild detergent for latex paints, or the appropriate solvent for oil-based paints. Regular cleaning prevents paint buildup and keeps the rollers performing well. Over time, though, they may wear out or lose their shape, especially if not cleaned promptly or used improperly. Fortunately, replacement rollers are affordable, making this a practical long-term option.
For DIYers juggling multiple tools and projects, platforms like Toolstash can help you stay organized. Toolstash lets you track roller replacements, manage painting supplies, and access expert tips to extend the life of your tools. Ready to move on? Let’s check out the next tool.
5. Mr. LongArm Trim Smart Paint Edger
The Mr. LongArm Trim Smart Paint Edger is a high-quality tool designed to deliver clean, precise trim lines. Its standout features include a dual-wheel system and an adjustable paint pad, both of which work together to make trim painting more efficient and professional-looking.
Precision and Edge Quality
One of the key features of this edger is its dual-wheel guidance system. These wheels glide smoothly along the edge of trim, keeping a consistent distance and angle for sharp, clean lines. The paint pad is designed to hold just the right amount of paint, preventing messy bleeding while ensuring even coverage. An adjustable reservoir enhances this precision by reducing the need for frequent reloading, making it especially effective for long sections of baseboards or door casings. Together, these features make the tool easy to control and deliver professional results.
Ease of Use and Handling
While there’s a slight learning curve, this edger can save significant time once you get the hang of it. Its ergonomic handle minimizes hand strain during extended painting sessions, and the lightweight design makes it comfortable to use, even for overhead tasks like crown molding. Loading paint is straightforward - simply dip the pad and let the reservoir fill. The built-in flow control system prevents over-saturation, ensuring smooth application on a variety of trim surfaces.
Compatibility with Trim Profiles and Surfaces
The Mr. LongArm performs well on smooth and lightly textured surfaces and is designed to handle most standard residential trim profiles. Its adjustable pad and dual-wheel system adapt easily to different trim shapes and paint types. This tool works particularly well with latex and acrylic paints, especially water-based options, and delivers polished results with finishes like semi-gloss and satin.
Durability and Maintenance
Built with durable, commercial-grade materials, this edger is designed to handle frequent use. The paint pads are replaceable, making it a cost-effective option for long-term projects. To maintain optimal performance, clean the paint reservoir and pad system with warm water immediately after using latex paints. The wheels should also be wiped down to prevent paint buildup, which could affect their smooth operation. Following this simple maintenance routine will keep the tool functioning at its best for years to come.
For those managing multiple tools, Toolstash offers helpful inventory tracking and maintenance advice. Their expert guides can provide tips on extending the lifespan of precision tools like the Mr. LongArm, ensuring you get the most out of your investment.
6. Richard Goose Neck Angular Paint Brush
The Richard Goose Neck Angular Paint Brush is a go-to tool for precision trim work. With its unique gooseneck handle and angled bristles, this brush is perfect for creating sharp, clean lines around baseboards, door casings, and window trim. Priced between $8–$15 USD, it offers professional-grade results at a wallet-friendly price, making it a solid choice for both DIY enthusiasts and contractors alike[1].
Precision and Edge Quality
The angled bristles are designed to deliver crisp, clean edges without the need for masking tape. Thanks to the precise cut of the bristles, this brush makes it easy to follow contours and tackle various trim profiles. Whether you're working on decorative molding or flat baseboards, the Richard Goose Neck Angular Paint Brush ensures sharp, professional-looking results. It's a favorite among painters for its ability to handle detailed work efficiently.
Ease of Use and Handling
What sets this brush apart is its gooseneck handle, which offers a curved design that reduces wrist strain during extended use. This makes it especially helpful for intricate tasks like painting crown molding or detailed baseboards. The handle also improves reach, allowing you to paint at tricky angles with ease. While it might take a little time to adjust if you're used to straight-handled brushes, the added comfort and control make the transition worthwhile. Plus, the brush is designed to load paint evenly, helping to prevent drips and ensuring smooth application.
Compatibility with Trim Profiles and Surfaces
This brush performs beautifully on both smooth and lightly textured surfaces, making it ideal for common interior surfaces found in U.S. homes. It's compatible with popular interior paints like latex and acrylic and works seamlessly on standard trim profiles, including flat baseboards, crown molding, and decorative casings. Whether you're using oil-based or water-based paints, this brush delivers consistent results. Water-based paints are especially convenient, as they allow for easier cleanup.
Durability and Maintenance
The synthetic bristles are built to last, maintaining their sharp edge and precision even after multiple uses. To keep the brush in top shape, clean it thoroughly after each use. For water-based paints, soap and warm water will do the trick, while oil-based paints require the use of appropriate solvents. The key is to prevent paint from drying in the bristles, as this can compromise the brush's performance.
Proper storage is also essential. To maintain the angled bristles, store the brush in a protective sleeve or hang it to avoid bending or crushing. Many professionals swear by these habits to extend the life of their tools. For more tips on maintaining brushes like the Richard Goose Neck Angular Paint Brush, check out resources from Toolstash. Their advice can help you get the most out of your tools, keeping them in excellent condition for future projects.
7. Emery Edger Trim Tool
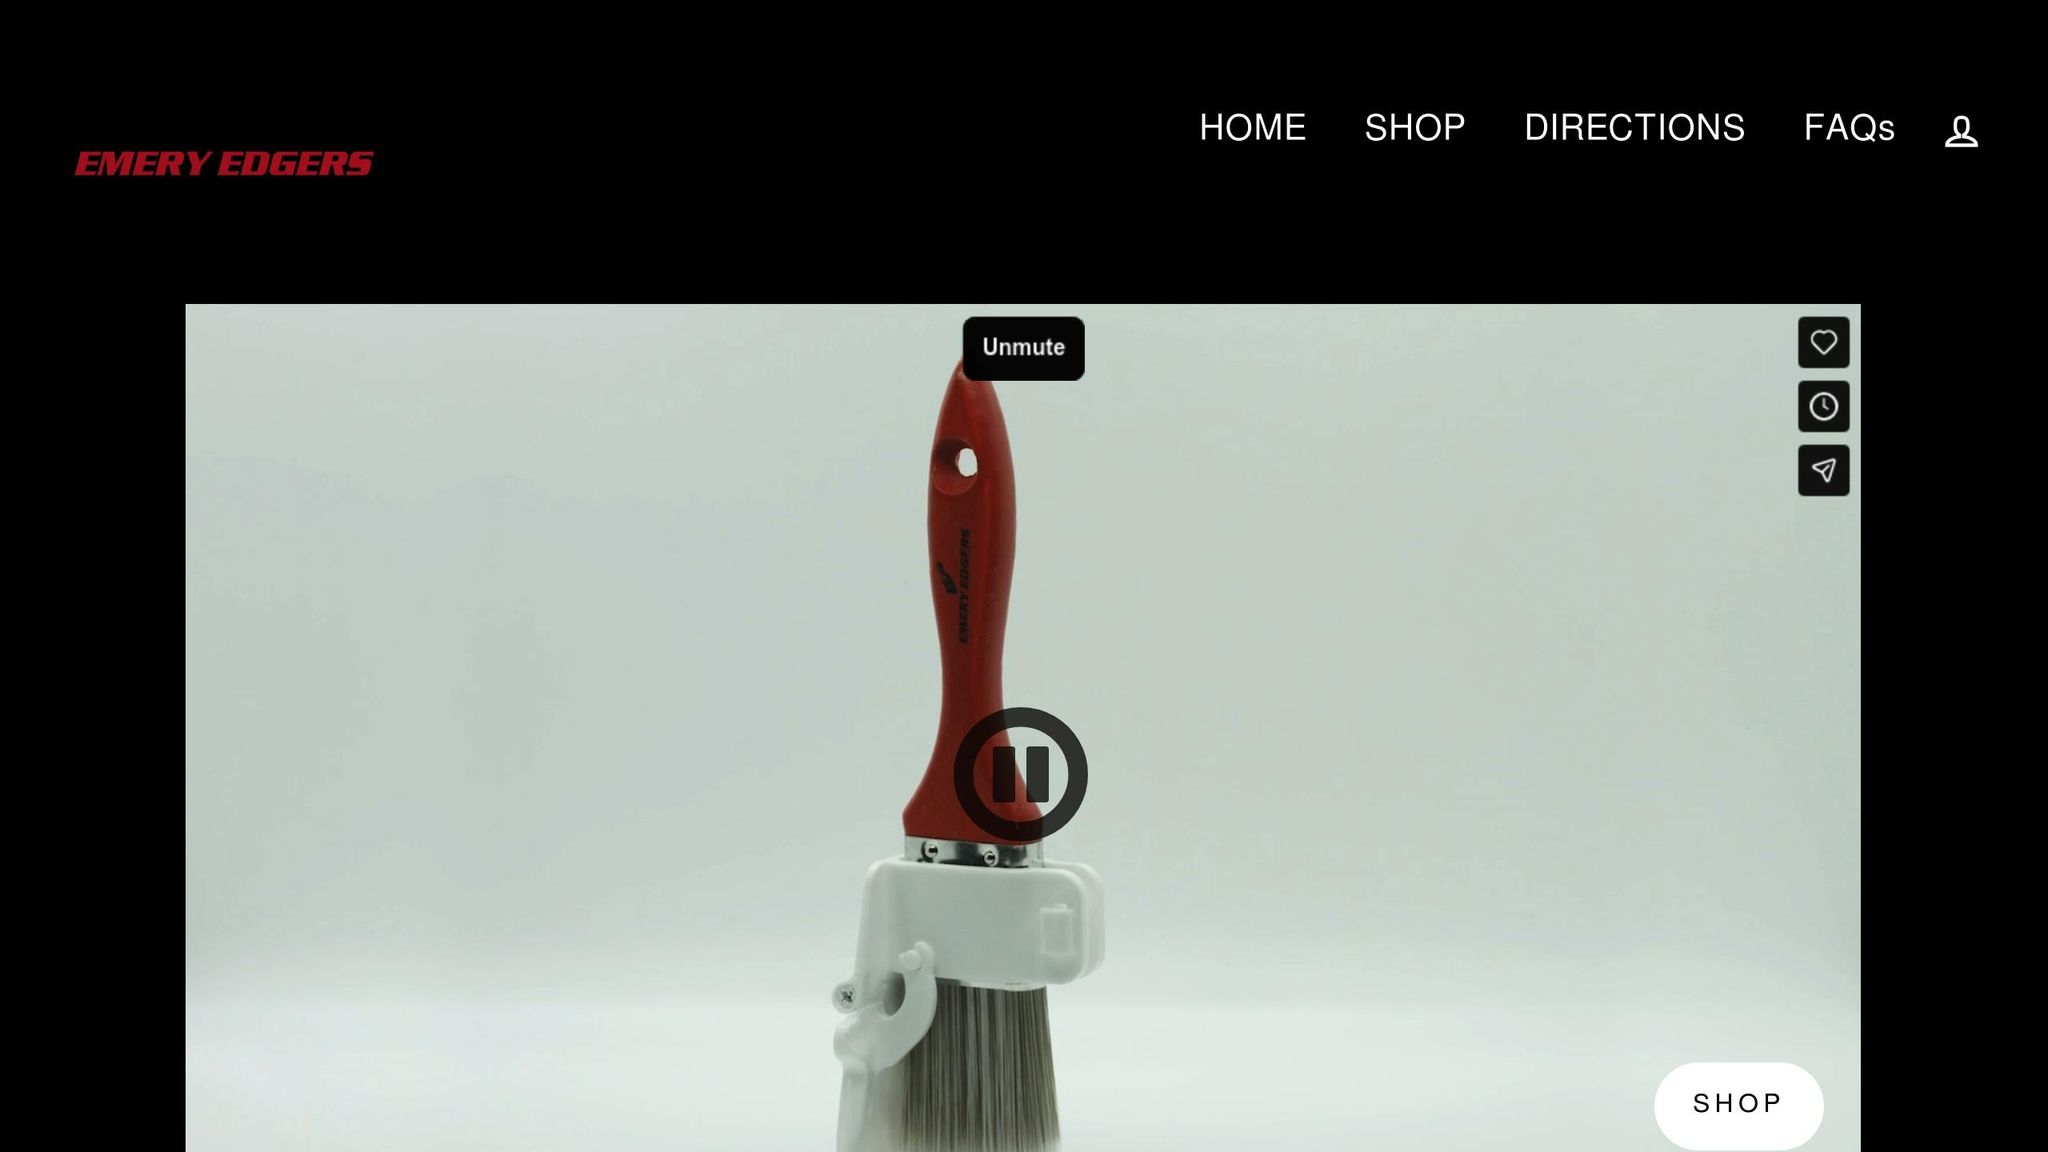
The Emery Edger Trim Tool takes a pad-based approach to trim painting, offering a unique alternative to traditional brushes. Priced between $10 and $25 USD, it features a replaceable pad system paired with an edge guide, making it easier to achieve clean lines without relying heavily on painter's tape. It's a great choice for speeding up trim work while maintaining quality.
Let’s take a closer look at its performance and usability.
Precision and Edge Quality
The Emery Edger is designed to deliver sharp, clean lines by using its pad and guide to maintain a consistent distance from the trim. This setup minimizes paint bleed and produces results comparable to those of high-quality angled brushes. However, some users note that touch-ups may be necessary in corners or on highly textured surfaces[1][2].
The pad system ensures even paint loading and controlled release, reducing the chances of drips or uneven coverage that can sometimes occur with overloaded brushes.
Ease of Use and Handling
With an ergonomic and lightweight design, this tool is comfortable to use, even during longer painting sessions, helping to reduce wrist strain. Achieving the best results requires applying proper pressure and maintaining the right angle while working.
For optimal performance, it's recommended to move the tool steadily along the trim, ensuring the pad is evenly loaded with paint but not oversaturated. Many users find that practicing on a test surface first helps them get the hang of its handling before tackling larger projects.
Compatibility with Trim Profiles and Surfaces
The Emery Edger excels on standard flat and slightly contoured trim profiles, performing particularly well on smooth surfaces. However, it may struggle with deeply textured or highly detailed trim, where the pad cannot fully adapt to surface contours. In such cases, precision may be compromised, and a detail brush might be needed for touch-ups[1][2].
This tool works with both latex and oil-based paints, making it versatile for various projects. That said, for intricate trim profiles with tight corners or fine details, traditional brushes often provide better control and precision. Despite this limitation, the Emery Edger is a strong option among edging tools.
Durability and Maintenance
To keep the tool in top shape, cleaning the pad and guide after each use is essential. For latex paints, soap and water suffice, while oil-based paints require appropriate solvents for proper cleaning[1][3].
The replaceable pad system is both practical and cost-effective. When pads begin to fray or lose performance, they can be swapped out without replacing the entire tool. Storing the tool in a dry location also helps preserve its components. Regular maintenance ensures the edger continues to perform effectively over time.
For those juggling multiple painting tools, resources like Toolstash provide helpful DIY tips, usage guides, and maintenance advice to maximize the performance and lifespan of tools like the Emery Edger.
8. Cut-N-Edge Pro Edging Tool
The Cut-N-Edge Pro Edging Tool wraps up our list with a brush-based design that brings adjustable precision to your trim work. Priced between $10 and $20 USD, this tool works with any standard 2-inch angled brush, allowing you to choose a brush that best suits your project. Its adjustable bristle exposure system gives you control over how the brush interacts with the surface, making it a versatile option for achieving clean edges.
This tool is designed to reduce reliance on painter's tape, helping you create sharp, professional-looking edges across a variety of trim profiles.
Precision and Edge Quality
What sets the Cut-N-Edge Pro apart is its adjustable bristle exposure feature. This mechanism gives you control over how much of the brush contacts the surface, allowing for precise paint application along trims and corners. With some practice, you can achieve crisp, clean lines with minimal paint bleed. While there’s a bit of a learning curve, the results are worth the effort.
Ease of Use and Handling
Though the tool is fairly straightforward, it does require some initial practice to master its setup and adjustments. It’s compatible with standard 2-inch angled brushes, which many homeowners likely already have, and the adjustable system lets you fine-tune it to fit your comfort level and the specific trim profile you're working on. For best results, work slowly and apply steady, even pressure.
Compatibility with Trim Profiles and Surfaces
Thanks to its adjustable design, the Cut-N-Edge Pro works well with a wide range of trim profiles, such as baseboards, window and door casings, and crown molding. It performs best on smooth or lightly textured surfaces, where it maintains steady contact for consistent results. However, for heavily textured or irregular trim, you might need to touch up with traditional brushwork to ensure complete coverage.
Durability and Maintenance
Built with durability in mind, the Cut-N-Edge Pro is designed for repeated use. However, proper maintenance is key to keeping it in good working condition. After each use, both the adjustable mechanism and the brush need to be thoroughly cleaned to prevent paint buildup, which can affect performance. Since the tool doesn’t come with a brush, you’ll also need to maintain your own paintbrushes according to the manufacturer’s recommendations. While this adds a bit of upkeep, it allows you to use high-quality brushes for better results and longer lifespan.
With regular care, the Cut-N-Edge Pro can handle many painting projects, making it a great choice for DIYers who want professional-grade results without breaking the bank. For tips on maintaining tools like this, platforms such as Toolstash offer DIY guides and advice to help you get the most out of your painting equipment.
Tool Comparison Chart
If you're trying to pick the right edging tool for painting trim, this chart breaks down key features, best use cases, and price ranges to help you decide.
Here’s a comparison of eight popular edging tools:
| Tool Name | Type | Best Use Cases | Features | Pros | Cons | Price Range (USD) |
|---|---|---|---|---|---|---|
| Accubrush MX Jumbo Kit | Roller/Guard | Baseboards, window/door trim, crown molding | Roller with edge guide, mini brush, washable/reusable | Speeds up edging (saves 50% time[1]), reusable parts | Only edges one side; struggles on textured surfaces | $35–$45 |
| Shur-Line Edger Pro Kit | Pad | Baseboards, ceilings, trim | Pad with wheel guides and ergonomic handle | Precise application, sturdy design, easy pad replacement | Limited paint capacity; less effective on textured/molded trim | $10–$15 |
| Wagner SMART Edge Paint Roller | Roller | Walls and trim | Roller with edge guide and refill system | Quick, clean lines; simple to refill | Bulky; may cause splatter | $20–$30 |
| Luigi's Mini Foam Paint Roller Set | Foam Roller | Small trim and corners | Mini foam rollers with compact design | Smooth finish; ideal for tight corners | Small coverage area | $12–$18 |
| Mr. LongArm Trim Smart Paint Edger | Pad/Edger | Trim and corners | Pad with guide and ergonomic handle | Precise and easy to handle | Not suited for textured surfaces | $15–$25 |
| Richard Goose Neck Angular Paint Brush | Brush | Detailed trim and corners | Angled bristles with a flexible neck | Great for detailed work | Requires skill for straight lines | $8–$15 |
| Emery Edger Trim Tool | Brush/Edger | Edges and corners | Brush with edger and ergonomic handle | Precise and easy to use | Small paint capacity | $12–$20 |
| Cut-N-Edge Pro Edging Tool | Pad/Edger | Trim and baseboards | Pad with guide and easy-clean design | Quick, reusable, and simple to clean | May need touch-ups in corners | $10–$18 |
Performance Insights
Surface Compatibility:
Pad and roller edgers - like the Accubrush MX, Shur-Line Edger Pro, and Wagner SMART Edge - are top performers on smooth or lightly textured surfaces. For intricate details, the Richard Goose Neck Angular Brush is a solid choice. If you’re after a mix of ease and precision, tools like the Emery Edger and Cut-N-Edge Pro blend innovative design with user-friendly handling, though they might take a bit of practice to master.
Value and Maintenance:
High-end tools, such as the Accubrush MX Jumbo Kit, come with durable, washable components, making them a smart long-term investment. On the other hand, budget-friendly picks like the Shur-Line Edger Pro Kit are perfect for occasional projects, featuring replaceable pads and an easy ejection system. Regular cleaning and proper care can significantly extend the life of these tools, ensuring consistent performance.
For those who enjoy DIY projects and want to keep their tools organized, platforms like Toolstash offer inventory management and guides to help you choose, maintain, and track your equipment for the best results.
How to Use Edging Tools on Trim
Turning your DIY trim painting into a polished, professional-looking project isn't as hard as it seems. With the right edging tools and techniques, you can achieve clean, precise results. Here's a guide to help you use these tools effectively and safely.
Workspace Preparation
Start by getting your workspace ready. Clear the area around the trim, and protect furniture and floors with drop cloths. Clean the trim and surrounding surfaces to remove dust, dirt, or debris that could interfere with the paint's adhesion. Make sure the space is well-ventilated - open windows or use fans to reduce your exposure to paint fumes. If needed, apply painter's tape to mask off nearby surfaces. Once everything is set, you’re ready to dive into the specific techniques for each tool.
Using Pad-Style Edgers
When using pad-style tools like the Shur-Line Edger Pro, follow these steps for the best results:
- Flip the wheels up and lightly dip the pad into the paint.
- Lower the wheels back down, then position the tool against the trim.
- Glide the edger along the edge with a steady hand, letting the wheels guide you for a straight, clean line.
Reload the pad as necessary, and for tight corners or tricky spots, switch to a small angled brush or a compatible corner tool for touch-ups.
Using Roller-Style Edgers
Roller-style edgers, such as the Accubrush MX Jumbo Paint Edger Kit, can cut your edging time in half compared to traditional brushes [1]. Here’s how to use them:
- Attach the roller and brush to the tool, then load the roller with paint.
- Align the guide against the trim and roll the tool along the edge.
- The guide and mini brush work together to maintain a sharp, crisp line.
Make sure to clean the guide before each reload to avoid smudges. Use the roller for long, straight sections and the mini brush for corners or detailed areas.
Using Mini Foam Rollers
Mini foam rollers are another excellent option for edging. Start by loading the roller evenly from a paint tray, then roll off any excess paint to prevent drips. Slowly roll along the trim edge for a smooth, even coat. For corners or spots the roller can’t reach, use a small angled brush to cut in. If full coverage requires a second coat, let the first coat dry completely before applying more paint.
Handling Common Challenges
To avoid common pitfalls:
- Don’t overload your tool with paint - it can lead to drips and uneven lines.
- Maintain steady pressure and keep the tool at a consistent angle.
- If paint bleeds onto unwanted areas, clean it up right away and use a small angled brush for touch-ups.
- For textured surfaces, a high-quality brush can help with final detailing where edging tools might struggle.
Safety Precautions
Safety always comes first. Keep your workspace ventilated, and wear gloves and safety goggles to protect yourself. If you’re working on high trim, use a stable step ladder. Store paints and solvents securely, out of reach of children and pets, and follow the safety instructions on the paint and tool packaging.
Cleaning and Maintenance
Proper cleaning and maintenance will keep your tools in good shape for future projects. After painting:
- Remove excess paint immediately.
- Wash tools with warm, soapy water for water-based paints or use mineral spirits for oil-based paints.
- Replace worn pads or rollers as needed.
- Clean guide wheels and guards to prevent paint buildup.
Store your tools in a dry, dust-free space. For added convenience, consider using an inventory app like Toolstash to track your tools and get maintenance tips.
Conclusion
Pad-style edgers, like the Shur-Line Edger Pro, are fantastic for smooth, flat surfaces. On the other hand, roller-based tools such as the Accubrush MX can cut edging time in half, especially on long runs and baseboards [1].
Choosing the right tool boils down to the specifics of your project. Consider factors like the texture of the trim surface, whether you need an extension, and how much precision is required. For instance, the Cut-N-Edge Pro allows you to adjust bristle exposure for detailed work, though it does come with a bit of a learning curve [3].
Budget is another key factor. Tools like the Shur-Line Edger Pro are budget-friendly, typically priced between $10 and $15. In contrast, the Accubrush MX Jumbo Kit, with its additional features, usually costs between $35 and $50 [1].
Don't overlook technique and maintenance. Start by practicing on a small section, properly prep your workspace, and always follow safety guidelines. Keeping your tools clean and in good condition will ensure they perform well for future projects.
For added convenience, platforms like Toolstash can help you keep track of your tools, offer step-by-step guides, and even provide AI-driven tips to improve your results. With the right edging tool and careful technique, you can achieve sharp, professional-looking trim lines every time.
FAQs
What should I consider when choosing an edging tool for painting textured surfaces?
When choosing an edging tool for textured surfaces, it’s important to pick one that can handle the bumps and grooves with ease. Tools with flexible edges or adjustable features are great because they can move along the contours of uneven surfaces without missing a spot. Foam or fabric applicators are particularly effective since they can get into those hard-to-reach grooves and crevices better than stiff, rigid tools.
You’ll also want to look for tools that include precision guides. These guides help you create clean, straight lines along trims and edges, even when the surface is tricky to work with. To avoid surprises, try testing the tool on a small section first. This way, you can make sure it’s the right fit for your project before diving in.
How can I maintain my edging tools to make them last longer?
To keep your edging tools in top condition and extend their lifespan, a little post-use care goes a long way. Start by giving them a thorough cleaning to remove any leftover paint. For water-based paints, warm, soapy water works best. If you've been using oil-based paints, opt for a suitable solvent instead. Once cleaned, be sure to dry the tools completely - this helps prevent rust and other damage.
When it comes to storage, choose a clean, dry spot, like a tool organizer or box, to shield your tools from dust and moisture. It's also a good idea to inspect them regularly. Look for signs of wear and tear, and replace parts like blades or pads when needed. Taking these simple steps not only keeps your tools in excellent condition but also ensures smoother, more precise painting results over time.
What are the best tips for using roller-style edgers when painting trim?
Using roller-style edgers for painting trim is an effective way to create sharp, polished edges. To achieve the best finish, ensure the roller is evenly loaded with paint - avoiding excess paint helps prevent drips and smudges. Apply with steady, controlled strokes, starting just a bit away from the edge and rolling toward it for greater accuracy.
For those hard-to-reach corners or detailed spots, a small brush can be handy for touch-ups after using the roller. Also, keeping your edger clean and free of dried paint will ensure it stays in good working condition for future projects.