Every year, thousands of DIY enthusiasts face preventable injuries. The right safety gear can shield you from risks like flying debris, chemical exposure, and loud noise. This guide covers essential equipment to protect your eyes, ears, hands, feet, and more.
Key Takeaways:
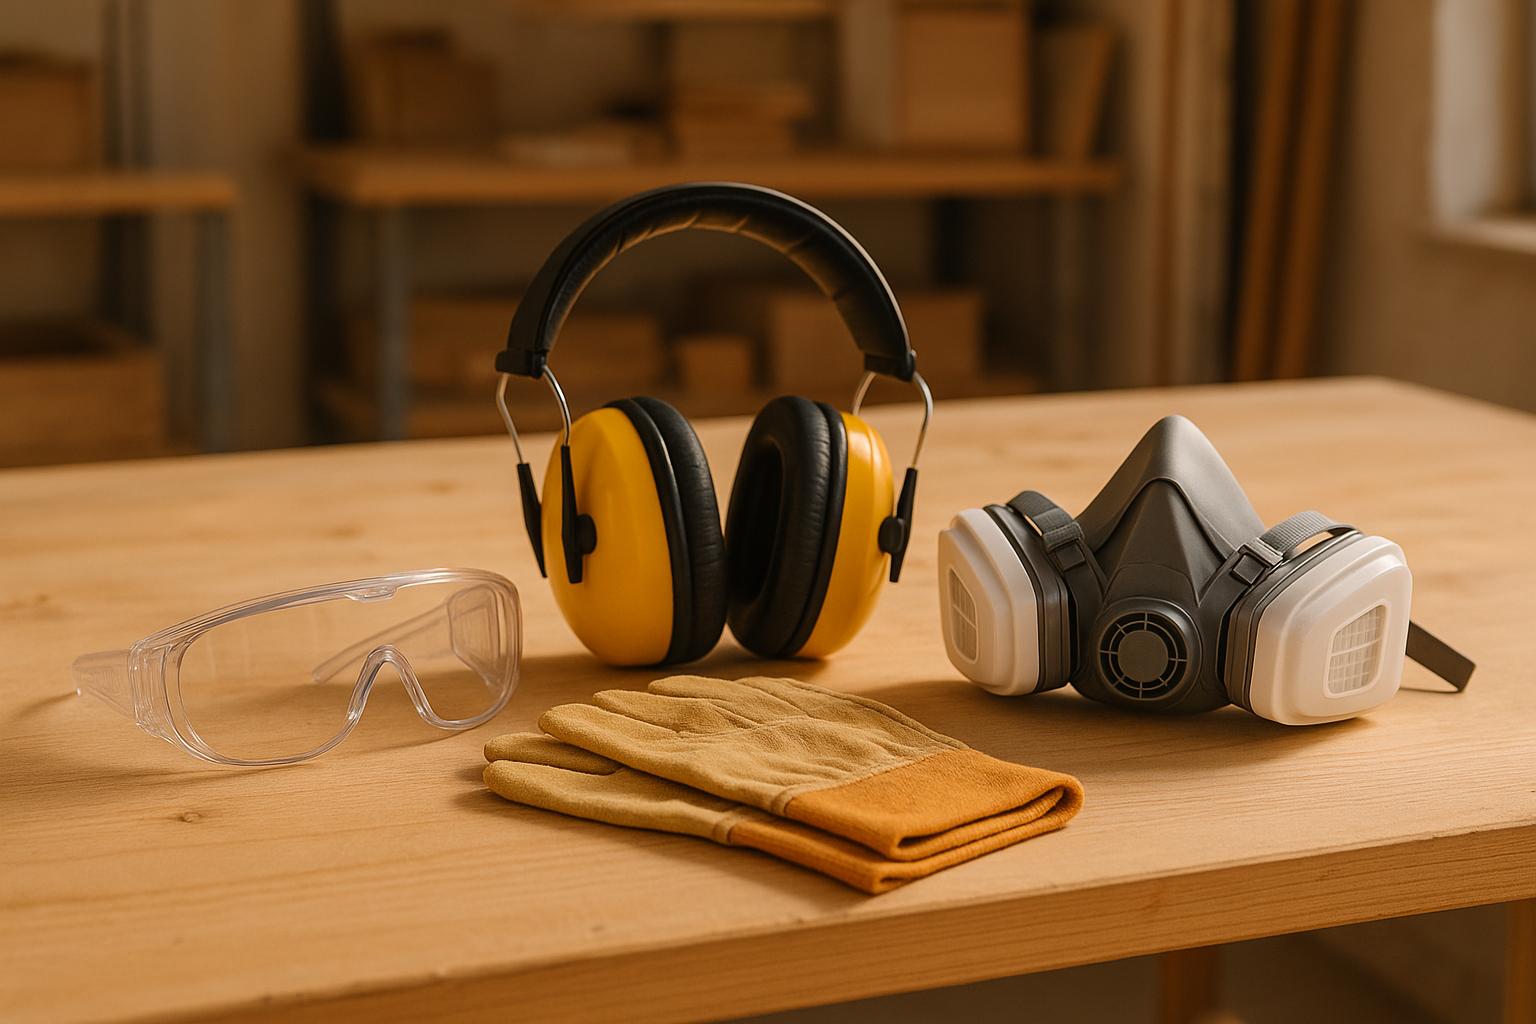
- Eye Protection: Use ANSI-approved safety glasses or goggles to guard against debris and chemical splashes.
- Hearing Protection: Earplugs or earmuffs reduce noise from power tools, preventing long-term hearing damage.
- Respirators: N95 or P100 masks filter dust and fumes during sanding, painting, or chemical tasks.
- Gloves: Choose gloves based on the job - leather for rough materials, chemical-resistant for solvents, or cut-resistant for sharp tools.
- Steel-Toed Boots: Protect your feet from heavy objects and sharp debris. Look for slip-resistant soles for added safety.
Emergency Prep:
- Keep a fire extinguisher, first aid kit, and eyewash station in your workspace.
- Regularly inspect safety gear for wear and replace damaged items promptly.
Pro Tip:
Use tools like Toolstash to organize and track your safety gear, schedule maintenance, and ensure you're always prepared.
Investing in proper safety gear and maintenance habits ensures a safer and more productive DIY experience.
🎥 Essential Safety Gear for DIYers: Protect Yourself Like a Pro! 🛠️👓🧤
Protective Gear by Body Part
When tackling DIY projects, having the right protective gear can make all the difference between a smooth experience and a trip to the emergency room. Every piece of equipment serves a purpose, helping you safeguard different parts of your body from potential risks.
Head and Eye Protection
Head and eye injuries are among the most common hazards during DIY work, often caused by falling objects, flying debris, or chemical splashes. A hard hat is essential if you're working under scaffolding, on ladders, or in demolition zones - basically, anywhere falling objects are a danger[1].
For your eyes, safety glasses with side shields are a solid choice for general tasks in the workshop. Make sure they’re ANSI-approved for proper impact resistance[1][4]. If you're working with power tools or chemicals, goggles offer better coverage, protecting against dust, vapors, and splashes[3]. For tasks like grinding, welding, or handling caustic substances, a face shield provides full-face protection[4]. And if you're working outdoors or in bright conditions, look for safety glasses with UV protection and anti-scratch coatings for clear vision[2].
With your head and eyes protected, it’s just as important to shield your ears from potentially harmful noise.
Hearing Protection
The loud noises from power tools and machinery can cause long-term hearing damage if ignored. Whether you prefer earplugs or earmuffs, both can significantly reduce noise levels. Earplugs, which fit directly into your ear canal, are great for lighter tasks and can be worn comfortably with other gear[1]. On the other hand, earmuffs provide more consistent protection and are ideal for very loud environments where extended use is required[3].
Respiratory Protection
Working with wood, paint, or chemicals often generates harmful particles and fumes. That’s where dust masks and respirators come in. Proper fit is key to ensuring they filter out dust, fumes, and other toxins effectively[2]. For basic sanding or general dust, a simple dust mask will do. But for finer particulates or chemical vapors, you’ll need a certified respirator.
- N95 respirators filter out 95% of airborne particles and work well for most woodworking and construction tasks.
- P100 respirators offer even higher protection, filtering 99.97% of particles.
- Reusable respirators with replaceable filters are a good long-term option, especially for projects involving specific contaminants[2][3].
Hand Protection
Your hands are often the first to come into contact with sharp tools, rough materials, or chemicals, so work gloves are a must. The type of glove you need depends on the job:
- Heavy-duty leather gloves are perfect for handling rough materials like wood or metal[3].
- Cut-resistant gloves are ideal for tasks involving sharp tools.
- Chemical-resistant gloves protect against substances like paint thinners and adhesives[3].
- Anti-vibration gloves reduce strain during prolonged power tool use by absorbing vibrations.
Make sure to measure your hands to ensure a snug, comfortable fit[4].
Foot and Body Protection
Your feet and body also need proper shielding. Safety boots protect against falling objects, sharp debris, chemicals, and even electrical hazards[4]. Steel-toed boots are especially important for heavy-duty projects involving hazardous materials[5]. Look for boots with slip-resistant soles to reduce the risk of falls, particularly on wet or slick surfaces[5][3].
For body protection, the right clothing is crucial. Depending on your project, you may need coveralls, aprons, or flame-resistant clothing. For instance, painting or staining requires gear that shields against chemical exposure, while welding or metal cutting calls for flame-resistant materials. High-visibility clothing, like reflective vests or brightly colored shirts, is essential in low-light environments to help others see you and prevent accidents[5].
Lastly, don’t forget your knees. Many DIY projects involve kneeling for long periods, which can lead to discomfort or strain. Knee pads are a simple solution, offering cushioning and support. Choose ones with adjustable straps for a secure, comfortable fit, especially for tasks that require extended kneeling[3][5].
Additional Safety Equipment for DIY Workspaces
When it comes to DIY projects, having the right safety gear goes beyond just personal protective equipment. Essential emergency tools can help prevent accidents or manage them effectively if they occur. According to the Consumer Product Safety Commission (CPSC), over 200,000 DIY-related injuries result in emergency room visits each year in the U.S., with common injuries including cuts, burns, and eye damage[3]. A well-equipped workspace can make all the difference between a minor issue and a serious accident. Here are some key safety tools every DIYer should have on hand.
Fire Safety Equipment
Fire hazards are a serious concern in DIY spaces, especially when working with power tools, flammable liquids, or electrical equipment. The National Fire Protection Association (NFPA) reports that U.S. fire departments respond to roughly 1,900 home structure fires annually caused by flammable liquids, with DIY activities often contributing to the risk[3].
- Fire extinguishers: These are crucial for tackling small fires. Choose the right type based on your workspace needs:
- Class A for materials like wood and paper.
- Class B for flammable liquids such as paint and solvents.
- Class C for electrical fires.
- A multi-purpose ABC extinguisher is a versatile option for most home workshops.
- Fire blankets: Useful for smothering small fires or protecting someone if their clothing catches fire.
- Smoke detectors: Install these near your workspace to provide early warnings of potential fire hazards.
Make it a habit to inspect fire extinguishers monthly and test smoke detectors regularly. Both should be serviced annually to ensure they’re in working condition.
First Aid Kit
A well-stocked first aid kit is indispensable for treating minor injuries like cuts and burns - common occurrences during DIY projects. Your kit should include essentials such as adhesive bandages, gauze, antiseptics, medical tape, tweezers, scissors, burn cream, and basic pain relievers. For more serious injuries, add sterile dressings and a CPR mask[1][3].
First aid kits are widely available and typically cost between $15 and $50, depending on their contents and quality[6][3]. Keep your kit easily accessible - near exits or high-risk areas - and check it every few months to replace expired items. Everyone using the workspace should know where it’s located and how to use its contents.
Emergency Eyewash Station
If you’re working with chemicals, solvents, or fine particulates, an emergency eyewash station is a must. These stations provide immediate relief if harmful substances get into your eyes, potentially preventing lasting damage[3].
When choosing an eyewash station, look for:
- Hands-free operation.
- A steady 15-minute water flow.
- Placement that’s easily accessible within 10 seconds of high-risk areas.
For smaller workshops, portable eyewash bottles are an affordable option, starting at around $30. For frequent chemical use, a plumbed eyewash station is a better choice, though it can cost upwards of $150[7].
| Equipment Type | Basic Option | Advanced Option | Key Features |
|---|---|---|---|
| Fire Extinguisher | $20 | $60 | Class A/B/C, rechargeable |
| First Aid Kit | $15 | $50 | Bandages, antiseptics, medications |
| Eyewash Station | $30 | $150 | Portable vs. plumbed, flow rate |
Place your eyewash station near areas where you handle substances like wood stains, paint thinners, or cleaning solvents. Quick access can make all the difference in an emergency.
Maintaining and Replacing Safety Gear
Keeping safety gear in top condition is just as important as choosing the right equipment in the first place. Well-maintained gear ensures it performs as intended when you need it most. It’s not just about longevity - it’s about protection.
Getting the Right Fit
The effectiveness of safety gear relies heavily on how well it fits. Ill-fitting gear - like loose gloves or safety glasses that slide - can compromise protection, distract you, or even create new hazards, such as gloves getting snagged in machinery[4].
For gloves, proper sizing is key to maintaining both safety and dexterity. To determine your size, measure the width of your palm and the length of your middle finger, add the two numbers together, then divide by two. This will guide you to the right size[4].
Safety glasses and goggles should fit snugly without pinching or slipping. The lenses should provide a clear, unobstructed view, and there should be no gaps around the edges. If you wear prescription glasses, consider safety glasses that fit over them or opt for prescription safety glasses.
Respirators require the most precise fit. Even small gaps can allow harmful particles to pass through. Always follow the manufacturer's fit-testing instructions to ensure a proper seal around your nose and mouth.
For hearing protection, earplugs should fit securely in your ear canal without causing discomfort, while earmuffs should form a complete seal around your ears. The headband should distribute pressure evenly without being overly tight.
Regular Inspection and Cleaning
Once you’ve ensured a proper fit, regular maintenance is essential to keep your gear in working order. Inspect your equipment routinely for signs of damage, wear, or contamination. A quick check before each use can prevent injuries.
- Safety glasses and goggles: Scratches and cracks can impair vision and reduce protection. Check for damage like deep scratches, broken frames, or worn straps that could compromise their effectiveness[1][3].
- Gloves: Look for tears, thinning material, or any signs of chemical damage like discoloration or stiffness. Pay close attention to high-wear areas like the fingertips and palms. Gloves used with chemicals or adhesives should be cleaned or replaced immediately if contaminated[1][3].
- Respirators: Inspect the straps for elasticity, check the face seals for cracks or deformation, and ensure filters aren’t clogged or damaged. Reusable respirators should be cleaned following the manufacturer’s instructions - usually with mild detergent and a damp cloth - and dried thoroughly to prevent mold or material breakdown[1][3].
- Hearing protection: Examine earplugs and earmuffs for cracks, worn padding, or damaged headbands that could affect their fit or seal.
Make cleaning part of your routine. Wash safety glasses after each use, and clean gloves when visibly dirty or exposed to chemicals.
When to Replace Equipment
Knowing when to replace safety gear is just as important as maintaining it. Replace any equipment showing visible damage or reduced performance. Common indicators include cracks, tears, frayed materials, loss of elasticity, persistent odors, or diminished functionality like fogging lenses or loose ear protection[1][4].
- Respirators: Disposable models should be replaced if breathing becomes difficult, after exposure to hazardous substances, or if the mask gets wet or damaged. Some are single-use, while others can last for a few days if stored properly.
- Safety glasses: Deep scratches can distort vision and weaken the lenses, so damaged pairs should be replaced immediately.
- Hard hats and helmets: These often have expiration dates printed inside. Materials can degrade over time, even if the helmet looks fine. Replace them every 2–5 years, depending on usage and exposure to sunlight or chemicals.
- Gloves: Replace gloves that show worn areas, no longer fit snugly, or have been exposed to chemicals that compromise the material. For example, cut-resistant gloves should be replaced immediately if the protective fibers are damaged.
Always follow the manufacturer’s guidelines for replacement timelines. Some gear has expiration dates or usage limits that aren’t obvious from a simple visual check[1][4]. Look for equipment that meets recognized safety standards, like those set by ANSI (American National Standards Institute), to ensure it has been rigorously tested for specific hazards[4][9].
To simplify maintenance and replacements, platforms like Toolstash can help track schedules and monitor the condition of your gear. With features like AI-powered categorization and location tracking, it’s easier to stay organized and ensure nothing slips through the cracks. Proper maintenance, paired with the right gear, is essential for staying safe during every DIY project.
Managing Safety Gear with Toolstash

Keeping track of safety gear across various projects can be a real headache. Toolstash simplifies this process by centralizing your gear management, making your inventory both organized and easy to access.
Tracking and Organizing Safety Equipment
Toolstash's inventory tracking system lets you maintain a complete record of your safety gear all in one place. You can quickly check what equipment you have, where it’s stored, and its condition. This helps you avoid unnecessary purchases and ensures you’re always prepared with the right protection.
One standout feature is the AI Snap tool, which makes adding new gear a breeze. Just snap a photo of your hard hat, safety glasses, or gloves, and the system automatically identifies the item and logs it into your inventory. This eliminates the hassle of manual entry and reduces the odds of missing important items.
The platform also organizes your gear intelligently. It automatically groups items by function, making it easier to prepare for projects. You can even create custom tags like "chemical-resistant" or "high-visibility" to tailor your inventory to specific needs. For instance, if you’re planning a woodworking project, you can filter for safety glasses, hearing protection, and dust masks - all in seconds - ensuring you’re fully equipped before starting.
This level of organization is particularly helpful for DIY enthusiasts with large collections of gear or those juggling multiple types of projects. Instead of rummaging through toolboxes or storage bins, you can instantly check your inventory and know exactly what’s available. This streamlined catalog also sets the stage for smart recommendations tailored to your needs.
AI Features for DIY Safety
Toolstash takes safety a step further with its AI Chat Assistance, which goes beyond inventory management to offer expert advice on gear selection and upkeep. Whether you're a beginner or a seasoned DIYer, this feature helps you make informed decisions about the protective equipment you’ll need.
Planning a project? The AI can suggest gear based on the tools you’ll use and the risks involved. For example, if you’re working with a power sander, it might recommend NIOSH-approved respirators for dust, along with safety glasses and hearing protection. This kind of guidance removes the guesswork and ensures you’re following best safety practices without having to dig through safety manuals.
The AI also keeps track of maintenance and replacement schedules. It monitors purchase dates, usage frequency, and manufacturer guidelines for each item. When your dust masks near their 40-hour usage limit or your safety glasses start showing wear, you’ll get timely alerts to replace them before they become ineffective.
This proactive approach helps avoid the common mistake of using worn-out or expired equipment - a leading cause of preventable injuries in DIY projects. Essentially, the AI acts as your personal safety advisor, keeping you informed about proper care and compliance standards.
Finding Your Gear with Location Tracking
Toolstash doesn’t just help you manage your inventory - it also makes finding your gear effortless. One of the most frustrating parts of DIY work is wasting time hunting for safety equipment when you're ready to dive into a project. The location tracking feature solves this by recording exactly where each item is stored.
You can assign specific locations to your gear, like "Garage Shelf A", "Basement Toolbox", or "Under-Sink Kit." So, when you need your knee pads for a plumbing job or your respirator for painting, you can simply check the app and head straight to the right spot.
This feature is especially handy in cluttered workshops or homes with multiple storage areas. Instead of digging through every corner, you can retrieve what you need quickly and get back to work.
Toolstash also integrates location tracking with its lending and borrowing management feature. If you lend your hard hat to a neighbor, the app tracks who has it and when it’s due back. This ensures your safety equipment doesn’t go missing and remains accounted for, saving you the hassle of replacements or awkward follow-ups.
Staying Safe on Every DIY Project
Safety on DIY projects goes beyond simply putting on the right gear - it's about making thoughtful choices throughout the process. A solid safety plan blends proper equipment, regular maintenance, and smart organization, creating a mindset where safety is second nature from start to finish.
Start by matching your gear to the specific risks of your project. For instance, painting may only require safety glasses and a dust mask, but sanding drywall calls for a NIOSH-approved respirator and hearing protection to guard against dust and noise levels exceeding 85 dB [8]. Using general-purpose gear for specialized tasks can leave you unprotected, so always choose equipment designed for the job at hand [6].
Before each use, inspect your safety gear for any signs of wear or damage. Cracked safety glasses, torn gloves, or a respirator with a compromised seal can create a false sense of security, leaving you exposed to potential harm [10]. A quick pre-use check can make all the difference in keeping you safe.
Organization also plays a key role in maintaining safety. When your protective gear is misplaced or buried under other tools, you’re more likely to skip using it or grab the wrong equipment. This is where tools like Toolstash come in handy. With its tracking system, you can keep an inventory of your safety equipment, set reminders for maintenance, and locate items instantly. The platform’s AI features can even suggest gear based on your specific project, ensuring you’re always prepared for potential hazards. By staying organized, you reinforce the habit of consistent safety practices.
In addition to personal protection, being ready for emergencies is essential. Keep a first aid kit, fire extinguisher, and eyewash station in easily accessible spots, and check them regularly to ensure they’re stocked and functional [3]. Quick access to emergency supplies can significantly reduce the impact of accidents, especially when working with power tools or flammable materials.
Investing in safety gear is a wise choice. Basic safety glasses range from $5 to $20, and work gloves typically cost $10 to $30. While these prices are modest, the expense of medical bills or lost time from an avoidable injury can be far greater. High-quality gear not only protects you but also saves money in the long run by keeping you safe and productive.
Ultimately, making safety a habit is the best way to protect yourself. By consistently using the right equipment, keeping it in good condition, and staying organized with tools like Toolstash, safety becomes an integral part of your DIY routine. This proactive approach not only prevents injuries but also builds confidence, ensuring you’re ready to tackle any project with peace of mind.
FAQs
What’s the difference between N95 and P100 respirators, and how do I know which one to use?
N95 and P100 respirators are both designed to shield you from harmful particles, but they vary in how much they filter. N95 respirators block at least 95% of airborne particles, such as dust and non-oil-based particulates. This makes them a solid choice for common DIY tasks like sanding, painting, or cutting wood. P100 respirators, however, provide a higher level of filtration, capturing at least 99.97% of airborne particles. Plus, they are oil-resistant, making them ideal for work involving oil-based substances or highly hazardous environments.
If you're tackling general DIY projects where dust and debris are the main concerns, an N95 respirator should do the job. For tasks involving toxic chemicals, oil-based fumes, or situations demanding top-tier filtration, go with a P100 respirator.
How do I make sure my safety gear, like gloves and respirators, fits correctly for the best protection?
Getting the right fit for your safety gear is crucial for staying protected during DIY projects. When it comes to gloves, measure your hand size carefully and pick a pair that fits snugly - tight enough to stay in place but loose enough to allow comfortable movement. For respirators, stick to the manufacturer's sizing instructions and always perform a seal check before use to make sure there are no air leaks around the edges.
Whenever possible, try on safety gear before buying to ensure it fits properly, and replace any items that show signs of wear or no longer fit securely. Well-fitting gear not only keeps you safe but also makes your DIY projects more comfortable and easier to manage.
How can I properly maintain my DIY safety gear to ensure it stays effective?
To ensure your DIY safety gear stays in top shape and continues to work as intended, a little regular upkeep goes a long way. Start by giving your gear a thorough cleaning after every use. This helps remove dirt, dust, or debris that might interfere with its effectiveness. Be sure to carefully check items like gloves, goggles, and helmets for any signs of wear and tear - things like cracks, tears, or other damage. If you spot anything that compromises their safety, it’s time to replace them.
When you're not using your safety gear, store it in a clean and dry spot. Keeping it away from moisture or extreme temperatures can help prevent unnecessary damage or deterioration. Staying organized is another smart move - consider using a tool management system so your gear is always easy to find and ready to go. Taking these simple steps not only helps your equipment last longer but also ensures you’re well-protected for every project.