Want to make the most of your small workshop space? Here's the key: smart planning and efficient organization. A well-designed compact workshop boosts productivity, keeps tools accessible, and ensures a safer workspace.
Key Takeaways:
- Assess Your Needs: Identify your main tasks and tools. Store frequently used tools within easy reach and less-used ones in harder-to-access areas.
- Measure Your Space: Map out your workshop dimensions, including doors, windows, outlets, and obstacles. Create a scaled floor plan to test layouts before moving anything.
- Plan for Growth: Use mobile storage and flexible setups to accommodate new tools or seasonal projects without constant rearranging.
- Organize by Workflow: Group tools by function (cutting, assembly, finishing) and keep materials and tools close to where you'll use them.
- Maximize Storage: Use vertical space with pegboards, wall-mounted racks, and overhead shelves. Add mobile carts and under-bench storage for flexibility.
- Focus on Safety: Maintain at least 36 inches of clearance around equipment, ensure proper ventilation, and keep pathways clear.
Pro Tip: Tools like Toolstash can help you track and organize your inventory, saving time and avoiding duplicate purchases.
With these strategies, even a small workshop can handle big projects efficiently.
7 Key Tips to Maximize Your Small Workshop Layout
Evaluate Your Workshop Needs and Space
Before making any changes to your workshop, take a good look at your current tools and space. A thorough assessment helps you avoid mismatches and ensures everything fits your needs.
Identify Your Main Activities and Required Tools
Start by listing the primary activities you perform in your workshop. Are you into woodworking, metalworking, general repairs, or DIY projects? Each activity comes with its own set of tools. For example, woodworkers often rely on saws and sanders, while metalworkers need welders and grinders.
Once you’ve identified your activities, organize your tools based on how often you use them. Tools you reach for every day should be stored in convenient, easy-to-access spots. Meanwhile, items you use less frequently can go in higher or less accessible storage areas. This simple system ensures your most-used tools are always within reach, saving you time and effort.
Measure and Record Your Available Space
Grab a tape measure and carefully document your workshop’s dimensions, noting everything from the size of the room to the locations of doors, windows, outlets, and any fixed obstacles. These details matter. For instance, an electrical outlet might dictate where you can plug in a table saw, and forgetting to account for door swings could lead to frustrating and costly rearrangements later.
To visualize your space, create a scaled floor plan. You can use graph paper or digital design tools, with each square representing one foot. This allows you to experiment with different layouts without physically moving heavy equipment. Don’t forget to mark door swing directions and clearance requirements for larger tools like table saws, which need more room than a standard workbench.
Also, measure your ceiling height and look for any low-hanging obstructions. This information is essential for planning wall-mounted storage or overhead racks. By mapping everything out, you’ll be ready to make the most of your space while leaving room for future growth.
Plan for Future Tool Additions
Your workshop will likely evolve over time, so it’s smart to plan for future tools now. Set aside flexible areas and consider mobile, modular storage solutions. For instance, a rolling tool cart can double as workspace and be relocated easily when you need extra room.
Think long-term. Document your current inventory and keep track of tools you plan to add. Digital platforms like Toolstash can help you stay organized by categorizing your tools and identifying gaps. This prevents duplicate purchases and keeps your workshop running smoothly.
Don’t forget to factor in seasonal changes. Maybe you tackle more outdoor projects in the spring or dive into holiday crafts during the winter. Your layout should adapt to these shifts without requiring a complete overhaul every season. Mobile bases and adjustable storage systems can provide the flexibility you need, ensuring your workflow stays efficient year-round.
With a clear understanding of your needs and space, you’ll be ready to create a workshop layout that works for you now and in the future.
Design an Efficient Workflow
Once you've assessed your workspace, the next step is creating a layout that minimizes unnecessary movement and keeps tools within easy reach. A well-thought-out workflow can make even a small workshop feel more spacious and functional. Here’s how to turn your measurements and needs into a practical, efficient setup.
Create a Scaled Floor Plan
Start by drafting a scaled floor plan. You can use graph paper with a one-foot-per-square scale or go digital with tools like SketchUp or AutoCAD for more precision. Mark all fixed elements, such as doors, windows, electrical outlets, and any obstructions. Don’t forget to indicate door swing directions.
While a hand-drawn plan offers a tactile way to visualize your layout, digital tools allow you to make adjustments without starting from scratch. Also, take note of light switches and HVAC vents, as these details can influence where certain tools or workstations should go.
Group Tools and Work Areas by Function
Divide your workshop into zones based on tasks to streamline your workflow. For example, designate specific areas for cutting, assembly, and finishing. This reduces unnecessary movement and keeps everything organized.
- Cutting Zone: Place saws, sanders, and dust collection tools together.
- Assembly Area: Keep gluing supplies, clamps, and fasteners within easy reach.
- Finishing Zone: Position this area near a window to take advantage of natural light and ventilation for tasks like painting or staining.
Many home woodworkers prefer a "doughnut" layout, with workbenches and storage lining the walls and stationary machines positioned in the center. This setup maximizes space and keeps tools accessible.
Focus on Safety and Comfort
Efficiency isn’t just about organization - it’s also about safety and comfort. Ensure there’s at least 36 inches of walking space around stationary equipment, and follow these clearance guidelines for larger machines:
| Machine Type | Minimum Clearance |
|---|---|
| Table saw | 48 inches |
| Thickness planer | 40 inches |
| Band saw | 36 inches |
| Router table | 36 inches |
Set your main workbench height between 34–36 inches to reduce back strain and maintain a comfortable posture. Placing your primary work area near a window can also improve natural lighting, which helps reduce eye strain and ensures better color accuracy during finishing tasks.
Proper ventilation is critical for managing dust and fumes. Consider installing exhaust fans or using portable air purifiers to maintain good air quality. Keep pathways clear by using mobile carts and modular storage, which can free up floor space and adapt to your changing needs.
To maintain order in your workshop, consider using digital organization systems. These systems can help you keep track of tools and supplies, ensuring everything stays in its designated zone and is easy to find when needed.
Use Space-Saving Storage Solutions
Efficient storage is the cornerstone of any well-organized compact workshop. When you're working with limited floor space, looking up - literally - and using every available inch can turn even the smallest area into a functional and tidy workspace. Let’s dive into some practical storage ideas that make the most of vertical and mobile space.
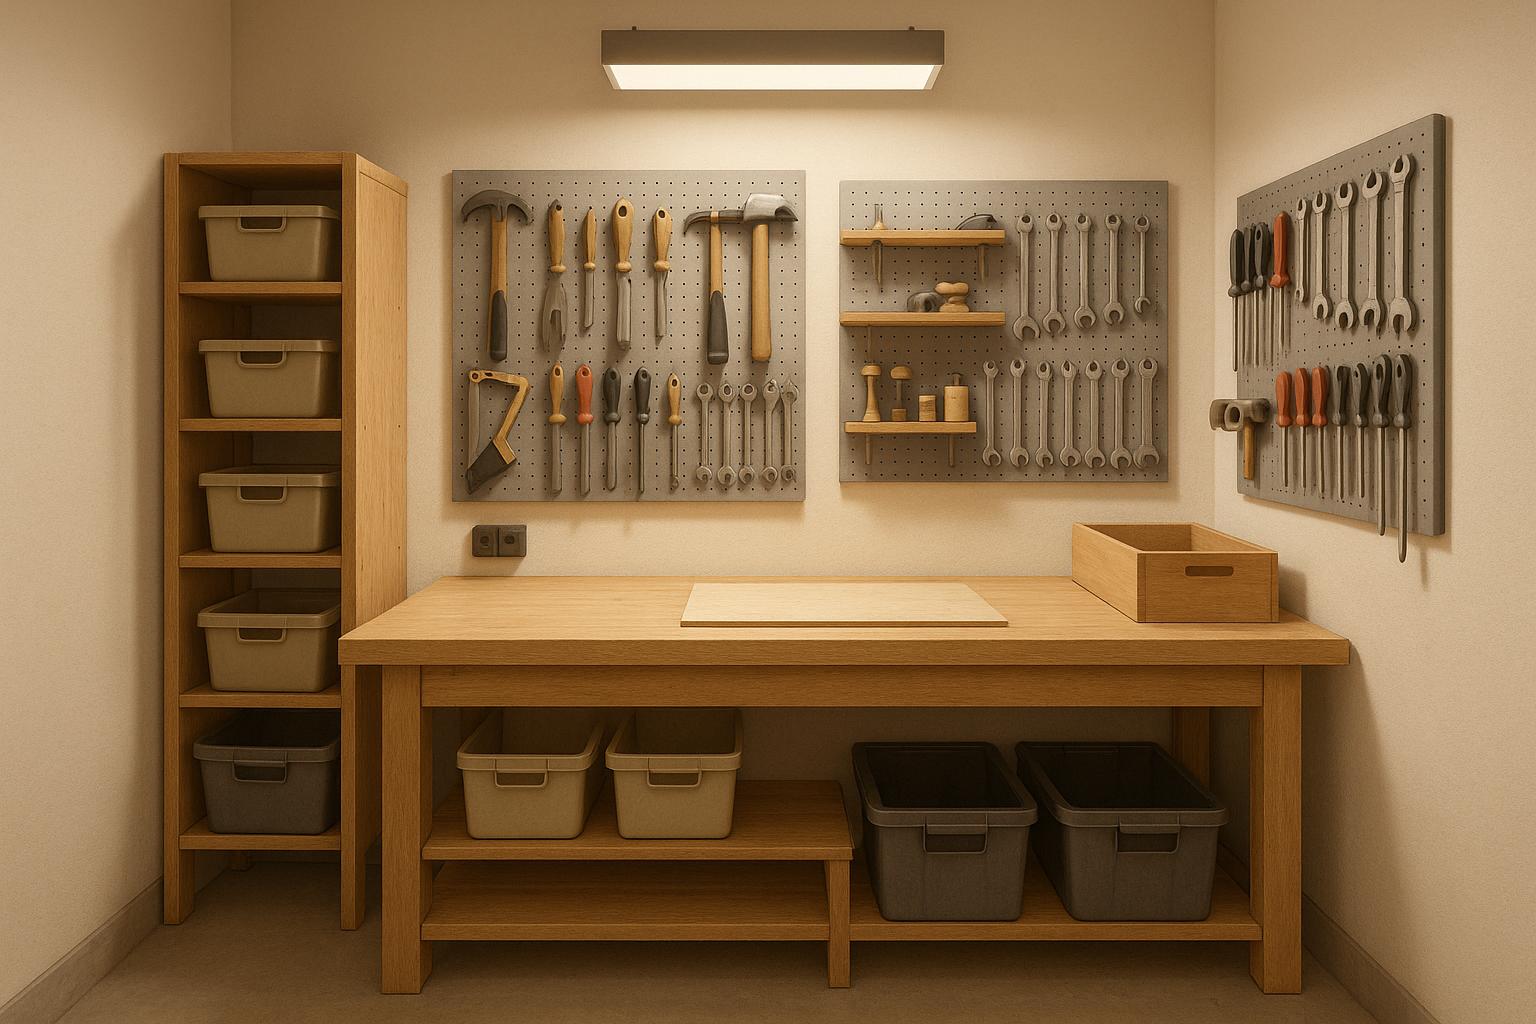
Install Wall-Mounted Storage and Pegboards
Wall-mounted storage is a game-changer for compact workshops. Pegboards, slat walls, and magnetic strips help keep tools visible, accessible, and off the floor. A thoughtfully arranged pegboard can hold a surprising number of tools in just a few square feet.
For added flexibility, consider a French cleat wall system. These systems allow you to hang custom tool holders, shelves, and cabinets that can be easily rearranged as your needs change. Whether you go for a DIY setup or a pre-made kit, French cleat systems typically cost between $40 and $120, making them a budget-friendly option for long-term organization.
Magnetic strips are perfect for keeping metal tools like chisels, drill bits, and wrenches in one place. For non-magnetic items, shadow boards are a great alternative. By outlining tools on the board, you’ll know instantly if something’s missing, keeping your workspace efficient and secure.
Add Mobile Tool Carts and Rolling Bases
Mobile tool carts are a practical solution for small workshops, offering the flexibility to adapt your workspace for different tasks. With locking casters for stability, these carts typically range from $50 to $200 and can significantly improve your workflow.
For instance, you can wheel a cart stocked with assembly tools to your workbench for one project, then swap it for another cart filled with finishing supplies. When not in use, many carts fit neatly under workbenches, keeping the floor clear. Similarly, rolling bases for stationary machinery like table saws or planers allow you to reposition heavy equipment with ease. Locking mechanisms ensure everything stays secure while in operation.
A survey of small workshop owners found that over 70% reported smoother workflows and less time spent searching for tools after adding wall-mounted storage and mobile carts [6].
Multi-drawer mobile units are another excellent option for organizing small parts like screws, bolts, and sandpaper. Labeling each drawer ensures everything stays orderly and easy to find, saving you time and frustration during projects.
Use Unused Space and Digital Tool Management
To maximize your workspace, focus on often-overlooked areas like overhead spaces, under-bench zones, and corners.
Overhead storage works well for items you don’t use every day. Shelves installed above doors, windows, or along the ceiling perimeter provide convenient spots for seasonal tools, extra materials, or project supplies. Overhead racks are particularly handy for storing long lumber, keeping it off the floor and neatly arranged.
Under-bench storage is equally practical. Adding drawers, cabinets, or shelves beneath your workbench keeps hand tools and accessories within arm’s reach while maintaining a clean work surface. Don’t overlook corners either - corner shelving units, slim cabinets, and door-mounted organizers are great for squeezing extra storage out of tight spaces.
For an extra layer of organization, consider digital tool management platforms like Toolstash. These platforms help you keep track of where your tools are stored - a valuable feature in compact workshops where every nook and cranny is utilized. Toolstash’s AI-powered tool cataloging makes adding new items effortless, and its lending and borrowing features are perfect for sharing tools with neighbors or fellow hobbyists.
| Storage Solution | Space Efficiency | Flexibility | Accessibility | Cost (USD) |
|---|---|---|---|---|
| Wall-mounted pegboards | High | Moderate | High | $20–$80 |
| Mobile tool carts | Moderate | High | High | $50–$200 |
| Overhead shelves | High | Low | Moderate | $30–$100 |
| French cleat system | High | High | High | $40–$120 |
| Digital tool management | N/A | High | High | Free–$10/mo |
Improve Material Flow and Tool Access
Arranging your tools and materials thoughtfully can turn even the most cluttered workshop into a productive haven. When everything is positioned with purpose, you’ll spend less time searching for supplies or wrestling with oversized materials - and more time actually building.
Once you’ve nailed down your storage solutions, it’s time to focus on how materials and tools flow through your space to keep your projects running smoothly.
Store Raw Materials and Finished Items Near Entry Points
Keep raw materials and completed projects close to your workshop’s entrance to cut down on unnecessary handling. Heavy items like lumber, sheet goods, and other bulky supplies should be stored just a few steps from where they’re unloaded.
Vertical lumber racks are a great choice for organizing boards by length and type while saving floor space. These racks fit perfectly near garage doors or entryways. For sheet goods like plywood or MDF, horizontal shelving near the entrance makes it easy to slide them in and out without carrying them across the entire shop.
Rolling carts can also be a game-changer. Use them to temporarily hold materials during a project, then tuck them away when not in use. This keeps your workspace clear while keeping supplies within reach.
One workshop owner with a single-car garage found that vertical lumber racks near the garage door, combined with a mobile workbench, allowed them to unload materials directly from their vehicle while keeping tools conveniently close by [6].
Clear pathways are essential for smooth movement. Keep at least 36 inches of walking space around your equipment and storage areas. This isn’t just about convenience - it’s also about safely maneuvering large items like 8-foot boards or full sheets of plywood without bumping into obstacles [5].
Keep Tools Close to Where You Use Them
The best workshops are designed so you rarely have to leave your work area to grab a tool. Position frequently used tools near their corresponding work zones to save time and maintain focus.
Wall-mounted systems and mobile carts are your best allies here. A pegboard above your workbench can hold hand tools like chisels, squares, and marking gauges, while magnetic strips keep drill bits and small metal tools from getting lost in drawers.
Mobile carts are another smart solution. For example, you could have one cart stocked with assembly tools - clamps, glue, fasteners, and measuring devices - parked near your workbench. Another cart could hold finishing supplies, ready to roll out when you’re sanding or applying coatings.
If your workshop has multiple zones, duplicate essential tools like tape measures, pencils, and utility knives at each station. This small investment saves you the hassle of constantly carrying tools back and forth - and spares you the frustration of misplacing them.
For even better organization, a tool-tracking system like Toolstash can help you keep tabs on where everything is located. Once your tools are strategically placed, it’s easier to define specific work zones.
Set Up Dedicated Areas for Different Tasks
Dividing your workshop into zones for different tasks keeps things organized and prevents messy operations from interfering with clean ones. Even in smaller spaces, you can create distinct areas to keep your workflow smooth.
Assembly areas should have flat surfaces, good lighting, and easy access to tools like clamps, fasteners, and measuring devices. Position your main workbench away from dust-producing machinery, and use wall-mounted storage or a nearby cart for your assembly tools. This setup keeps glue-ups neat and ensures a stable surface for precise work.
Finishing zones need to be separated from dusty activities. Even a simple movable partition or shelving unit can create a cleaner space for applying stains, paints, and clear coats. Store your finishing supplies here, along with brushes, sanders, and proper ventilation equipment.
Machine areas are best placed along walls or in corners, where dust collection systems can be easily installed. A popular setup is the "doughnut" layout, where machines are arranged centrally with workbenches and storage along the perimeter. This layout keeps noisy, dusty operations contained while hand tool areas remain accessible [1].
If permanent walls aren’t an option, use movable partitions or even tape on the floor to visually define zones [5][6]. Changes in lighting or flooring can also help separate areas functionally.
Compare Storage Options for Small Workshops
Choosing the right storage can make a world of difference in how smoothly your workshop runs. Different storage options bring different perks - some keep your tools dust-free, while others focus on easy access or adaptability. Below, we break down the pros and cons of popular storage solutions to help you find the best fit for your workspace.
A Closer Look at Storage Solutions
Wall Cabinets are great for keeping tools protected from dust while making use of vertical space. However, they can slow down your workflow since you’ll need to open and close doors to grab your tools - something to consider if you’re working on fast-paced projects[6].
Pegboards shine when it comes to accessibility and efficient use of space. They keep your tools visible and within arm’s reach, and you can rearrange them as your collection grows or changes. However, because they’re open, tools can gather dust, meaning you’ll need to clean them regularly. A basic 4'×4' pegboard setup is also budget-friendly, typically costing between $20 and $60[6][7].
Mobile Tool Carts are all about flexibility. You can wheel them right to your work area and then tuck them out of the way when you’re done. This makes them perfect for projects that involve frequent tool swaps. Prices start at $40 for basic models, but heavy-duty carts with multiple drawers can run over $200. Look for carts with locking wheels to keep them stable during use[2][6].
Under-Bench Storage is a smart way to use the often-overlooked space beneath your workbench. Adding drawers or bins under the bench works well for storing supplies, hardware, or backup tools. Full-extension drawers make access easier but come with a slightly higher price tag. This type of storage is best for items you don’t use every day[7].
For example, you might use pegboards for frequently handled tools, wall cabinets for items that need dust protection, and a mobile cart for tools you move around the shop during projects.
If you’re juggling multiple storage systems, digital tracking can help you stay organized. It’s also a good idea to group tools by how often they’re used. Tools you grab daily fit best on pegboards or mobile carts, while less frequently used items can go in wall cabinets or under-bench drawers. Seasonal or backup tools can be stored in harder-to-reach areas.
Storage Options Comparison Table
| Storage Option | Space Efficiency | Accessibility | Dust Protection | Typical Cost (USD) |
|---|---|---|---|---|
| Wall Cabinets | High (vertical) | Moderate | Excellent | $50–$300+ |
| Pegboards | Very High | Excellent | Poor | $20–$60 |
| Mobile Tool Carts | High (flexible) | Excellent | Varies | $40–$200+ |
| Under-Bench Storage | High (hidden) | Moderate | Good | $20–$100+ |
Conclusion: Key Points for Compact Workshop Design
Creating an efficient compact workshop takes careful planning, streamlined workflows, and smart storage solutions.
Start with precise planning - it’s the cornerstone of a well-organized space. A scaled floor plan that maps out fixed elements like machines and workbenches can help you avoid costly errors. Investing time upfront in planning will save you both time and resources down the road.
Next, focus on optimizing your workflow. A thoughtfully organized workspace ensures productivity stays high. Arrange your tools and equipment so materials move logically - intake, machining, assembly, and finishing - without unnecessary back-and-forth. A popular layout for compact spaces is the "doughnut" design, where workbenches and storage line the walls, and machines are centrally placed. This setup maximizes efficiency while keeping everything within easy reach [1][4].
Smart storage is key to functionality in tight spaces. Vertical storage solutions, such as pegboards and wall-mounted racks, free up floor space while keeping tools visible and accessible [6]. Mobile carts and modular equipment make it easy to adapt your workspace for different tasks. Even in a workshop as small as 75–100 square feet, these strategies can transform the area into a fully functional hobby space [3]. Pairing these storage ideas with digital tracking tools can take organization to the next level.
Digital tools like Toolstash (https://toolstash.com) can help you manage your inventory, categorize tools, and track exactly where everything is stored. This kind of system ensures you spend less time searching and more time working.
To get started, measure your space carefully, incorporate vertical storage, and use mobile solutions to maximize flexibility. Maintain at least 36 inches of clearance around machines for safety [5], and stick to a “clean as you go” routine to keep the workspace tidy and efficient [6].
With thoughtful design and these strategies in place, even the smallest workshop can handle big projects while remaining comfortable, safe, and a joy to work in.
FAQs
How can I keep my compact workshop layout adaptable for new tools and seasonal projects?
To make the most of your compact workshop, prioritize flexibility and smart organization. A tool management platform like Toolstash can be a game-changer. It helps you keep a detailed inventory of your tools, track where they’re stored, and even add new items using AI-powered features. This way, adjusting your layout becomes much easier as your needs evolve.
When you have a clear understanding of your tools and their locations, it’s simpler to reorganize for seasonal projects or make room for new equipment - all without throwing your workflow into chaos.
How can I efficiently organize tools by workflow in a small workshop?
To get the best use out of a small workshop, arrange your tools to match the flow of your work. Begin by grouping tools that you often use together and positioning them within easy reach of your primary workspace. This setup can make your tasks smoother and less time-consuming.
You might also want to explore a tool management platform like Toolstash to streamline the process. With features like smart categorization and location tracking, it becomes much easier to keep your tools in order and cut down on the time spent hunting for them. This approach not only helps maximize your space but also boosts your overall productivity.
How can Toolstash help me keep my compact workshop organized and efficient?
Toolstash simplifies managing your compact workshop, making it easier to stay organized and work efficiently. With features like detailed inventory tracking and location management, you’ll always know exactly where every tool is when you need it. The AI-powered tool addition feature takes the hassle out of updating your inventory, while smart categorization keeps everything in order. These features help ensure your workspace stays tidy and ready for maximum productivity.